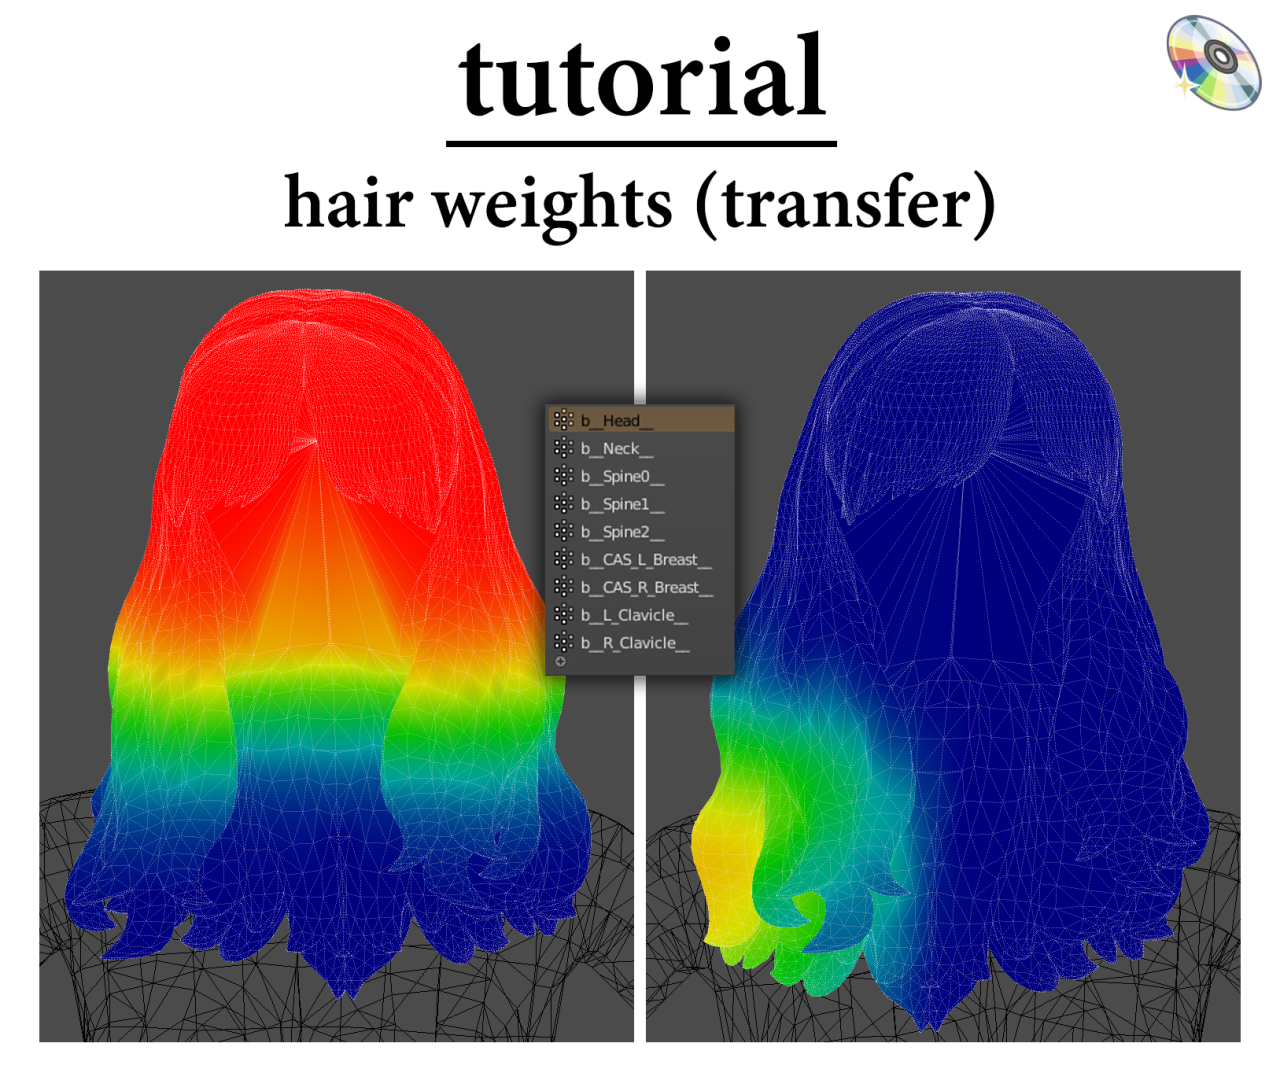
Anleitung – Haargewichte:
Wie gewünscht, Ich werde noch einmal durchgehen, wie ich gelernt habe, Gewichte für Haare zu machen ! Ich möchte das erwähnen@qiccBrachte mir diese Methode bei, damit alle Krediten an ihn gehen, er ist ein wahrer König! So, ohne weiteres, Fangen wir an 
* Ich empfehle Ihnen, über das Dashboard zu lesen, da das Öffnen der Bilder zu meinem Thema nicht funktioniert *
Schritt 1:
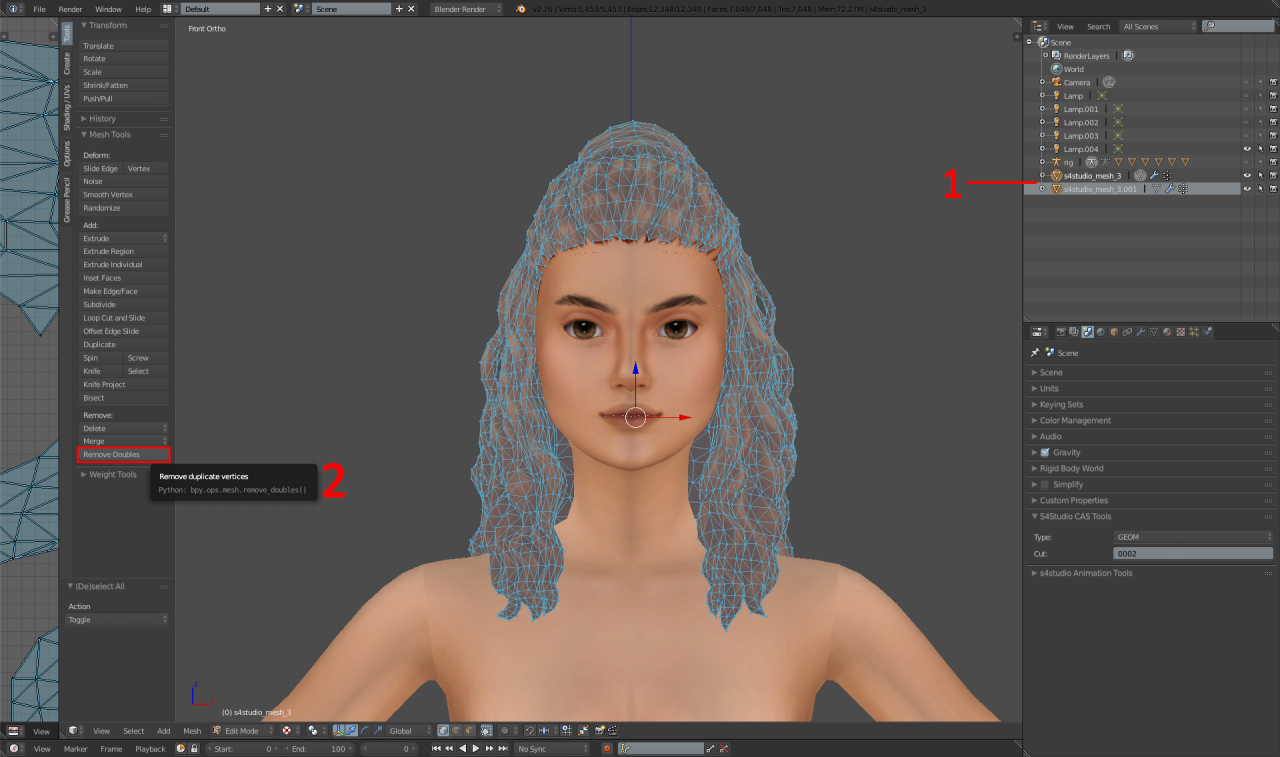
1 – Trennen Sie Haare und Haaransatz mithilfe der Linkauswahl (L) und bewegen Sie den Mauszeiger über den Haaransatz. Dann, Drücken Sie P auf Ihrer Tastatur, um eine neue Ebene zu erstellen.
2 – Dann, mit dem Haupthaar hervorgehoben, Wie abgebildet, Klicken Sie auf "Doppel entfernen".
Schritt 2:
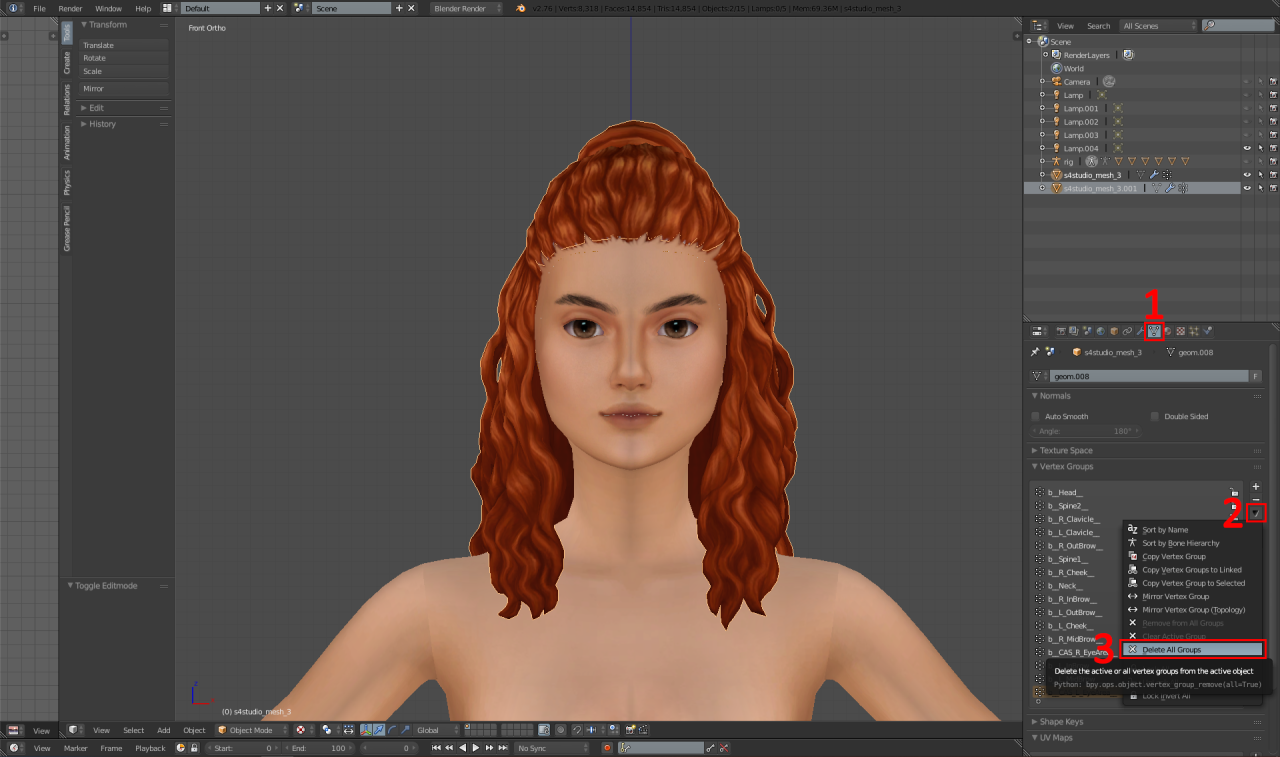
1 – Navigieren Sie zur Registerkarte "Daten".
2 – Klicken Sie auf den Pfeil.
3 – Klicken Sie auf "Alle Gruppen löschen".
Schritt 3:
Speichern Sie die Mixerdatei. Dann, Open Blender v2.8+ und navigieren zu: Datei – Offen, und öffnen Sie das Paket, das wir gerade gespeichert haben.
Schritt 4:
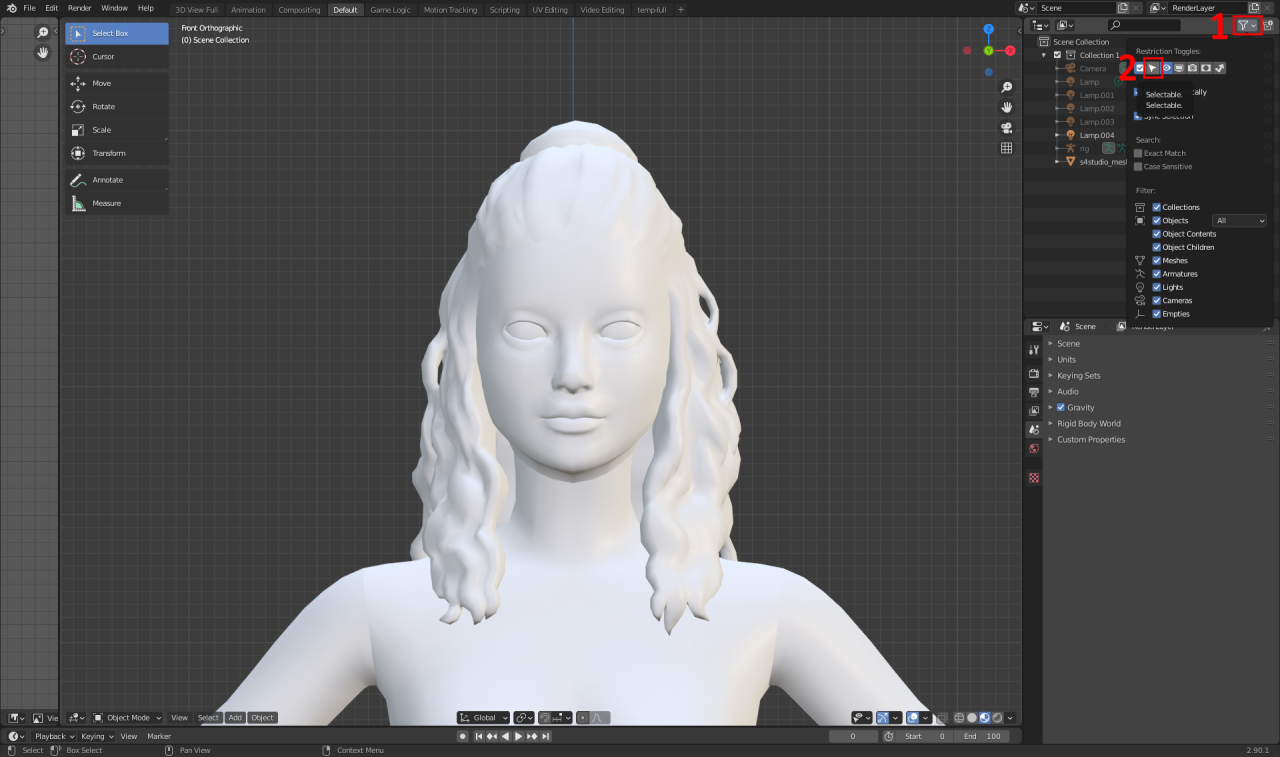
Sobald Sie diese Datei geöffnet haben, Sie können den Haaransatz löschen.
1 – Klicken Sie darauf.
2 – Klicken Sie darauf.
Dann, Fügen Sie diese Datei an.
Schritt 4.5:
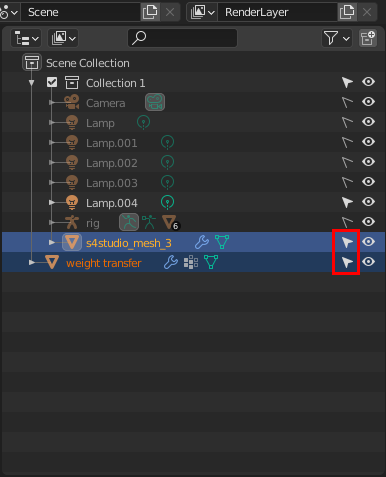
Stellen Sie sicher, dass beide Maschen diesen kleinen Cursor wie abgebildet hervorgehoben haben.
Dann, Ein sehr wichtiger Schritt – LinksklickDEINNetz, Dann, Verschiebung halten und links klicken Sie auf das Netz "Gewichtsübertragung".
Schritt 5:
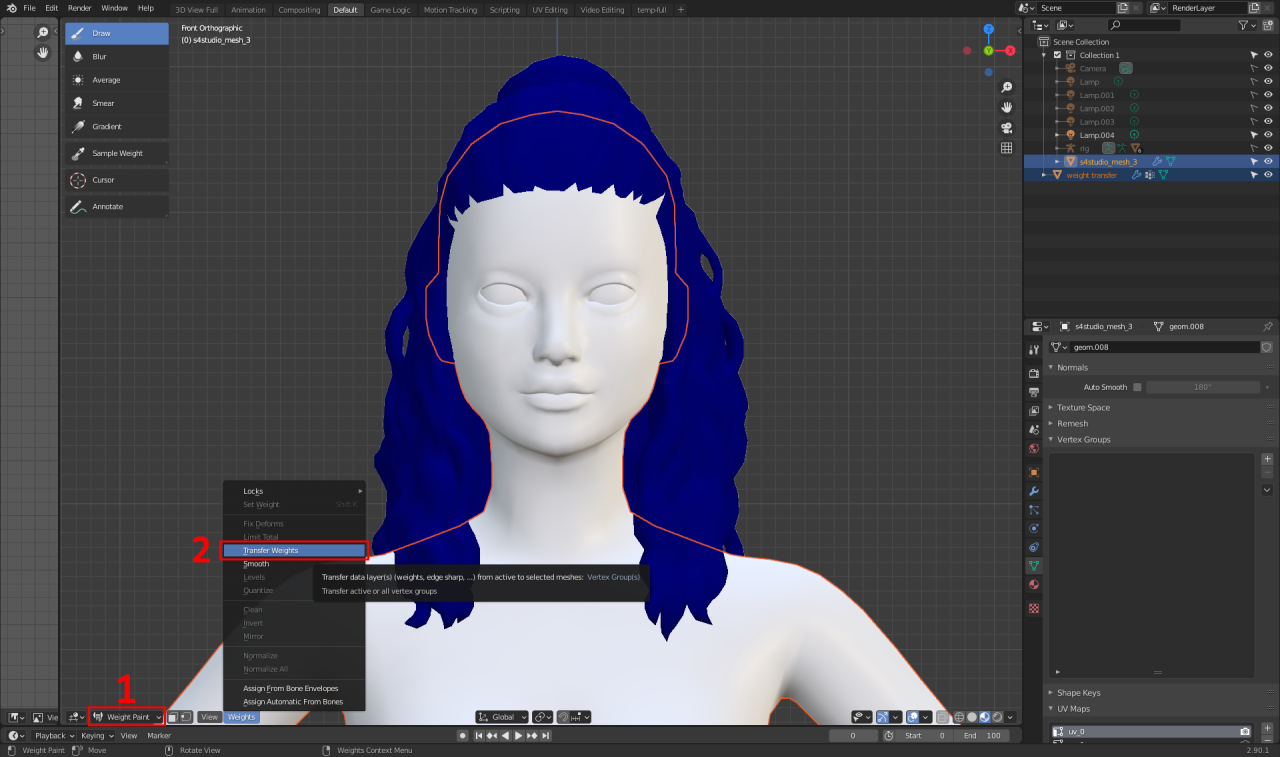
1 – Ändern Sie den Modus von "Objektmodus" in "Gewichtsfarbe".
2 – Klicken Sie auf diese kleine Schaltfläche "Gewichte" und klicken Sie auf "Übertragungsgewichte"
Schritt 5.5:
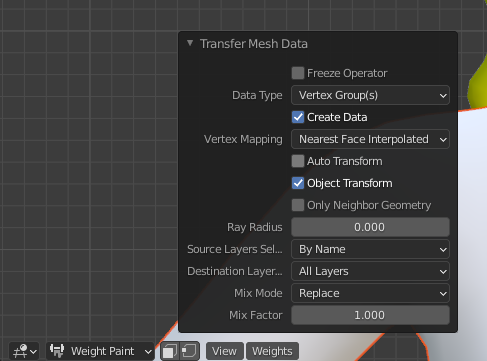
Klicken Sie auf die Schaltfläche "Netzwerkdaten übertragen.
Schritt 6:
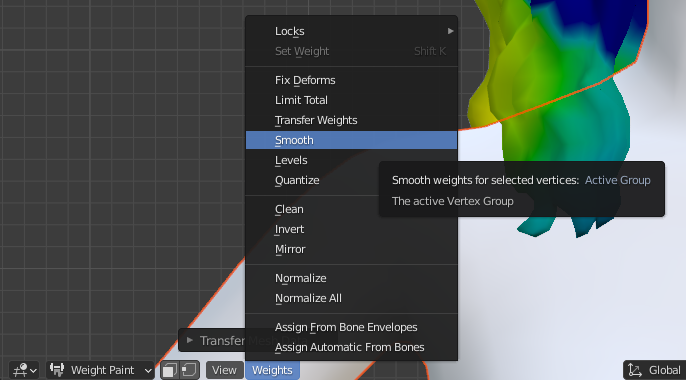
Klicken Sie erneut auf die Schaltfläche "Gewichte", Klicken Sie dann auf "glatt".
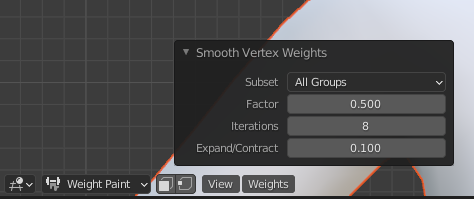
Stellen Sie die Einstellungen "Smooth" auf diese ein.
(Nehmen Sie diese Einstellungen als allgemeine Leitfaden, Abhängig von den Haaren und ihrer Länge kann die Iteration variieren)
Schritt 7:
Speichern Sie Ihr Paket und eröffnen Sie die gespeicherte "gelöschte Gewichte" -Datei erneut.
Löschte das Haarnetz gebrochene Gewichte, und fügen Sie die neu fertiggestellten Gewichte an.
Schritt 8:

Ihre Haare sehen meistens so aus, wenn Sie es importieren. So, um es zu reparieren, Jus klicken Sie auf diese drei Schaltflächen in der Reihenfolge.
Schritt 9:
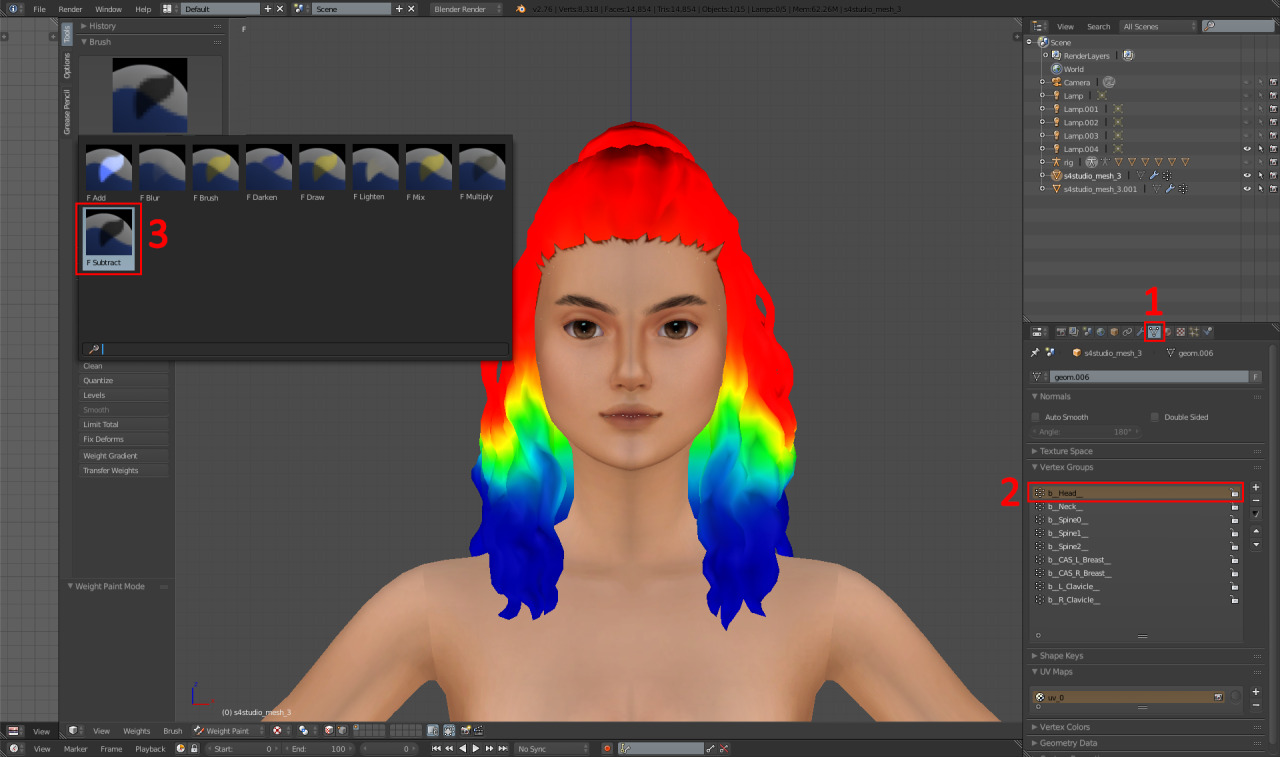
Jetzt, Wir müssen das Kopfgewicht reparieren, weil die Übertragung das durcheinander bringt lol.
1 – Klicken Sie darauf.
2 – Klicken Sie auf "B__head__".
3 – Gehen Sie zu den Bürsten und klicken Sie auf den Pinsel "Subtrahieren".
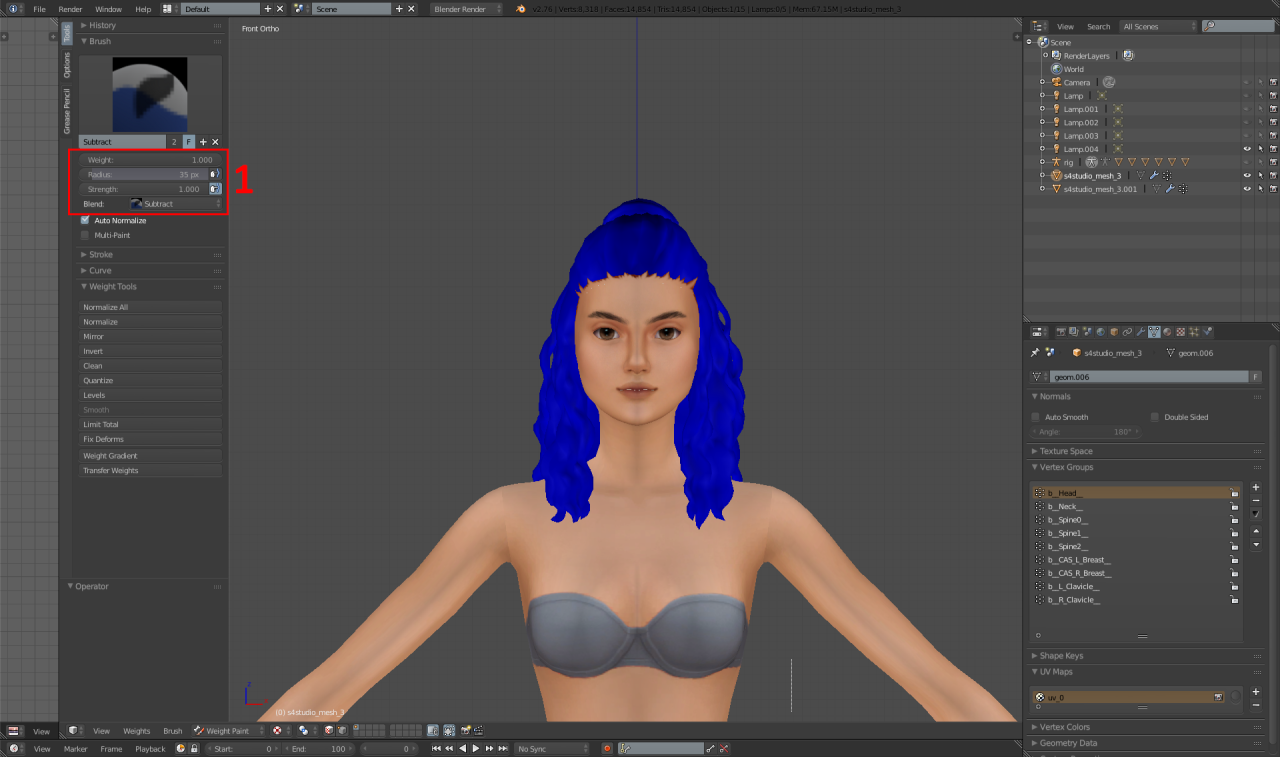
1 – Dann, Verwenden dieser Einstellungen, Verwenden Sie den Schaltfläche „Gewichtsgradienten“ und ziehen Sie im Achselbereich nach unten, damit das gesamte Netz blau blau wird.
Schritt 10:
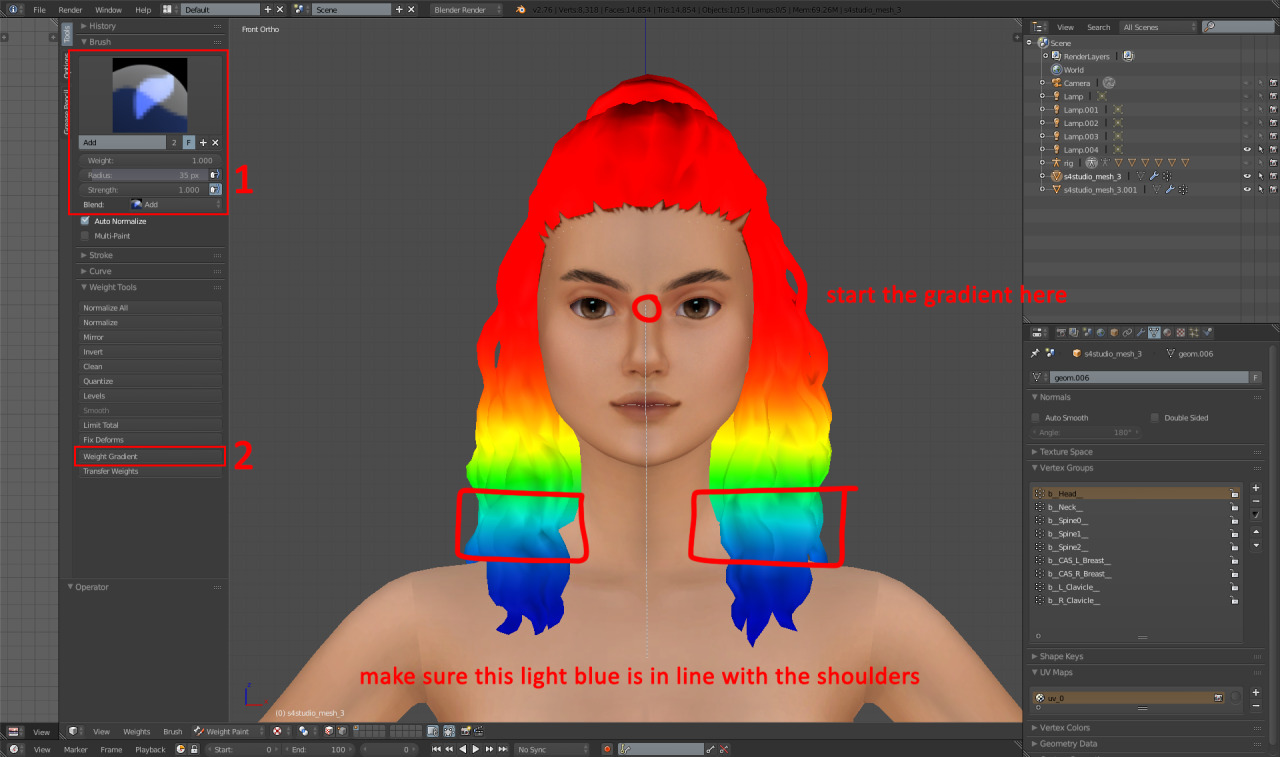
Jetzt müssen wir den Gewichtsgradienten für das Kopfgewicht durchführen.
1 – Wechseln Sie den Pinsel, um hinzuzufügen, und legen Sie ihn in diese Einstellungen ein.
2 – Klicken Sie auf "Gewichtsgradient".
3 – Ziehen Sie den Verlauf nach unten, Wie auf dem Foto zu sehen.
Schritt 11:
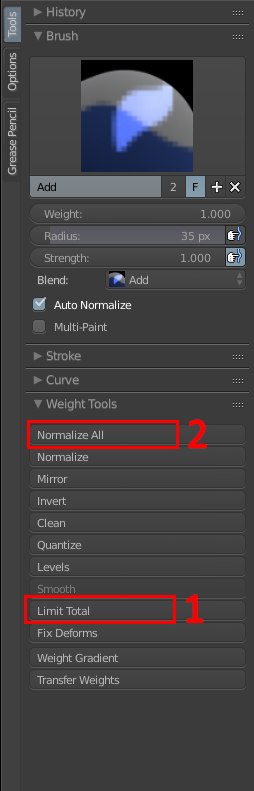
1 – Klicken Sie darauf.
2 – Klicken Sie darauf.
(Beim Klicken auf das "Normalisieren Sie alle", Stellen Sie sicher, dass Sie auf dem Gewicht „B__head__“ sind.)
Fertig!
Danach, treten Sie dem Haaransatz wieder zum Netz an, Duplizieren Sie das Netz zweimal und bestellen Sie die Schnitte als 0000, 0001 und 0002, Dann speichern und importieren Sie sie zu S4S zurück!
Haftungsausschluss– Die Schlüsselbeingewichte können zu einem Problem mit sehr langen Haaren werden und bewirken daher das Ausschneiden oder ein Maschenriss. Wenn dies ein Problem ist, Offensichtlich vergessen Sie die Schlüsselbeingewichte.
Wenn Sie Probleme oder Verwirrung dazu haben, Bitte schießen Sie mir einen DM und ich werde Ihnen gerne Ihnen helfen!