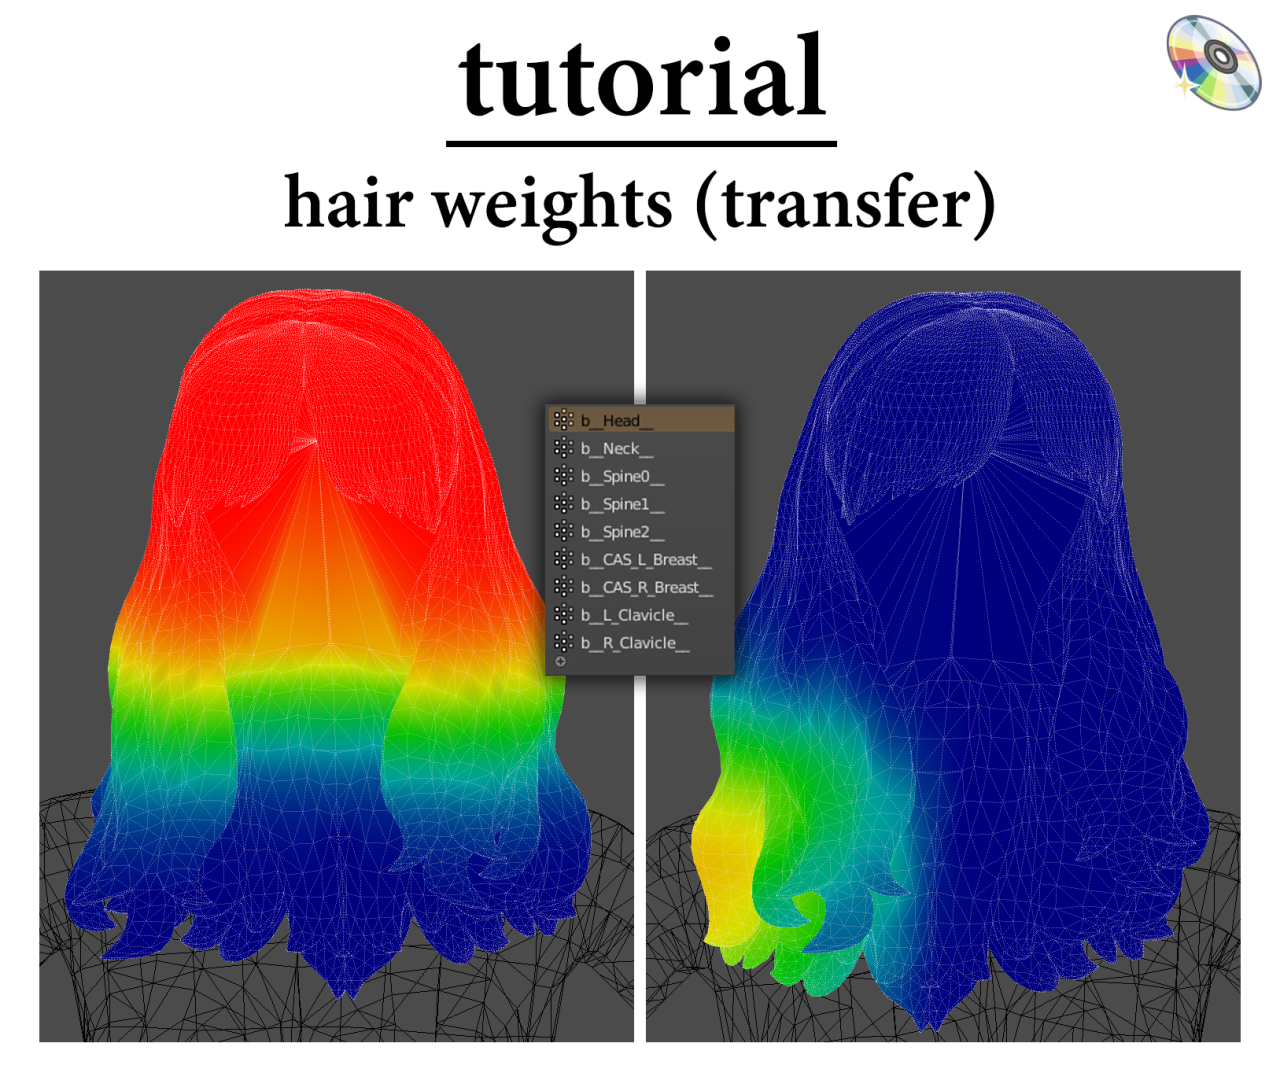
Φροντιστήριο – Βάρη μαλλιών:
Οπως ζητήθηκε, Θα εξετάσω πώς έμαθα να κάνω βάρη για τρίχες ! I would like to mention that@qicc taught me this method so all credit goes to him, είναι αληθινός βασιλιάς! Έτσι, χωρίς άλλη καθυστέρηση, ας ξεκινήσουμε
* Σας προτείνω να διαβάσετε μέσω του Πίνακα ελέγχου, καθώς το άνοιγμα των εικόνων στο θέμα μου δεν λειτουργεί *
Βήμα 1:
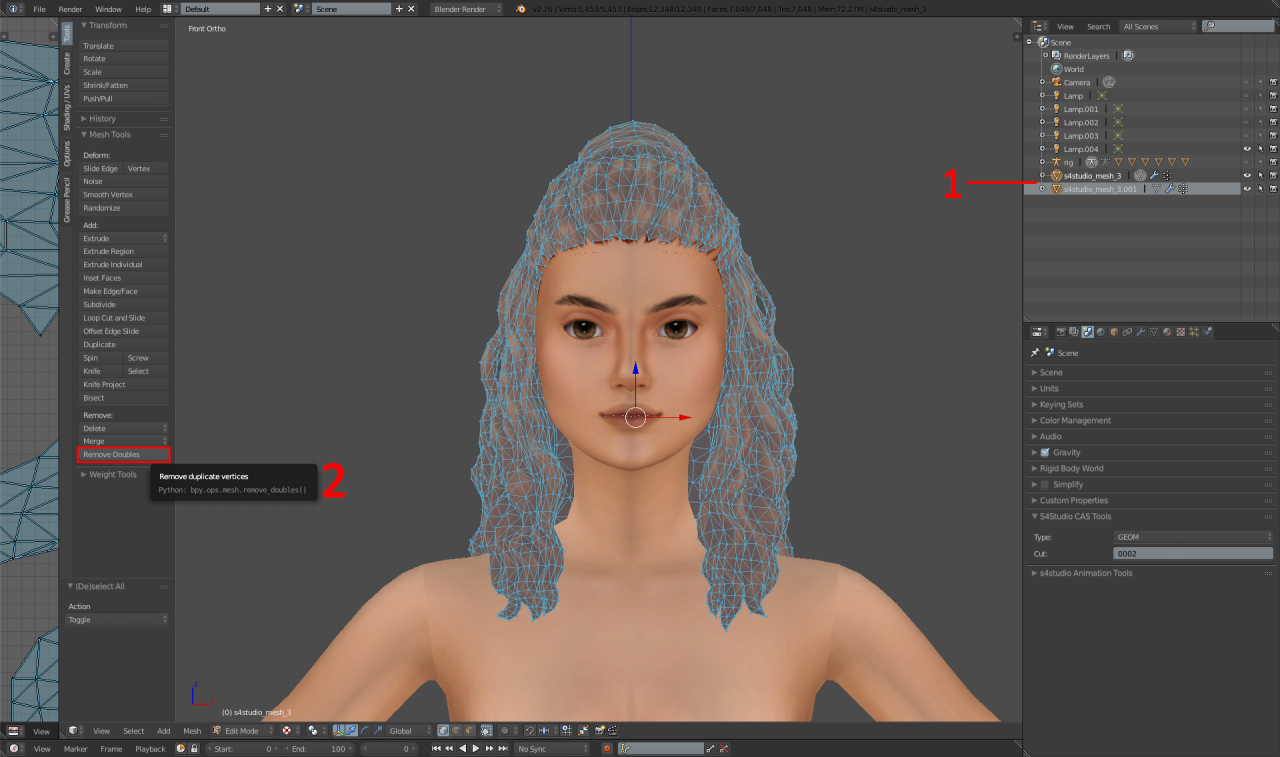
1 – Διαχωρίστε τα μαλλιά και τη γραμμή των μαλλιών χρησιμοποιώντας την επιλογή συνδέσμου (μεγάλο) και τοποθετώντας το δείκτη του ποντικιού πάνω από τη γραμμή των μαλλιών. Επειτα, πατήστε το P στο πληκτρολόγιό σας για να διαχωρίσετε σε ένα νέο επίπεδο.
2 – Επειτα, with the main hair highlighted, as pictured, click ‘remove doubles’.
Βήμα 2:
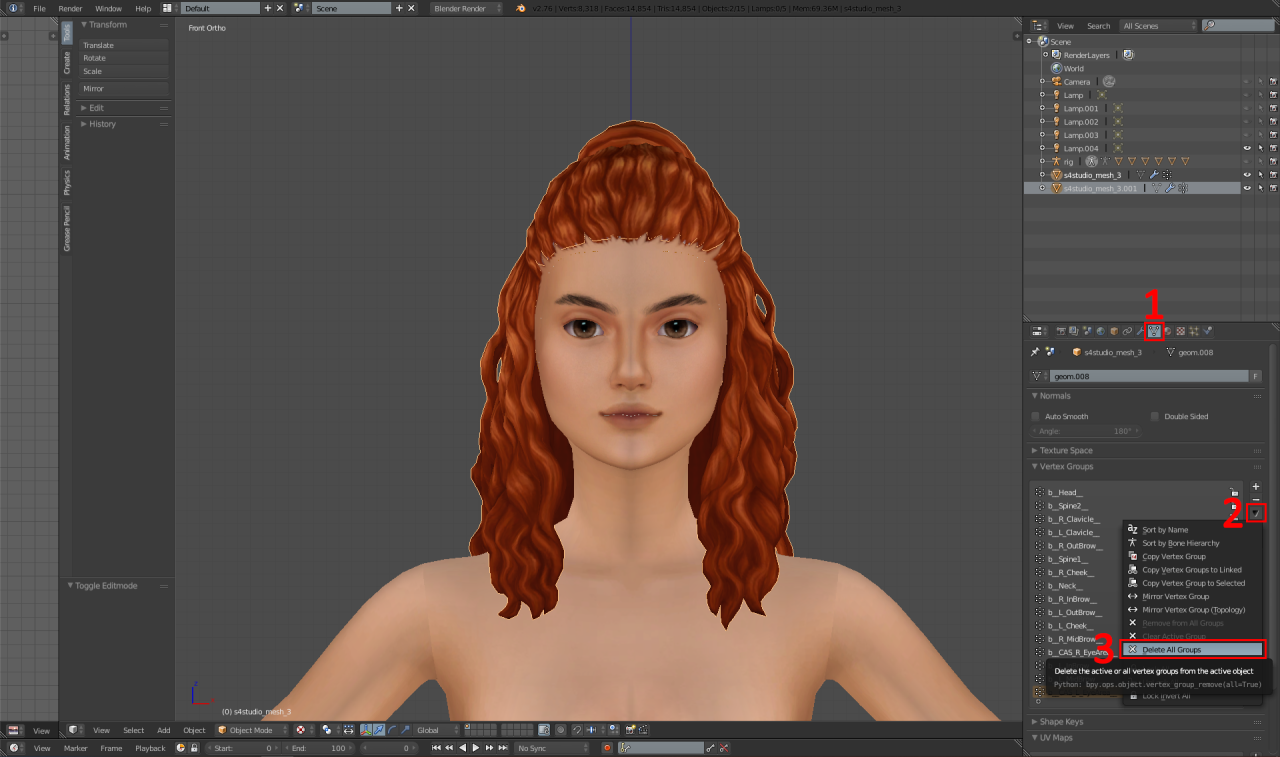
1 – Navigate to the ‘data’ tab.
2 – Click the arrow.
3 – Click ‘delete all groups’.
Βήμα 3:
Save the blender file. Επειτα, open Blender v2.8+ and navigate to: File – Open, and open the package we just saved.
Βήμα 4:
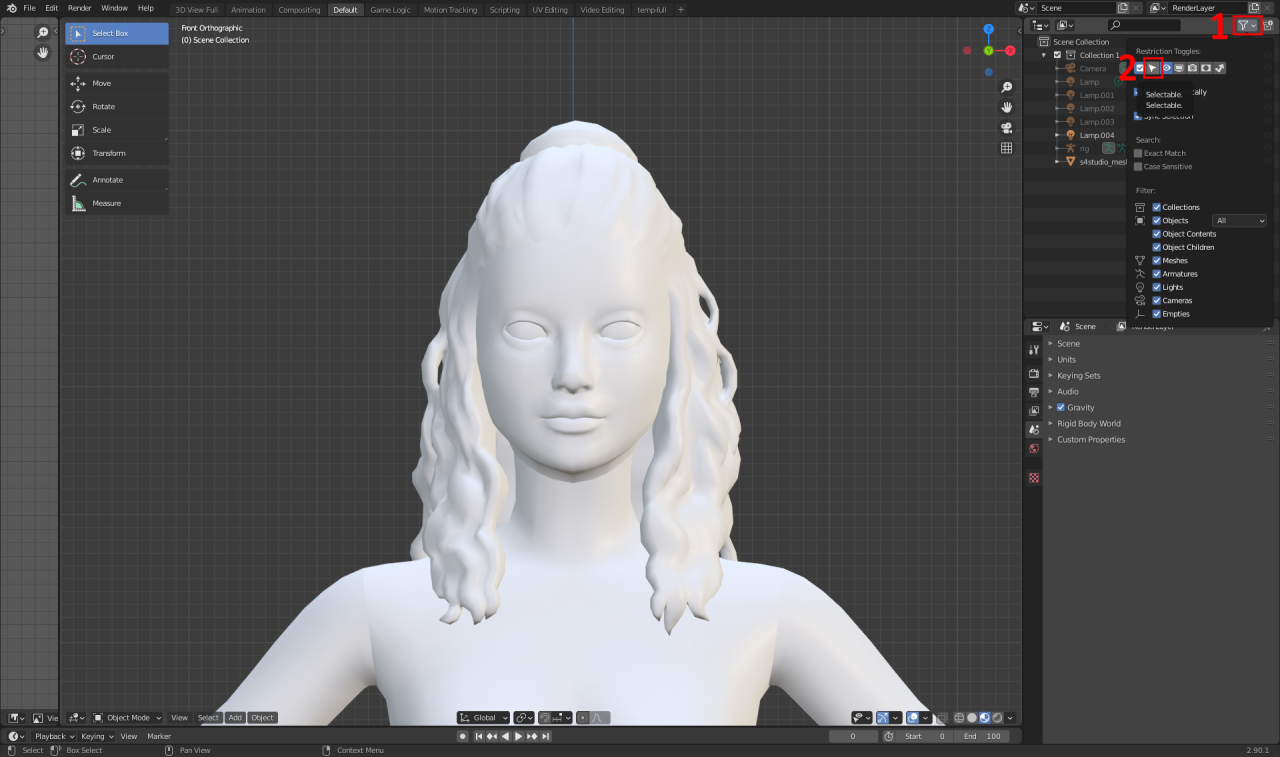
Once you’ve opened this file, you can delete the hairline.
1 – Click this.
2 – Click this.
Επειτα, append this file.
Βήμα 4.5:
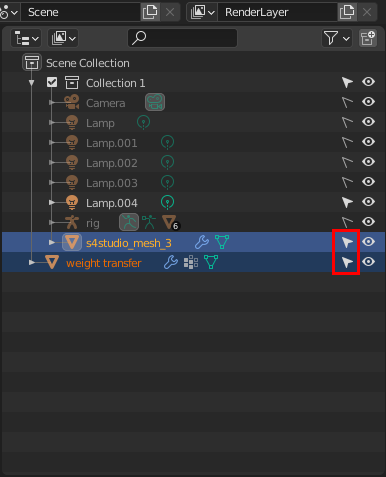
Make sure both meshes have this little cursor highlighted as pictured.
Επειτα, A VERY IMPORTANT STEP – left clickYOURmesh, then, HOLD SHIFT and left click the ‘weight transfer’ mesh.
Βήμα 5:
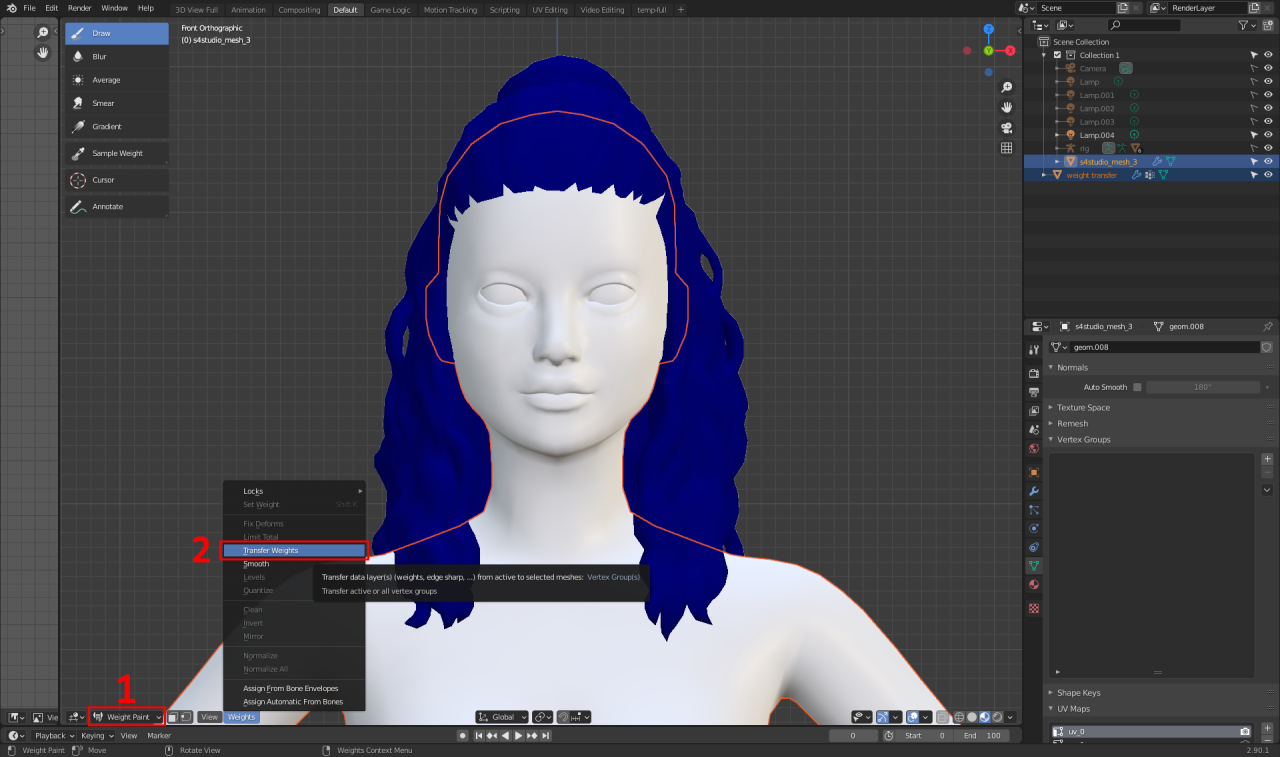
1 – Change mode from ‘object mode’ to ‘weight paint’.
2 – Click this little ‘weights’ button and hit ‘transfer weights’
Βήμα 5.5:
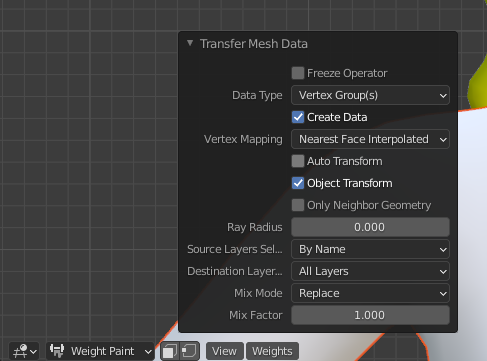
Click the ‘transfer Mesh Data’ button and set the settings to match these.
Βήμα 6:
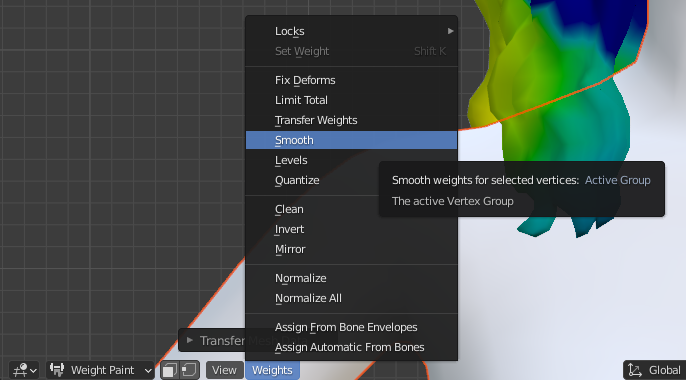
Click the ‘weights’ button again, then click ‘smooth’.
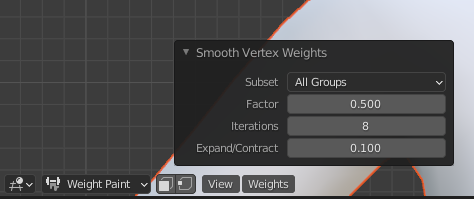
Set the ‘smooth’ settings to these.
(Take these settings as a general guide, depending on the hair and its length the iteration may vary)
Βήμα 7:
Save your package and re-open the saved ‘deleted weights’ file.
Deleted the broken weights hair mesh, and append the newly finished weights.
Βήμα 8:
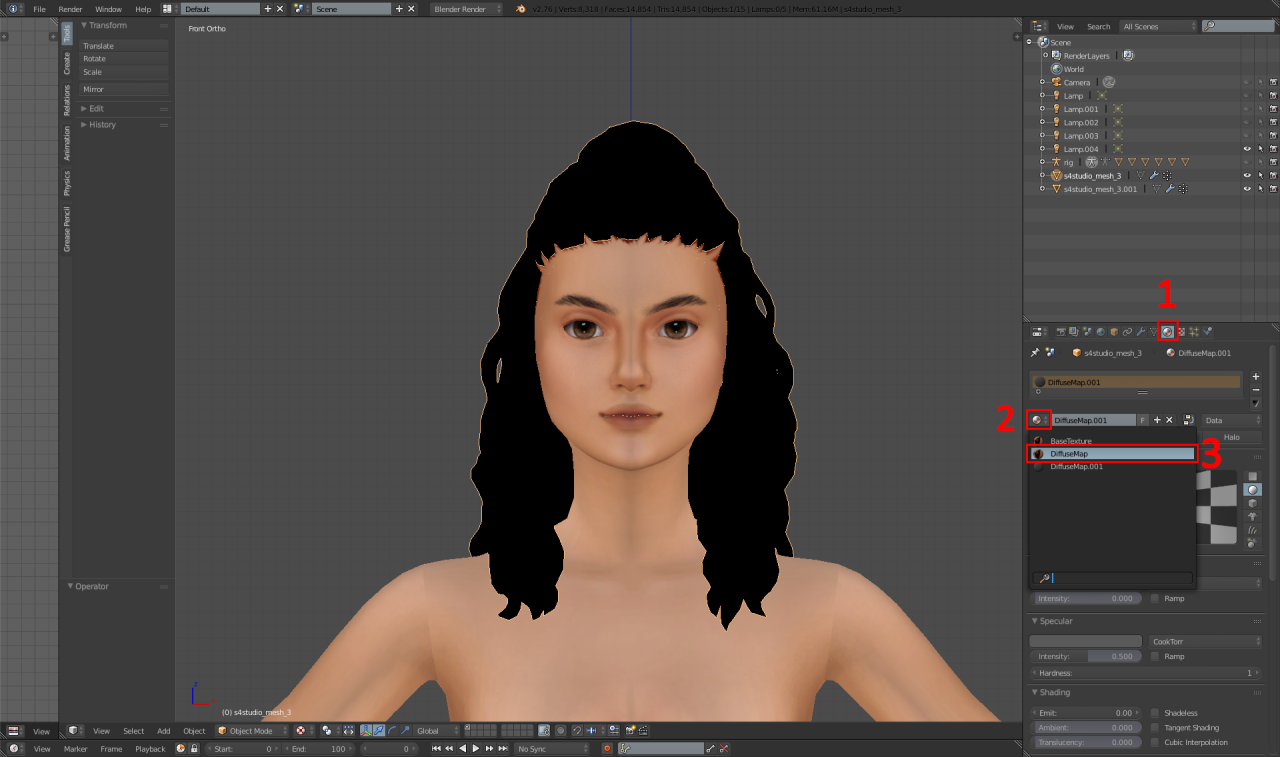
Your hair will mostly look like this when you import it. Έτσι, to fix it, jus click these three buttons in order.
Βήμα 9:
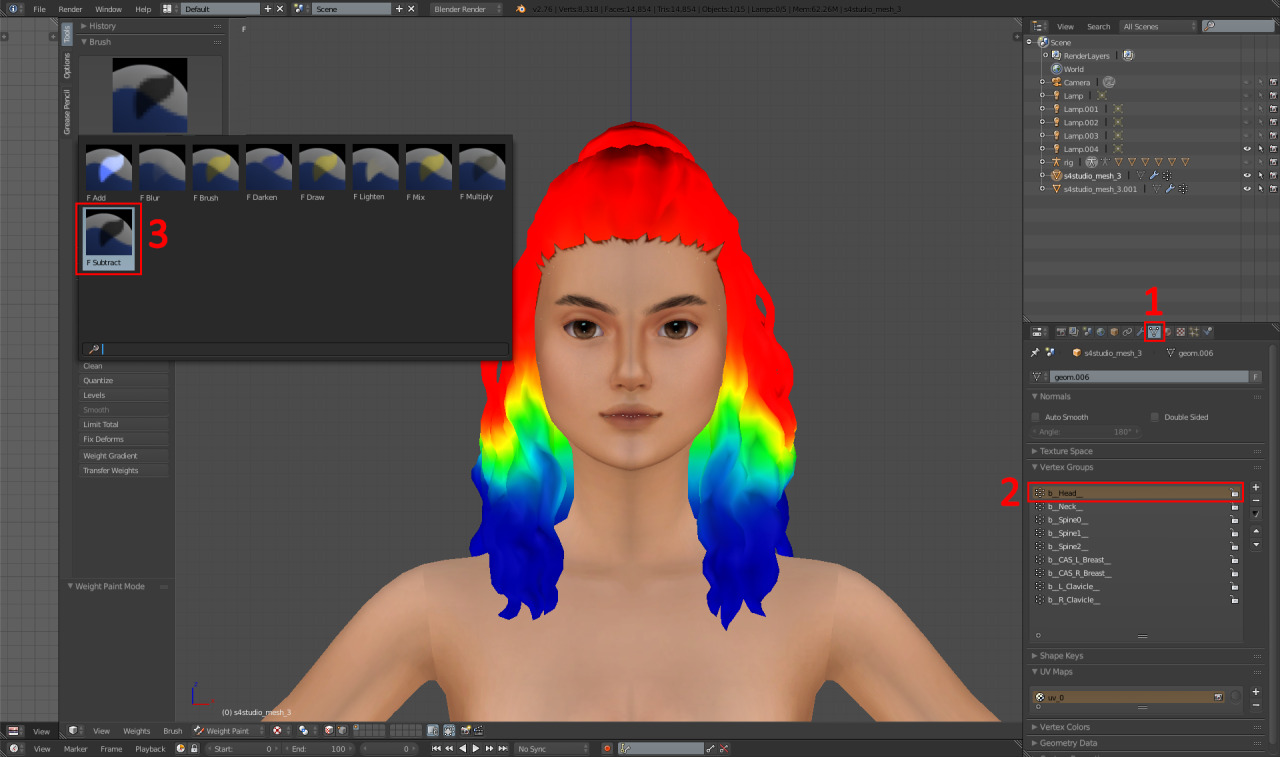
Now, we need to fix the head weight because the transfer messes that one up lol.
1 – Click this.
2 – Click “b__Head__”.
3 – Go to the brushes and click the ‘subtract’ brush.
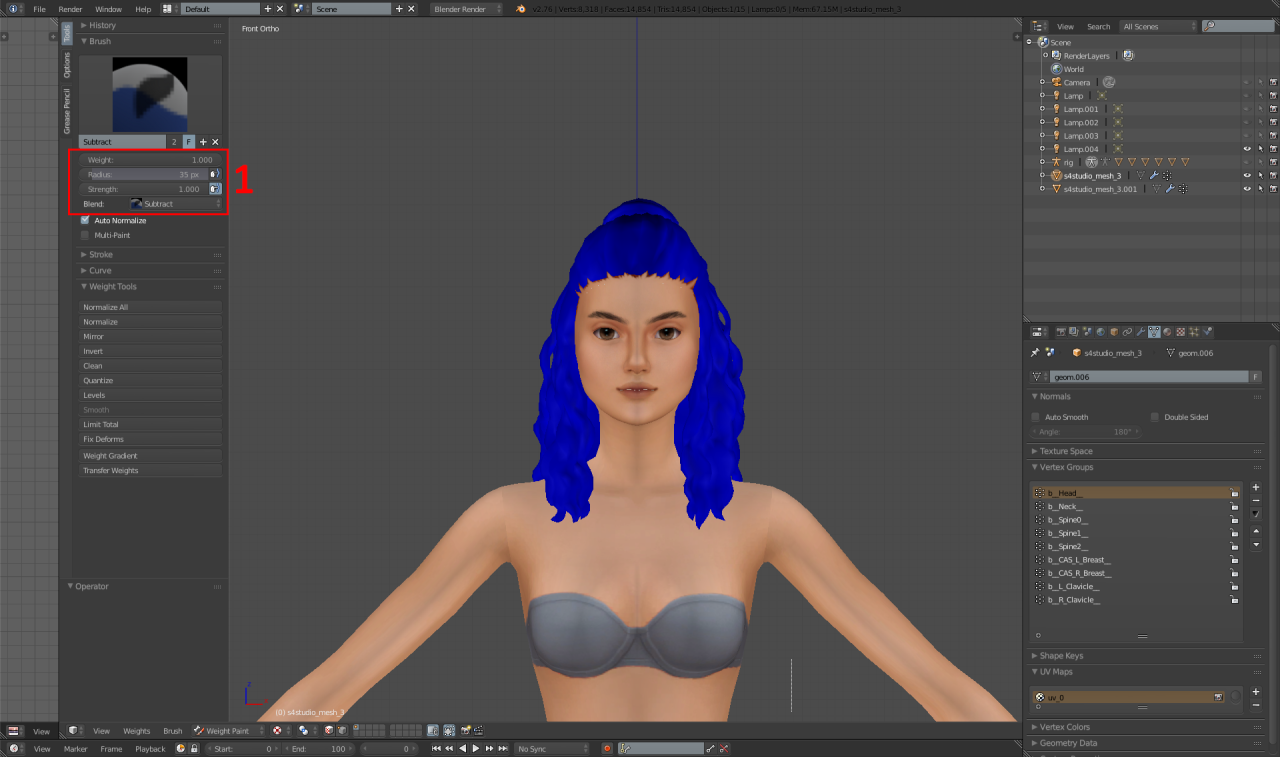
1 – Επειτα, using these settings, use the ‘weight gradient’ button and drag downwards in the armpit area so the ENTIRE mesh turns blue like so.
Βήμα 10:
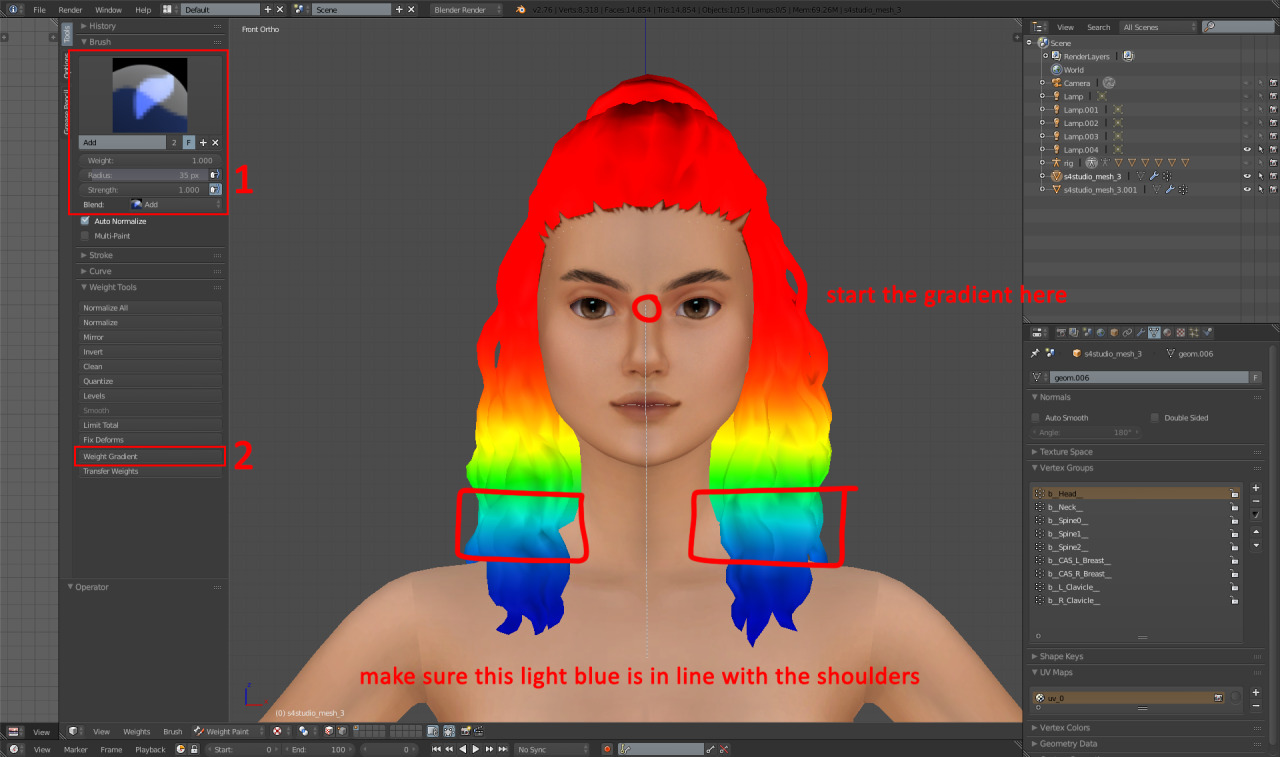
Now we need to do the weight gradient for the head weight.
1 – Change the brush to ‘add’ and put it at those settings.
2 – Click ‘weight gradient’.
3 – Drag the gradient downwards, as seen in the photo.
Βήμα 11:

1 – Click this.
2 – Click this.
(When clicking the ‘normalise all’, make sure you are on the “b__Head__” weight.)
Done!
After that, re-join the hairline to the mesh, duplicate the mesh two times and order the cuts as 0000, 0001 and 0002, then save and import back to s4s!
Disclaimer– the clavicle weights may become an issue with very long hairs and as a result cause clipping or mesh tearing. If this is an issue, obviously then forget about clavicle weights.
If you have any issues or confusion about this, please shoot me a DM and I’ll happily help you out!

