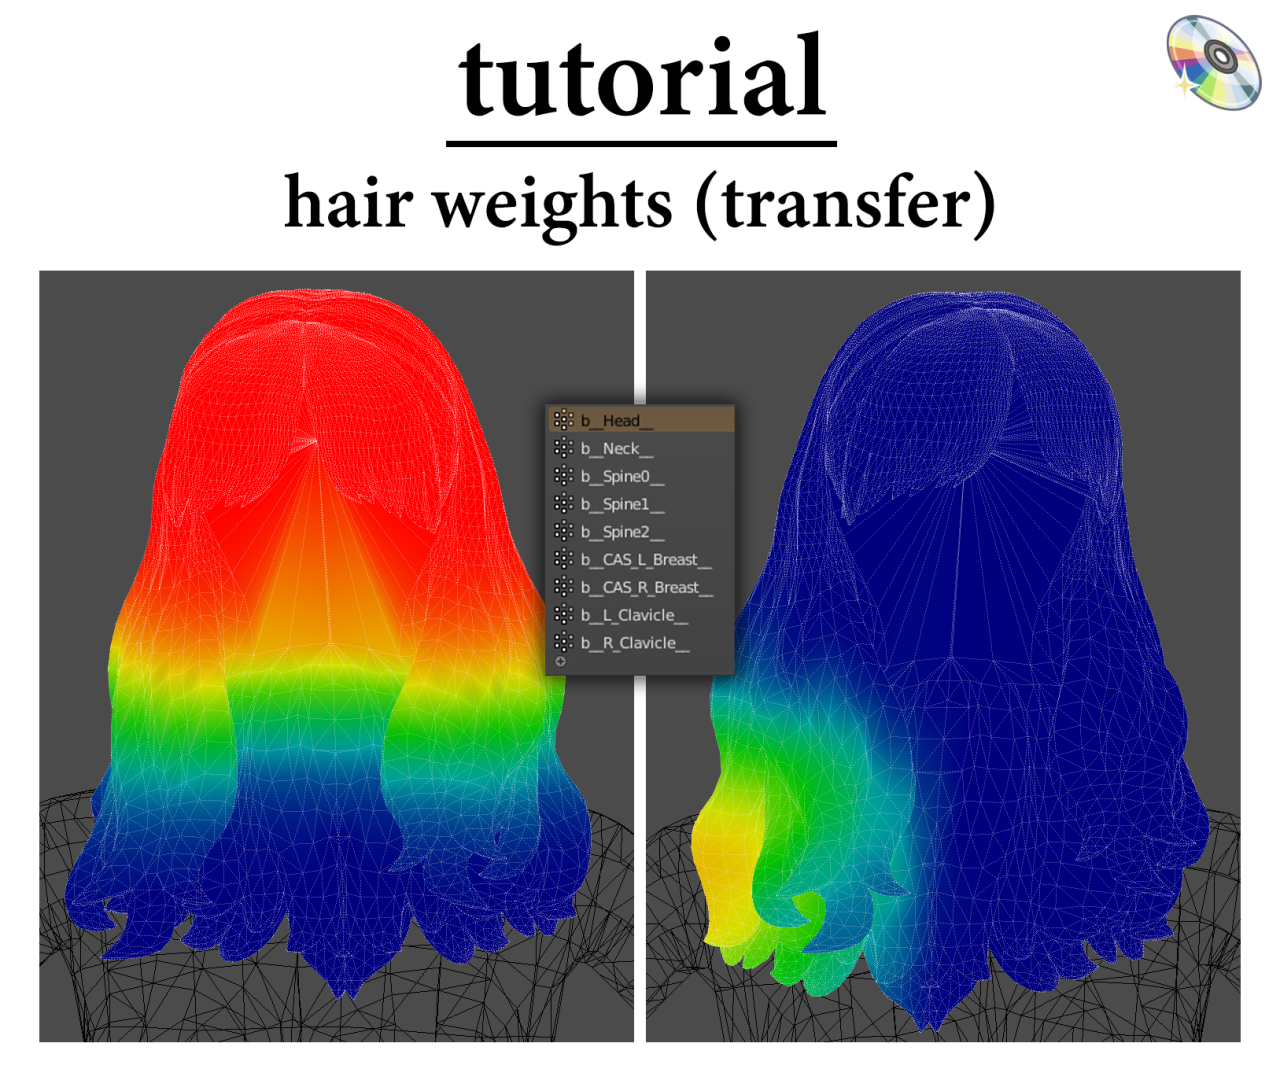
Tutorial – Pesos para el cabello:
De acuerdo a lo pedido, Voy a repasar cómo aprendí a hacer pesas para los pelos. ! Me gustaría mencionar que@qiccMe enseñó este método así que todo el crédito es para él., él es un verdadero rey! Entonces, sin más preámbulos, comencemos 🙂
* Le recomiendo que lea a través del Panel de control, ya que abrir las imágenes de mi tema no funciona. *
Paso 1:
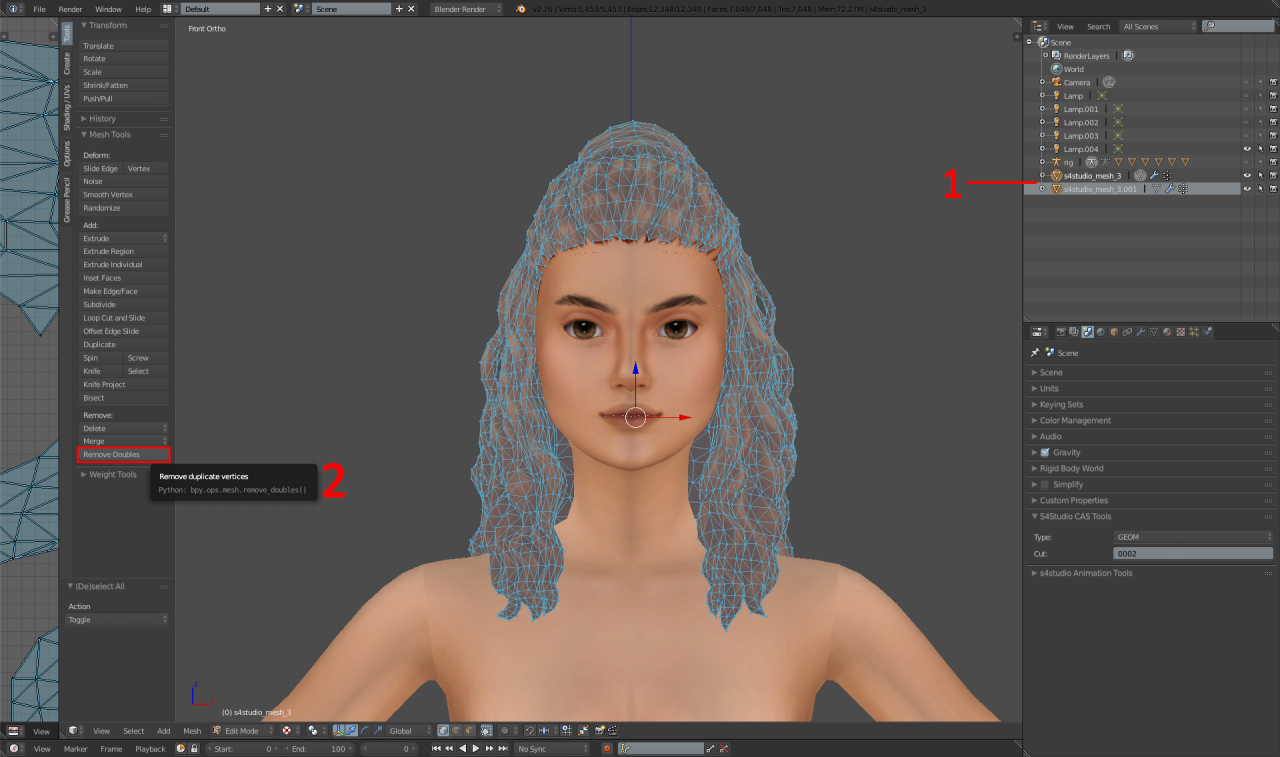
1 – separe el cabello y la línea del cabello mediante la selección de enlaces (l) y colocando el cursor sobre la línea del cabello. Entonces, presione P en su teclado para separarse en una nueva capa.
2 – Entonces, con el cabello principal resaltado, como se muestra en la imagen, haga clic en "eliminar dobles".
Paso 2:
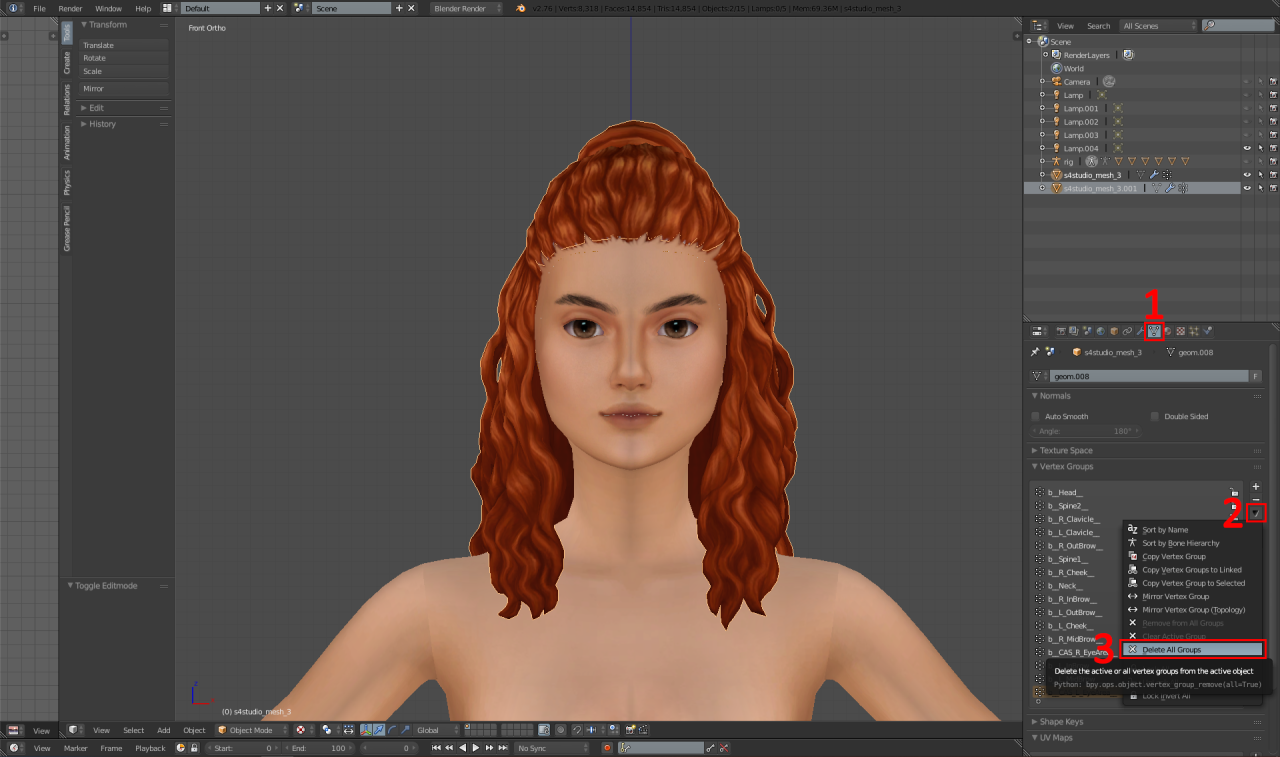
1 – Navegue a la pestaña "datos".
2 – Haga clic en la flecha.
3 – Haga clic en "eliminar todos los grupos"..
Paso 3:
Guarde el archivo de la licuadora. Entonces, abrir licuadora v2.8+ y navegar a: Expediente – Abierto, y abra el paquete que acabamos de guardar.
Paso 4:
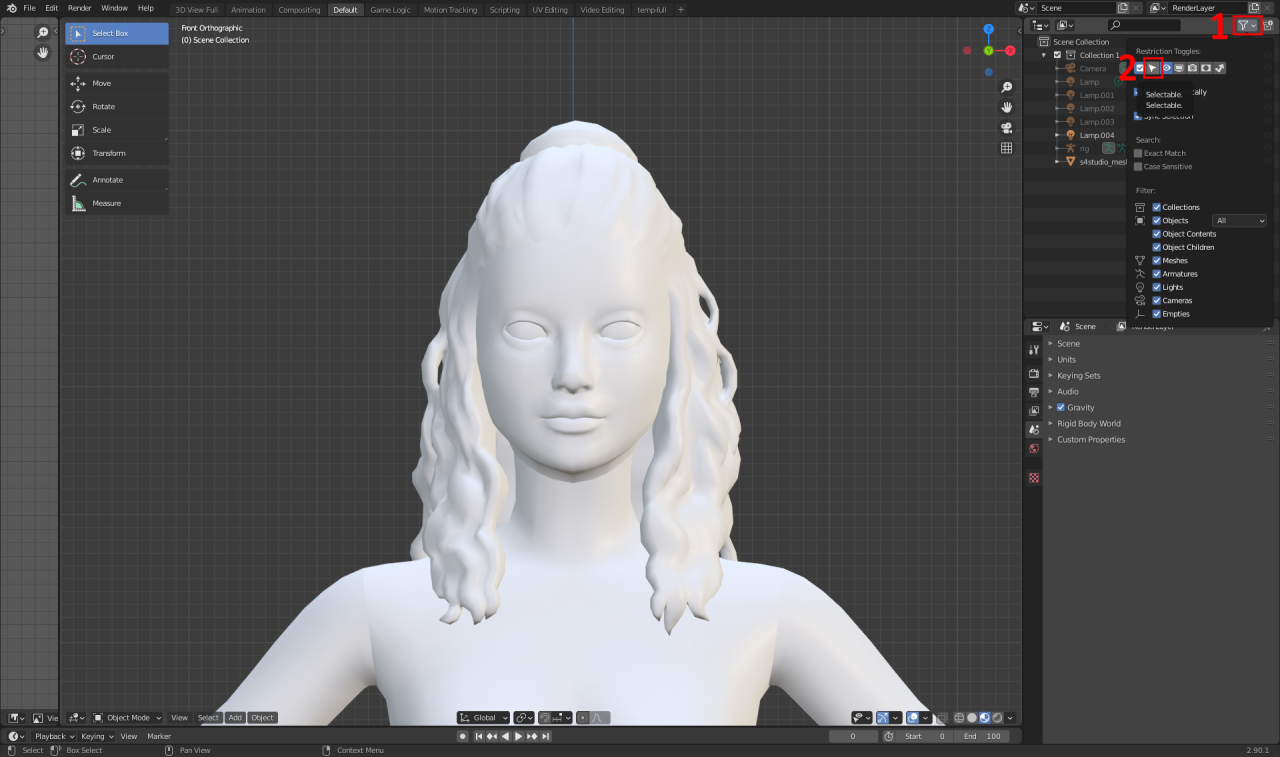
Una vez que haya abierto este archivo, puedes eliminar la línea del cabello.
1 – Haga clic en esto.
2 – Haga clic en esto.
Entonces, adjuntar este archivo.
Paso 4.5:
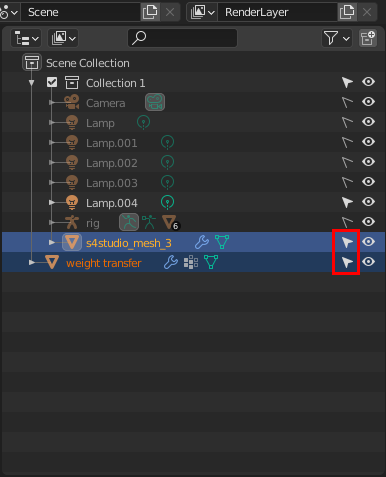
Asegúrese de que ambas mallas tengan este pequeño cursor resaltado como se muestra en la imagen..
Entonces, UN PASO MUY IMPORTANTE – click izquierdoSUmalla, entonces, MANTEN SOSTENIDO SHIFT y haga clic izquierdo en la malla de 'transferencia de peso'.
Paso 5:
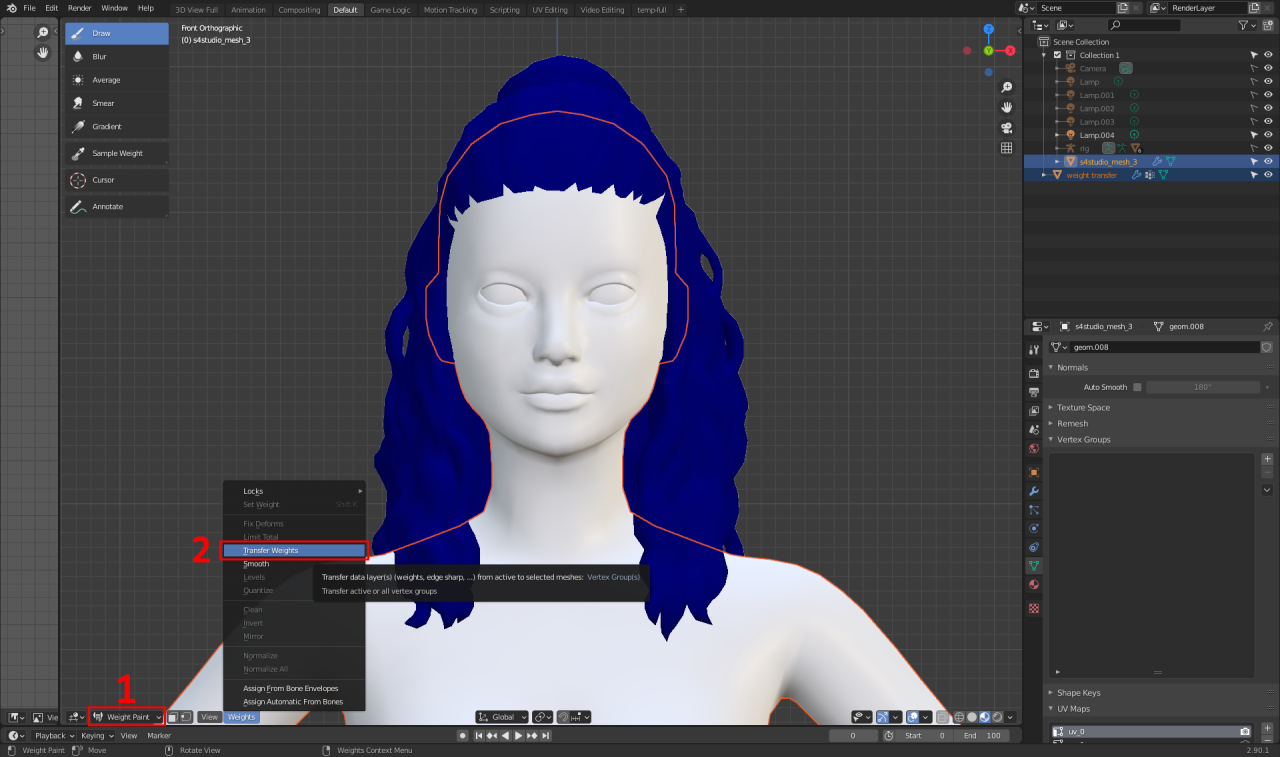
1 – Cambiar el modo de 'modo objeto' a 'pintura de peso'.
2 – Haga clic en este pequeño botón de "pesos" y presione "transferir pesos".
Paso 5.5:
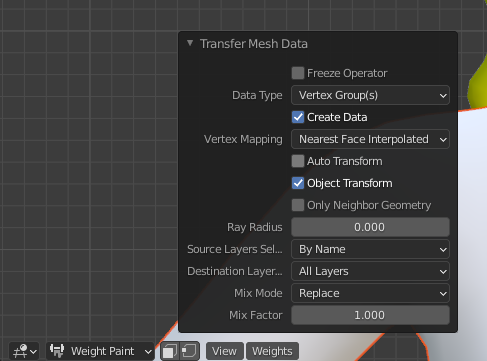
Haga clic en el botón "transferir datos de malla" y establezca la configuración para que coincida con estos.
Paso 6:
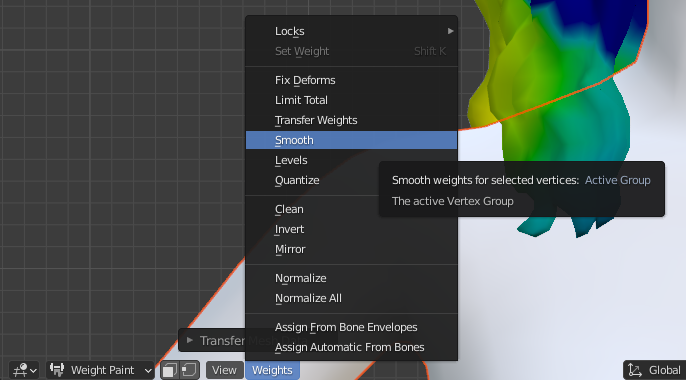
Haga clic en el botón "pesos" nuevamente, luego haga clic en "suave".
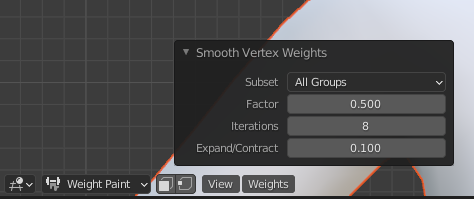
Establezca la configuración "suave" en estos.
(Tome estas configuraciones como guía general, Dependiendo del cabello y su longitud, la iteración puede variar.)
Paso 7:
Guarde su paquete y vuelva a abrir el archivo guardado de "pesos eliminados".
Se eliminó la malla del cabello de pesas rotas., y agregue los pesos recién terminados.
Paso 8:

Tu cabello se verá así cuando lo importes. Entonces, arreglarlo, simplemente haga clic en estos tres botones en orden.
Paso 9:
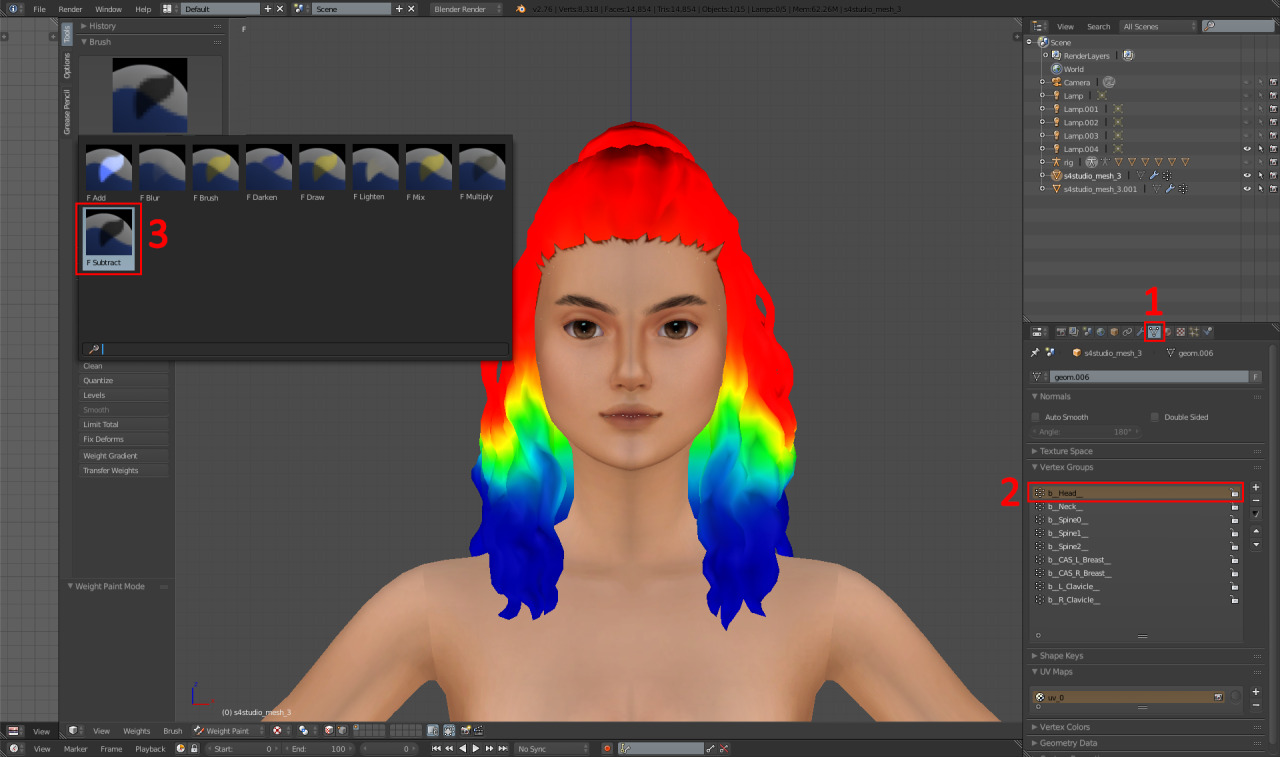
Ahora, Necesitamos arreglar el peso de la cabeza porque la transferencia lo arruina..
1 – Haga clic en esto.
2 – Haga clic en "b__Cabeza__".
3 – Vaya a los pinceles y haga clic en el pincel "restar"..
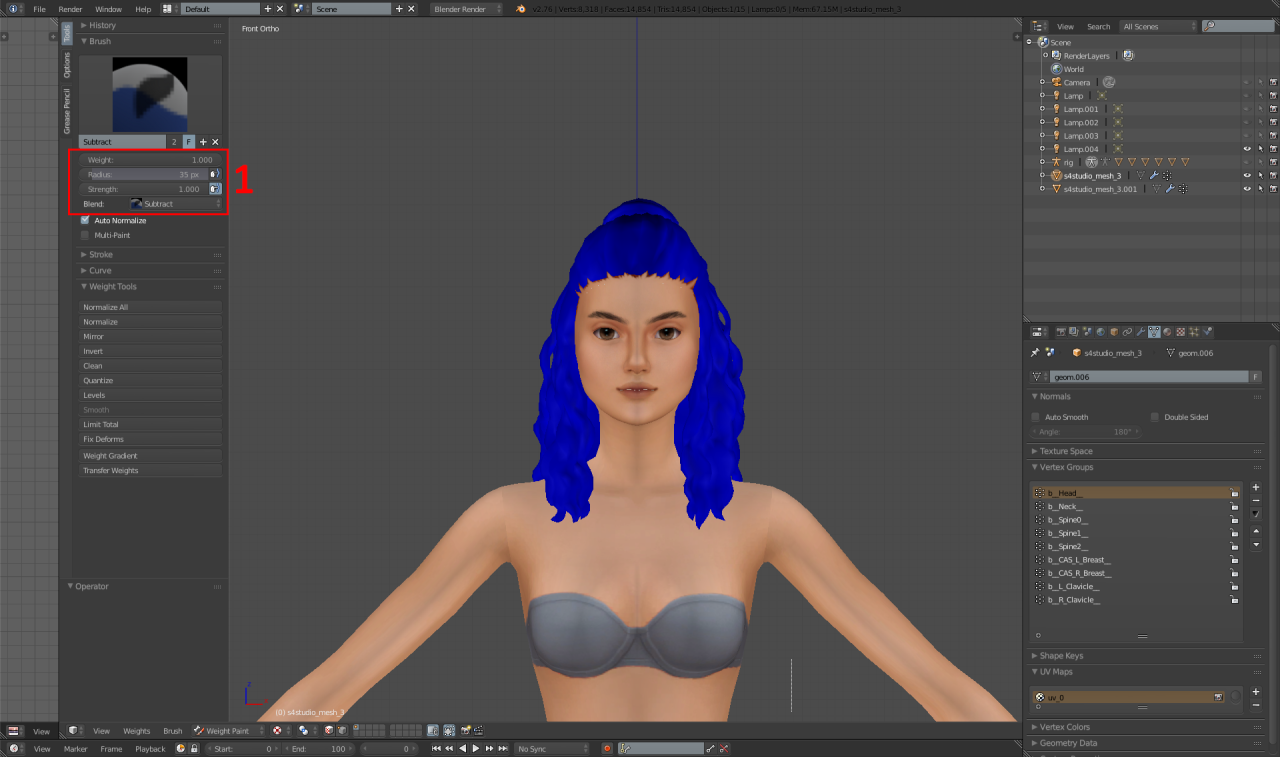
1 – Entonces, usando estas configuraciones, use el botón 'gradiente de peso' y arrastre hacia abajo en el área de la axila para que TODA la malla se vuelva azul así.
Paso 10:
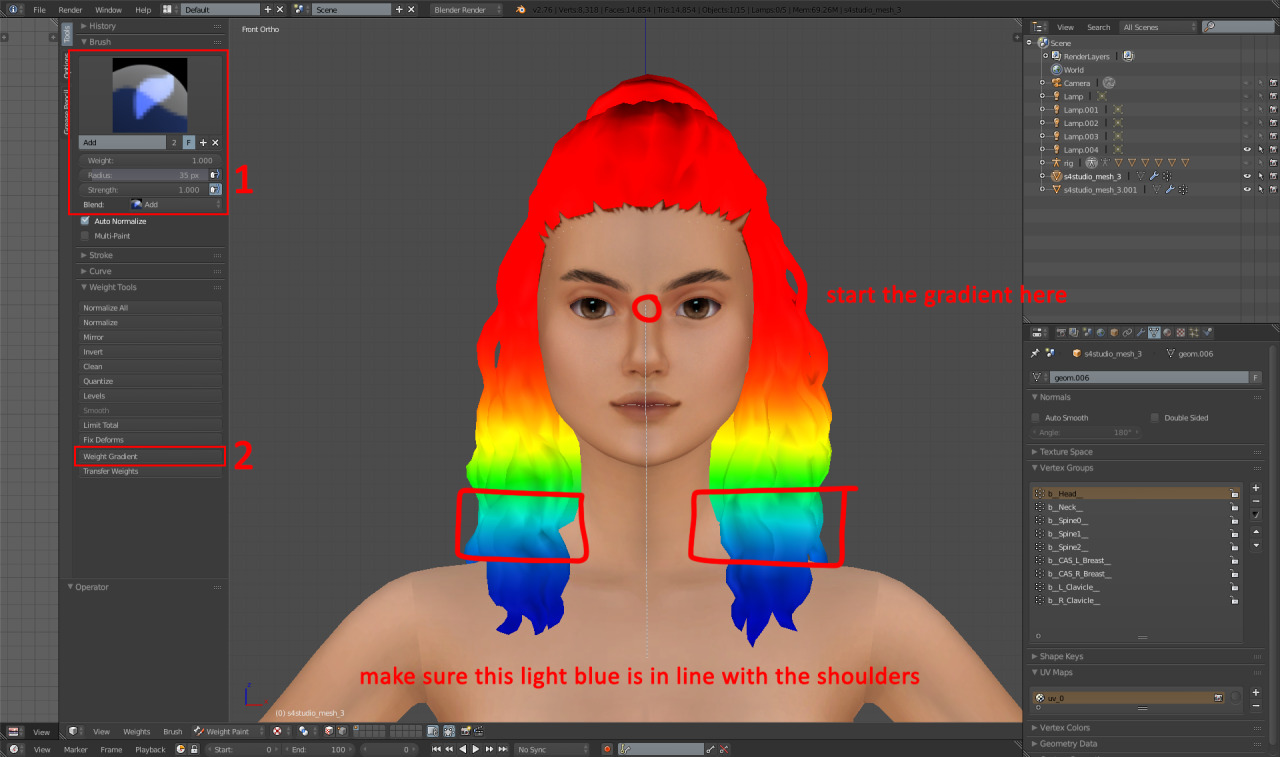
Ahora necesitamos hacer el gradiente de peso para el peso de la cabeza..
1 – Cambia el pincel para "agregar" y ponlo en esa configuración..
2 – Haga clic en "gradiente de peso".
3 – Arrastra el degradado hacia abajo, como se ve en la foto.
Paso 11:
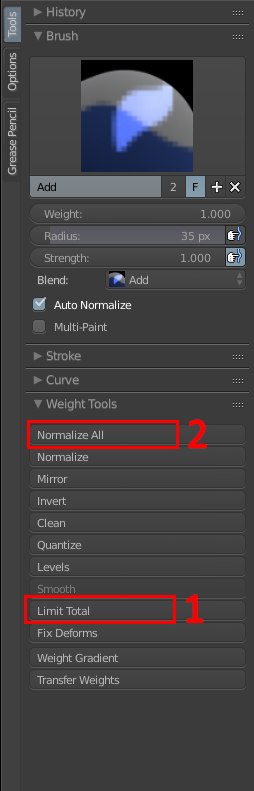
1 – Haga clic en esto.
2 – Haga clic en esto.
(Al hacer clic en 'normalizar todo', asegúrese de estar en el peso “b__Head__”.)
Hecho!
Después, Vuelva a unir la línea del cabello a la malla., duplicar la malla dos veces y ordenar los cortes como 0000, 0001 y 0002, luego guarde e importe nuevamente a s4s!
Descargo de responsabilidad– Las pesas para la clavícula pueden convertirse en un problema con los pelos muy largos y, como resultado, provocar cortes o roturas de la malla.. Si esto es un problema, Obviamente entonces olvídate de las pesas para clavícula..
Si tiene algún problema o confusión sobre esto, por favor envíame un DM y con gusto te ayudaré!