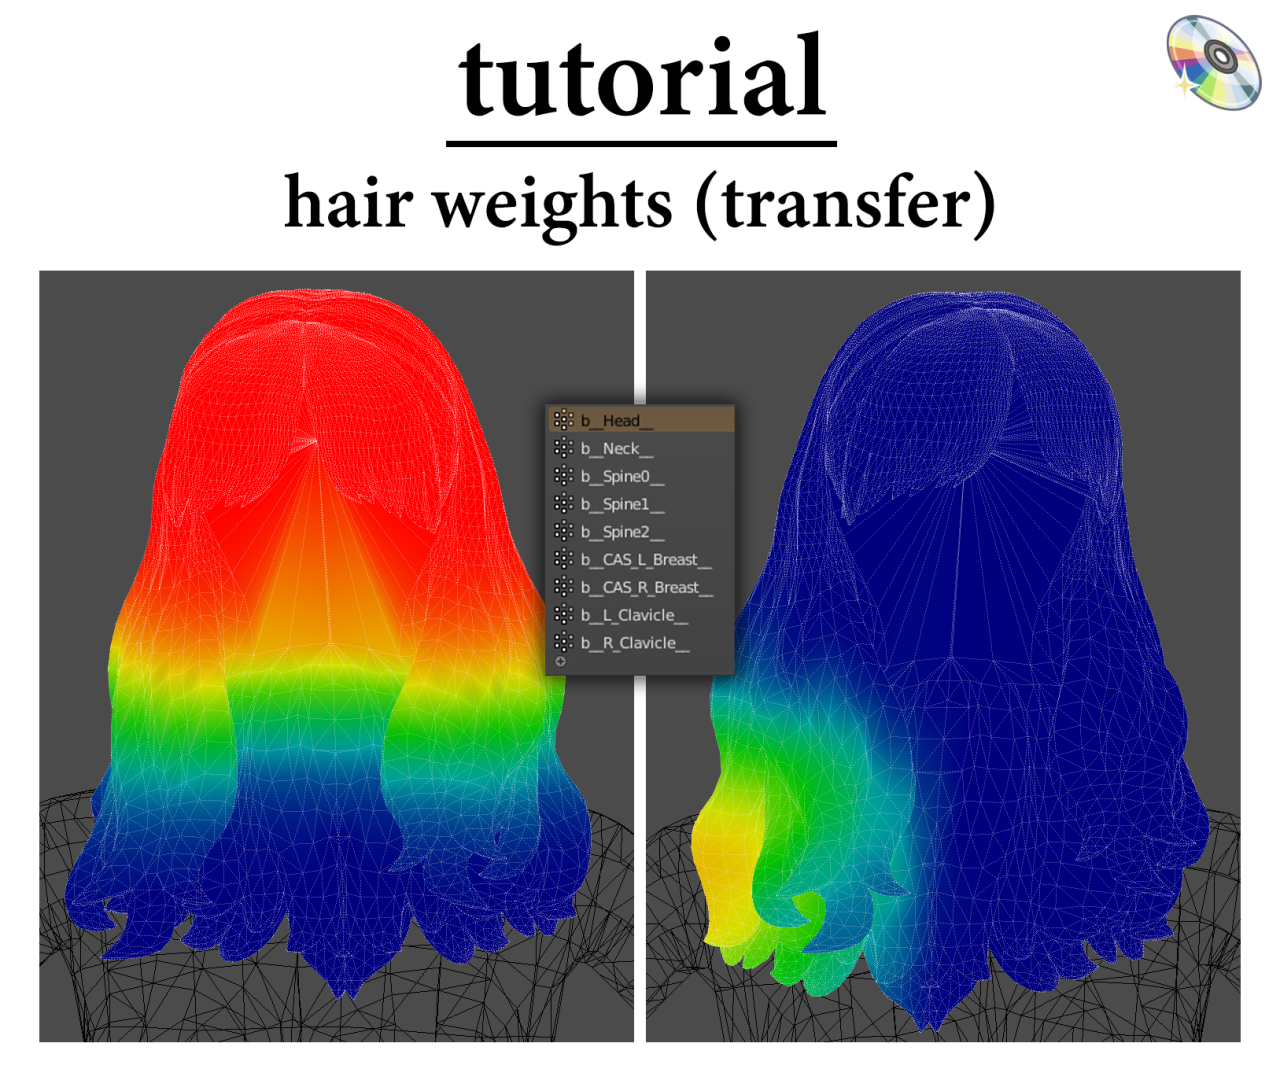
Tutorial – Hair Weights:
As requested, I’ll be going over how I learnt to do weights for hairs ! I would like to mention that @qicc taught me this method so all credit goes to him, he’s a true king! So, without further ado, let’s begin 🙂
* Recommend that you read via Dashboard as opening the images on my theme does not work *
Step 1:
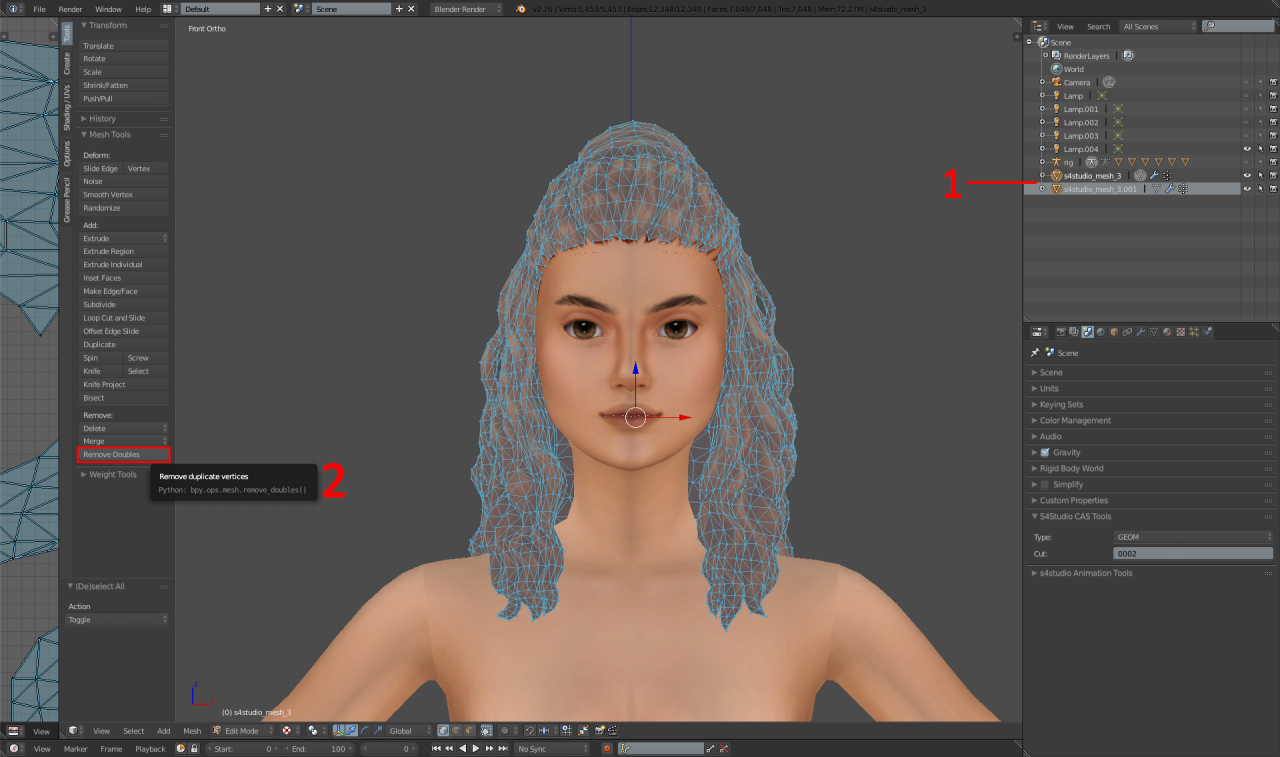
1 – separate the hair and the hairline by using link selection (L) and hovering your cursor over the hairline. Then, press P on your keyboard to separate to a new layer.
2 – Then, with the main hair highlighted, as pictured, click ‘remove doubles’.
Step 2:
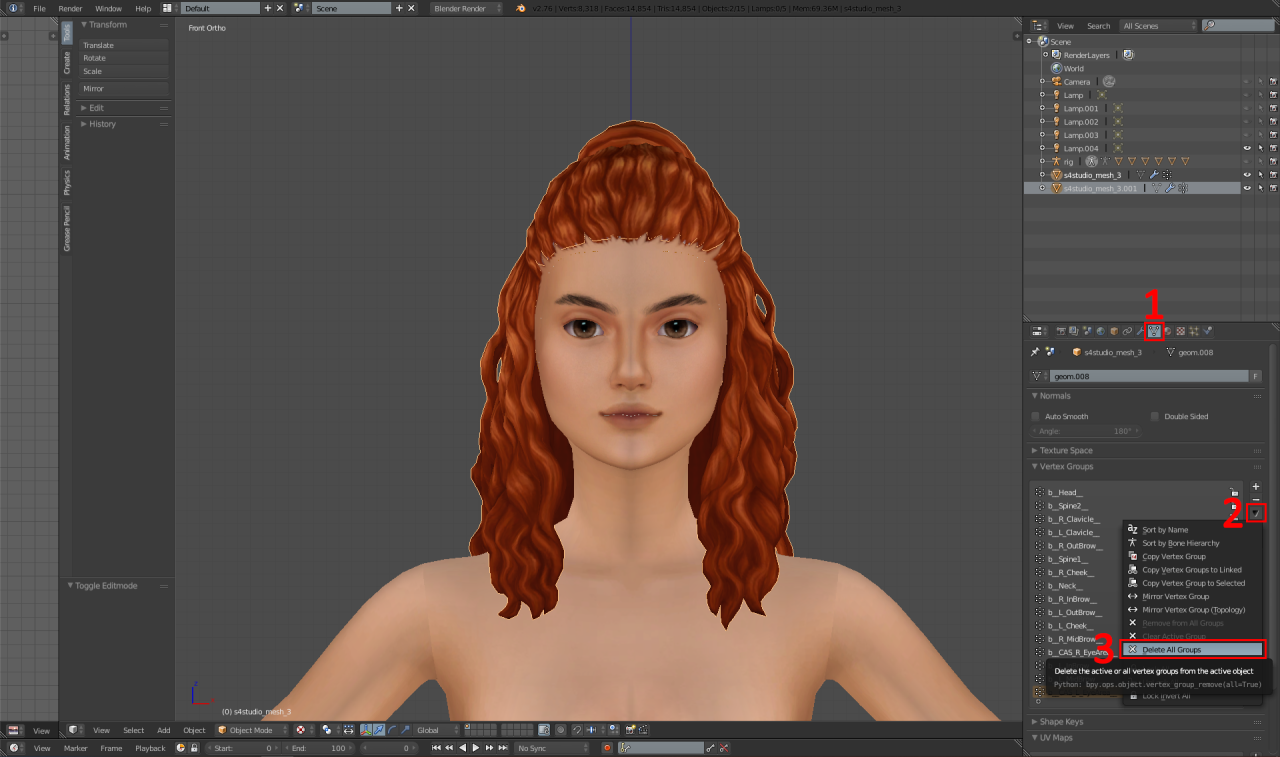
1 – Navigate to the ‘data’ tab.
2 – Click the arrow.
3 – Click ‘delete all groups’.
Step 3:
Save the blender file. Then, open Blender v2.8+ and navigate to: File – Open, and open the package we just saved.
Step 4:
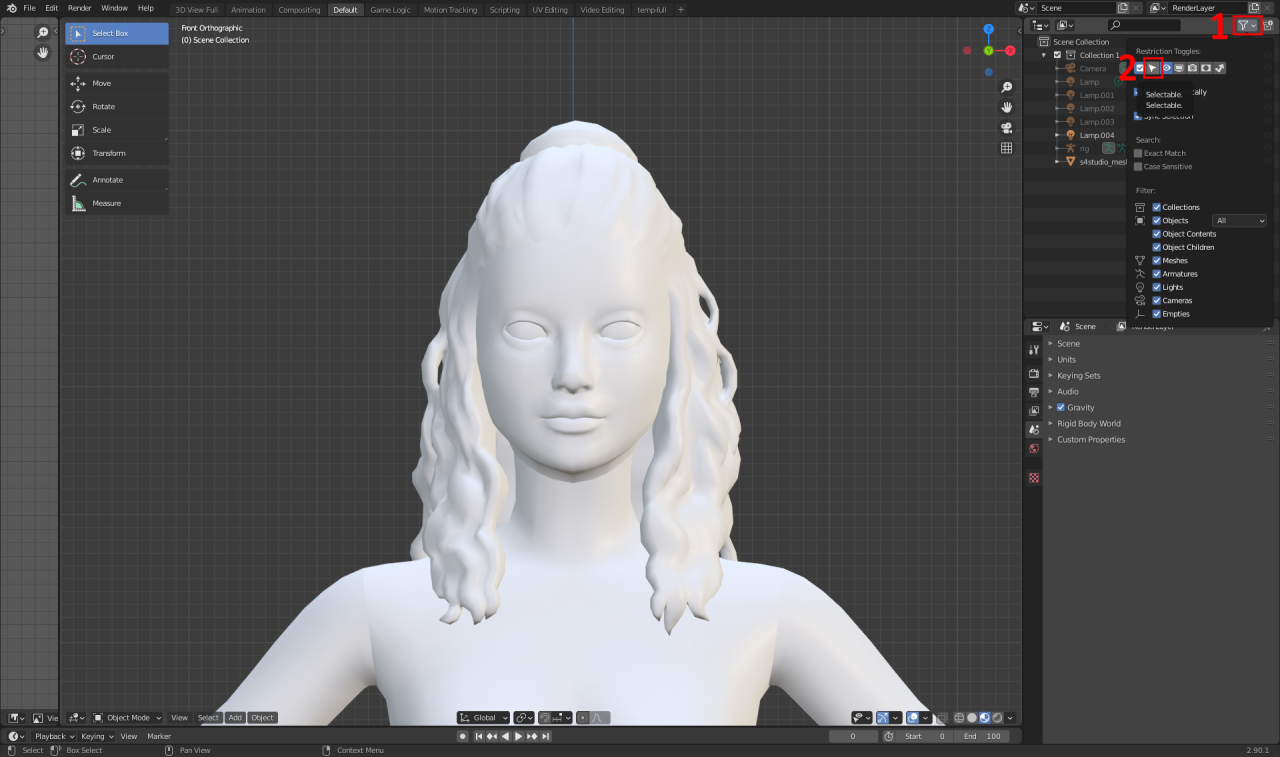
Once you’ve opened this file, you can delete the hairline.
1 – Click this.
2 – Click this.
Then, append this file.
Step 4.5:
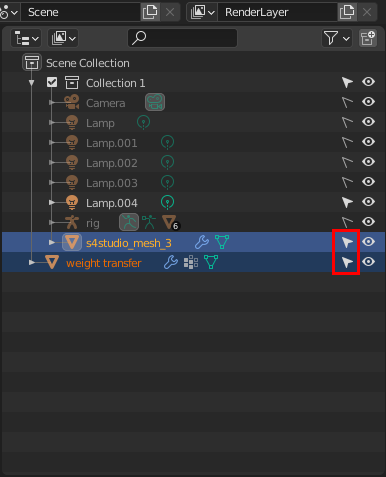
Make sure both meshes have this little cursor highlighted as pictured.
Then, A VERY IMPORTANT STEP – left click YOUR mesh, then, HOLD SHIFT and left click the ‘weight transfer’ mesh.
Step 5:
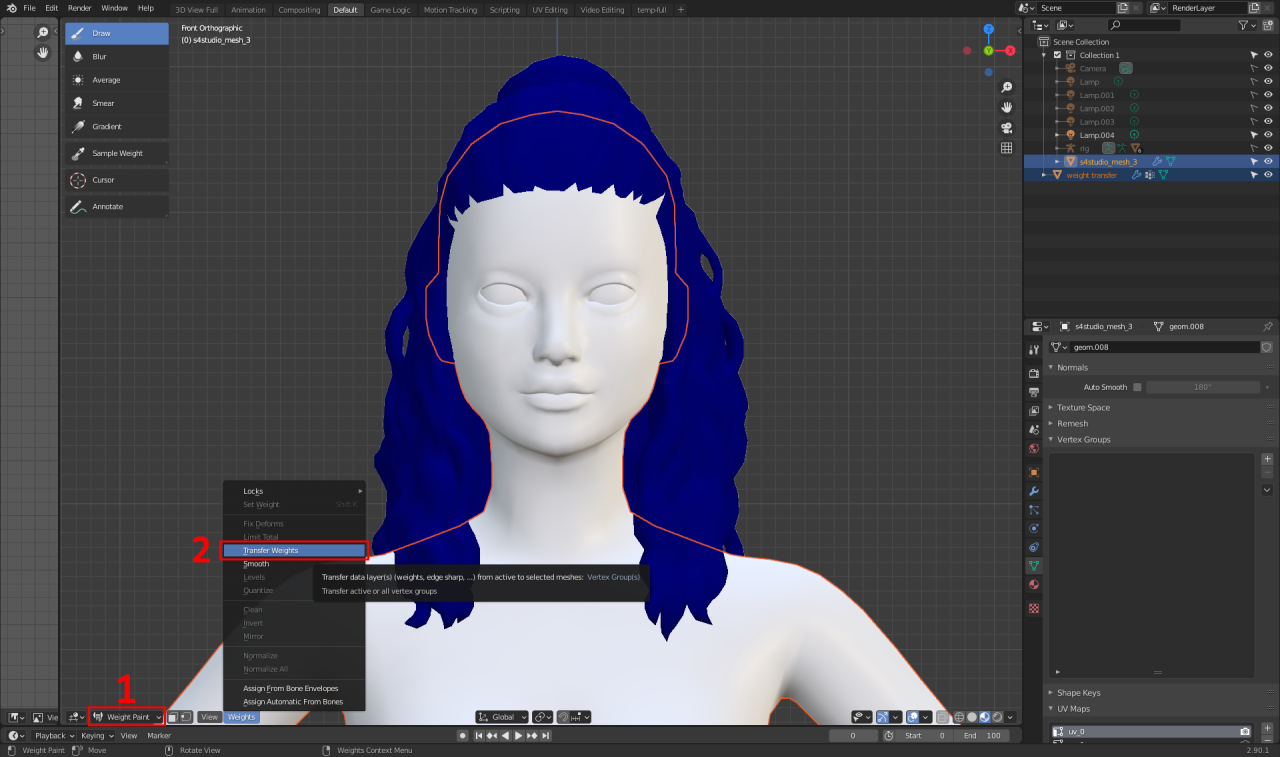
1 – Change mode from ‘object mode’ to ‘weight paint’.
2 – Click this little ‘weights’ button and hit ‘transfer weights’
Step 5.5:
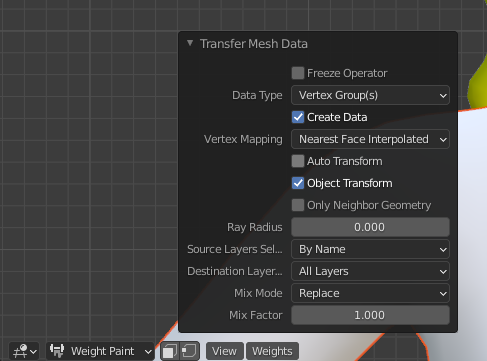
Click the ‘transfer Mesh Data’ button and set the settings to match these.
Step 6:
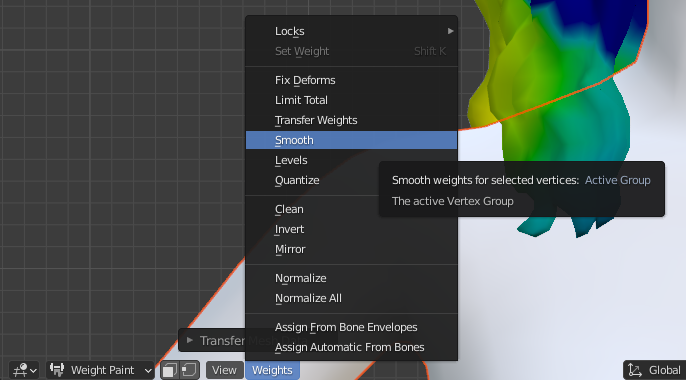
Click the ‘weights’ button again, then click ‘smooth’.
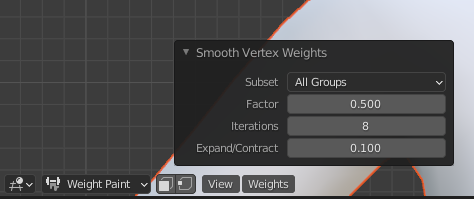
Set the ‘smooth’ settings to these.
(Take these settings as a general guide, depending on the hair and its length the iteration may vary)
Step 7:
Save your package and re-open the saved ‘deleted weights’ file.
Deleted the broken weights hair mesh, and append the newly finished weights.
Step 8:

Your hair will mostly look like this when you import it. So, to fix it, jus click these three buttons in order.
Step 9:
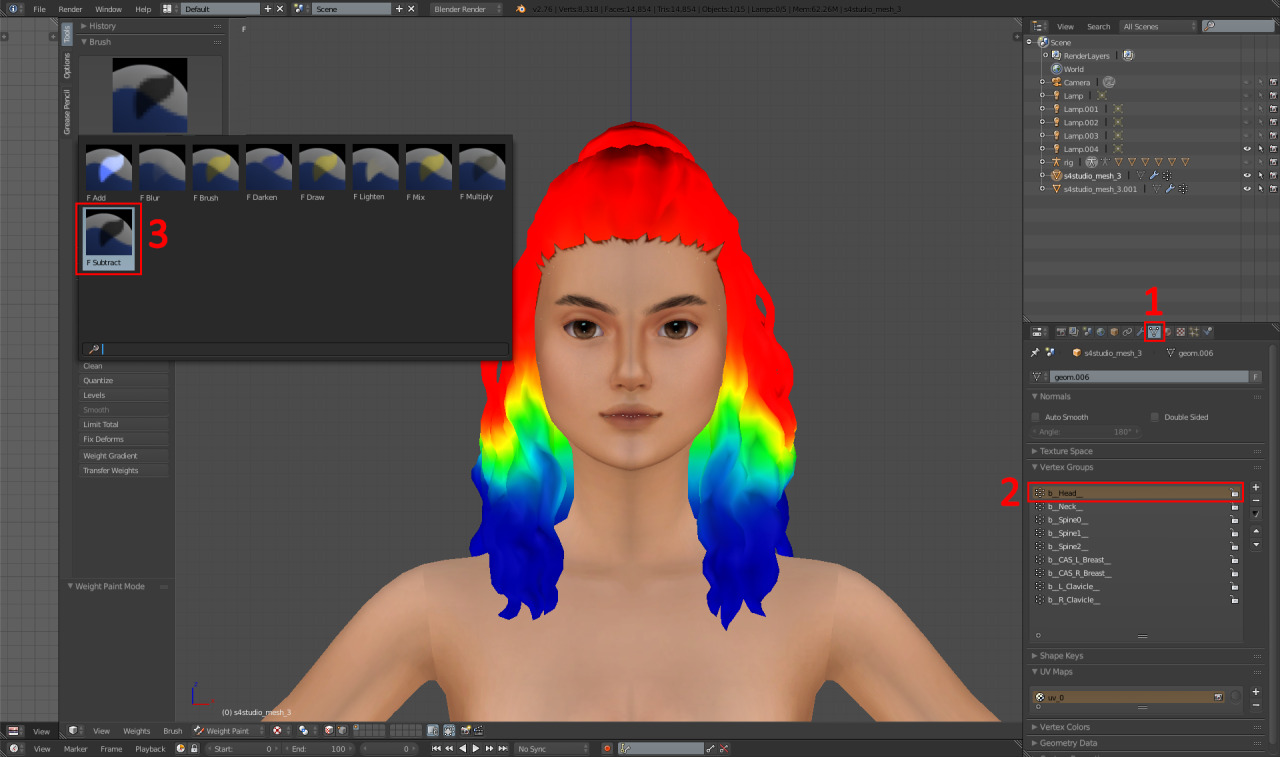
Now, we need to fix the head weight because the transfer messes that one up lol.
1 – Click this.
2 – Click “b__Head__”.
3 – Go to the brushes and click the ‘subtract’ brush.
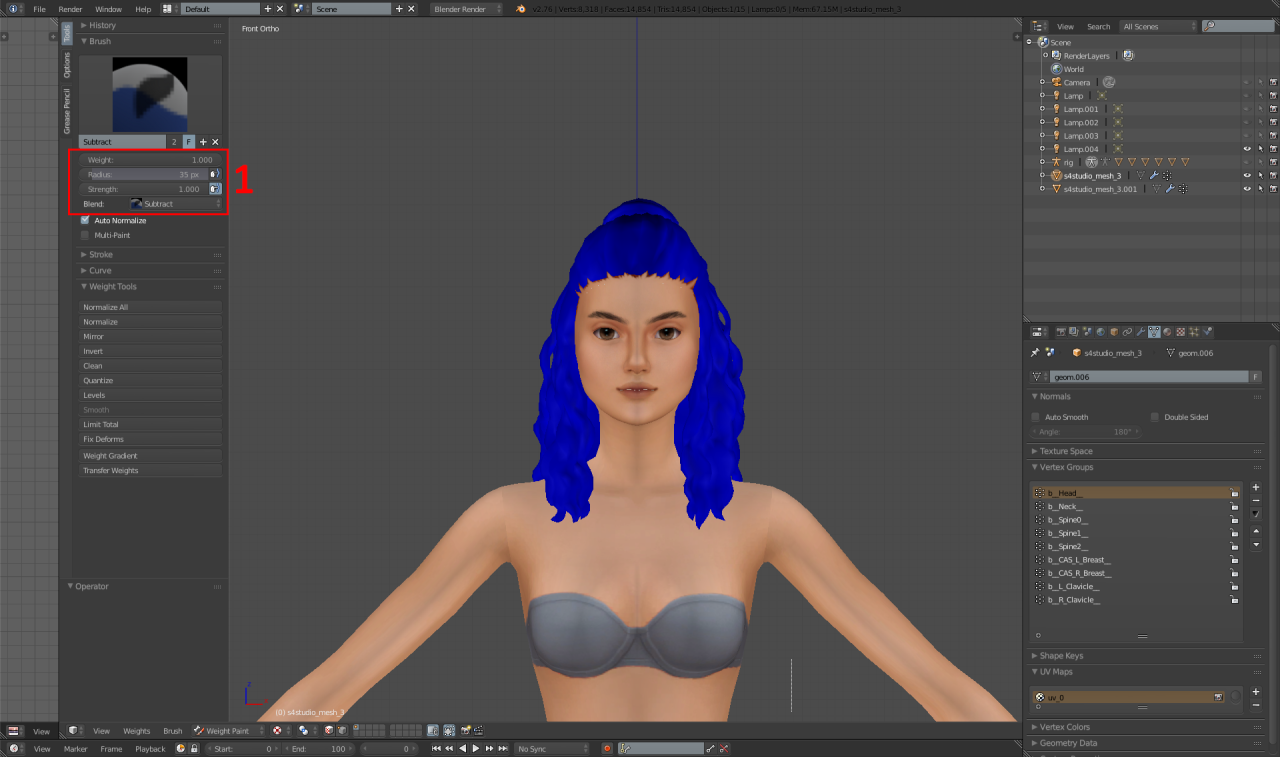
1 – Then, using these settings, use the ‘weight gradient’ button and drag downwards in the armpit area so the ENTIRE mesh turns blue like so.
Step 10:
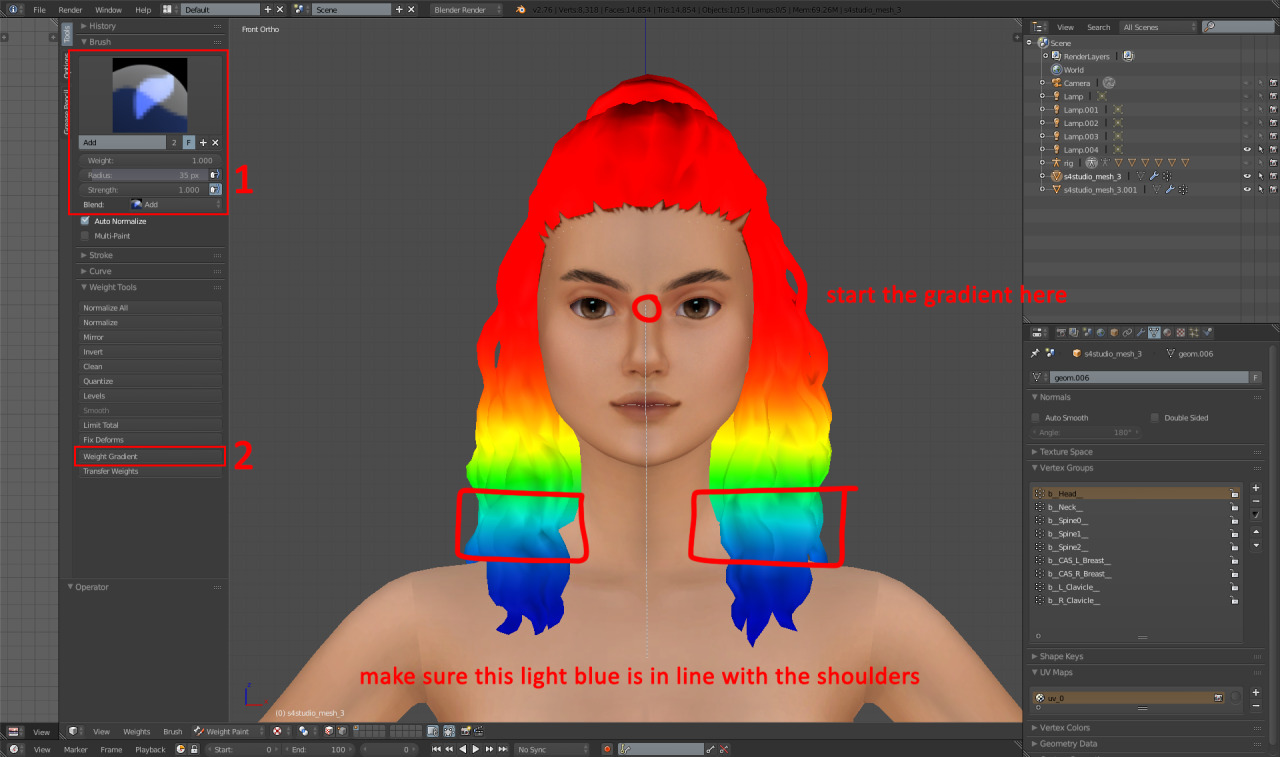
Now we need to do the weight gradient for the head weight.
1 – Change the brush to ‘add’ and put it at those settings.
2 – Click ‘weight gradient’.
3 – Drag the gradient downwards, as seen in the photo.
Step 11:
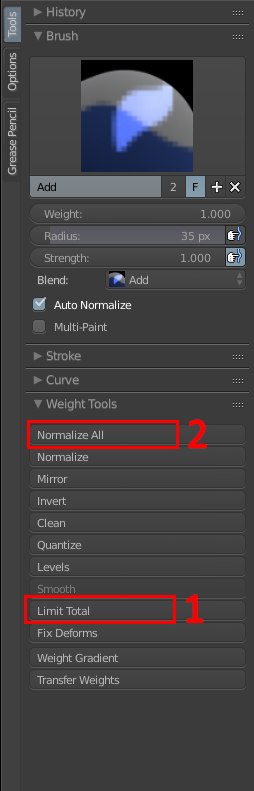
1 – Click this.
2 – Click this.
(When clicking the ‘normalise all’, make sure you are on the “b__Head__” weight.)
Done!
After that, re-join the hairline to the mesh, duplicate the mesh two times and order the cuts as 0000, 0001 and 0002, then save and import back to s4s!
Disclaimer – the clavicle weights may become an issue with very long hairs and as a result cause clipping or mesh tearing. If this is an issue, obviously then forget about clavicle weights.
If you have any issues or confusion about this, please shoot me a DM and I’ll happily help you out!