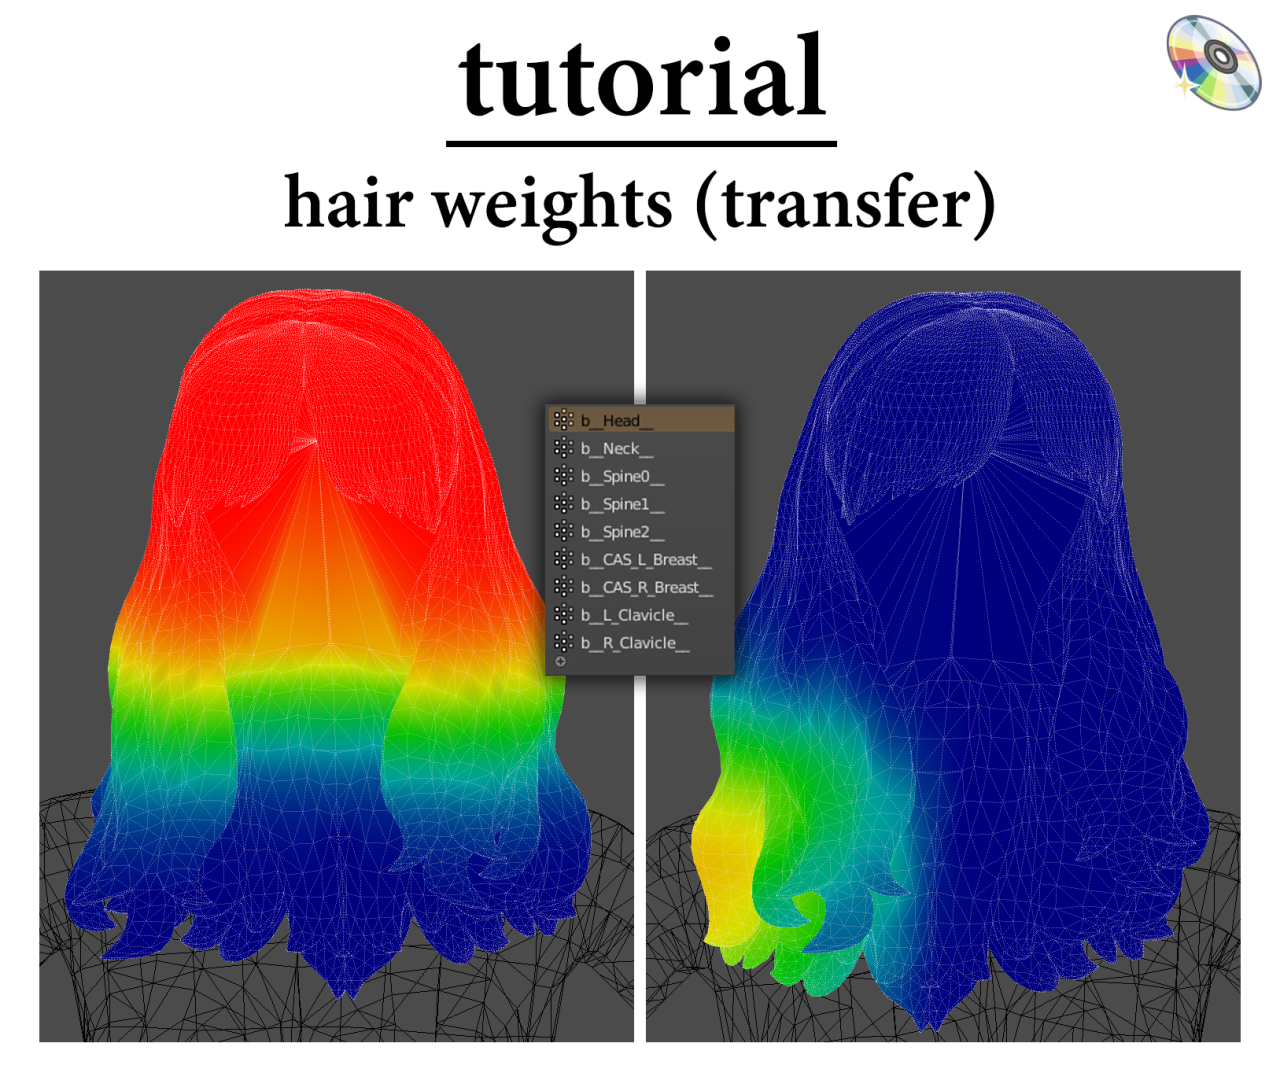
Esercitazione – Pesi dei capelli:
Come richiesto, Parlerò di come ho imparato a fare i pesi per i capelli ! Vorrei menzionarlo@qicc mi ha insegnato questo metodo quindi tutto il merito va a lui, è un vero re! COSÌ, senza ulteriori indugi, cominciamo 
* Ti consiglio di leggere tramite Dashboard poiché l'apertura delle immagini sul mio tema non funziona *
Fare un passo 1:
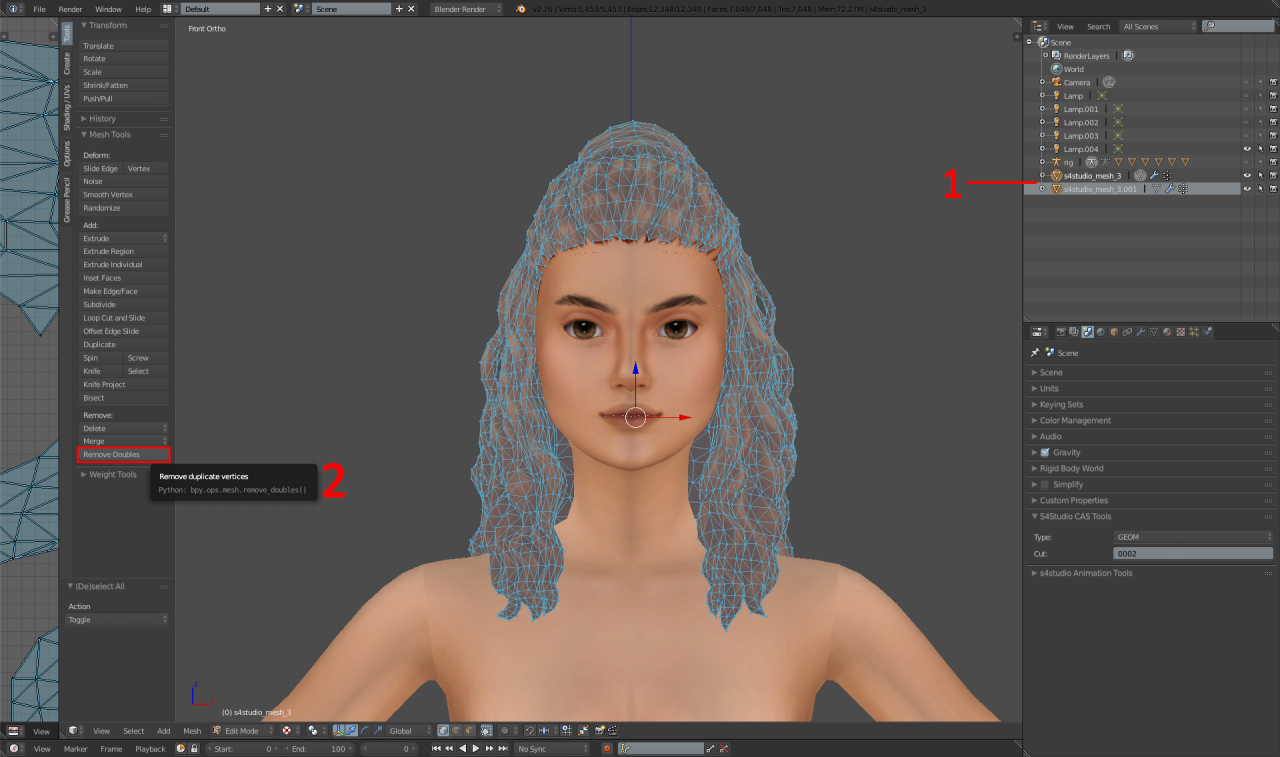
1 – separare i capelli e l'attaccatura dei capelli utilizzando la selezione del collegamento (l) e posizionando il cursore sull'attaccatura dei capelli. Poi, premi P sulla tastiera per separarlo in un nuovo livello.
2 – Poi, con i capelli principali evidenziati, come nella foto, fai clic su "rimuovi doppi".
Fare un passo 2:
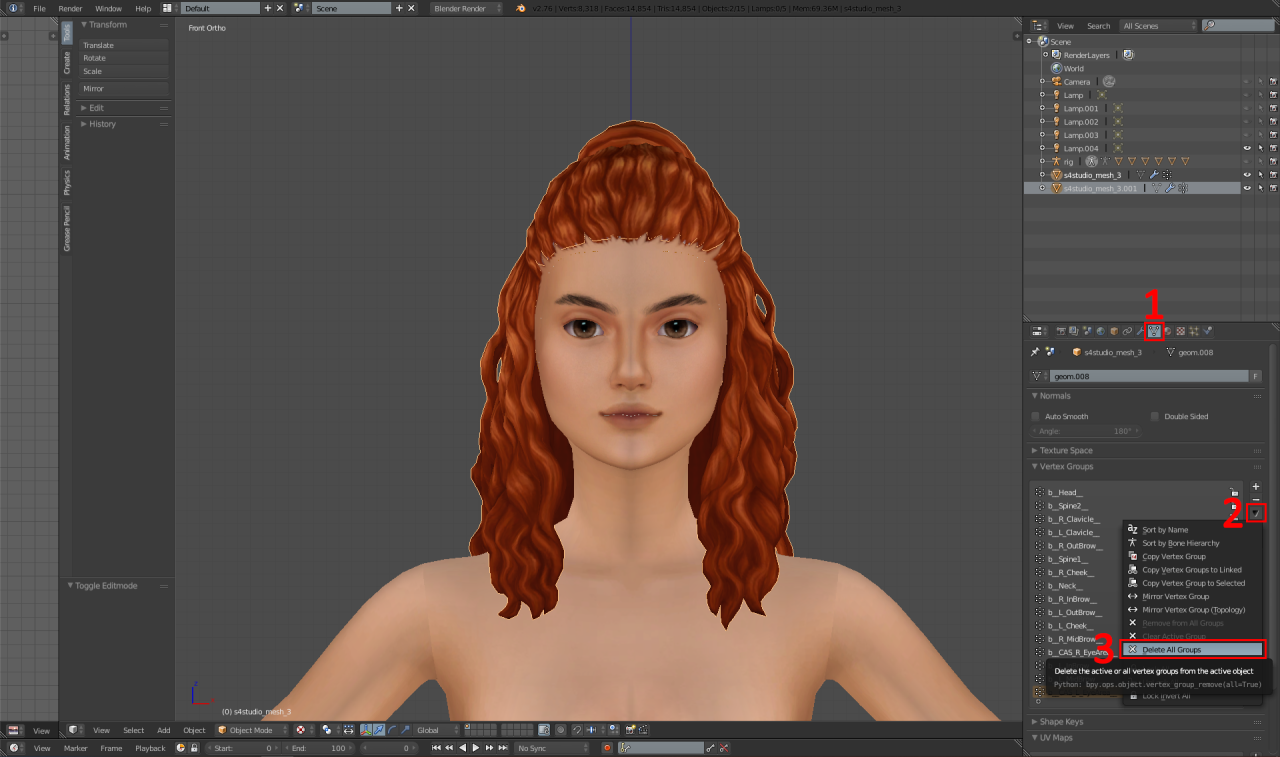
1 – Passare alla scheda "dati"..
2 – Fare clic sulla freccia.
3 – Fai clic su "Elimina tutti i gruppi".
Fare un passo 3:
Salva il file del frullatore. Poi, apri Blender v2.8+ e navigare verso: File – Aprire, e apri il pacchetto che abbiamo appena salvato.
Fare un passo 4:
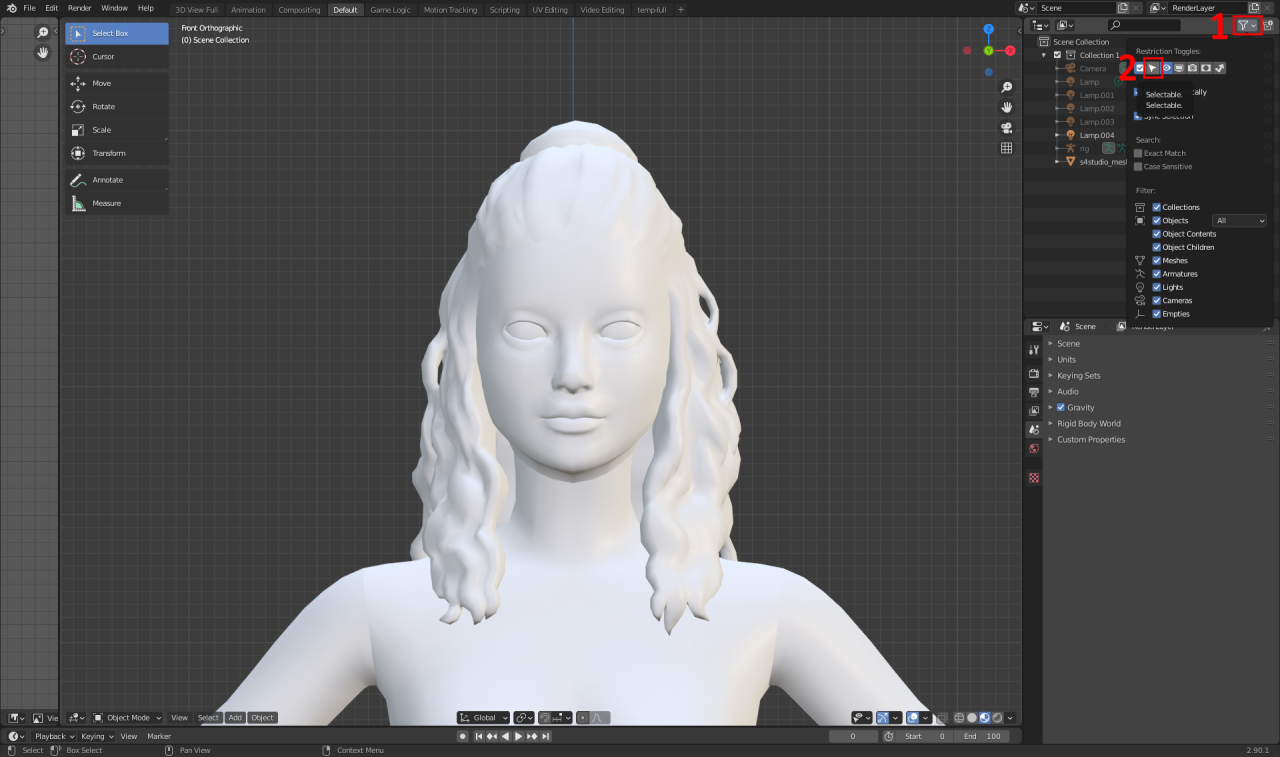
Una volta aperto questo file, puoi eliminare l'attaccatura dei capelli.
1 – Fare clic su questo.
2 – Fare clic su questo.
Fare un passo 4.5:
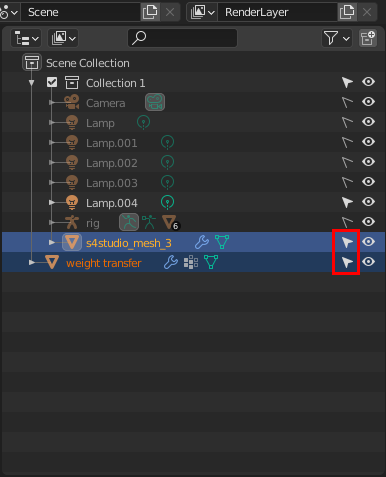
Assicurati che entrambe le mesh abbiano questo piccolo cursore evidenziato come nella foto.
Poi, UN PASSO MOLTO IMPORTANTE – clic sinistroTUOmaglia, Poi, TIENI PREMUTO MAIUSC e fai clic con il pulsante sinistro del mouse sulla mesh "trasferimento peso"..
Fare un passo 5:
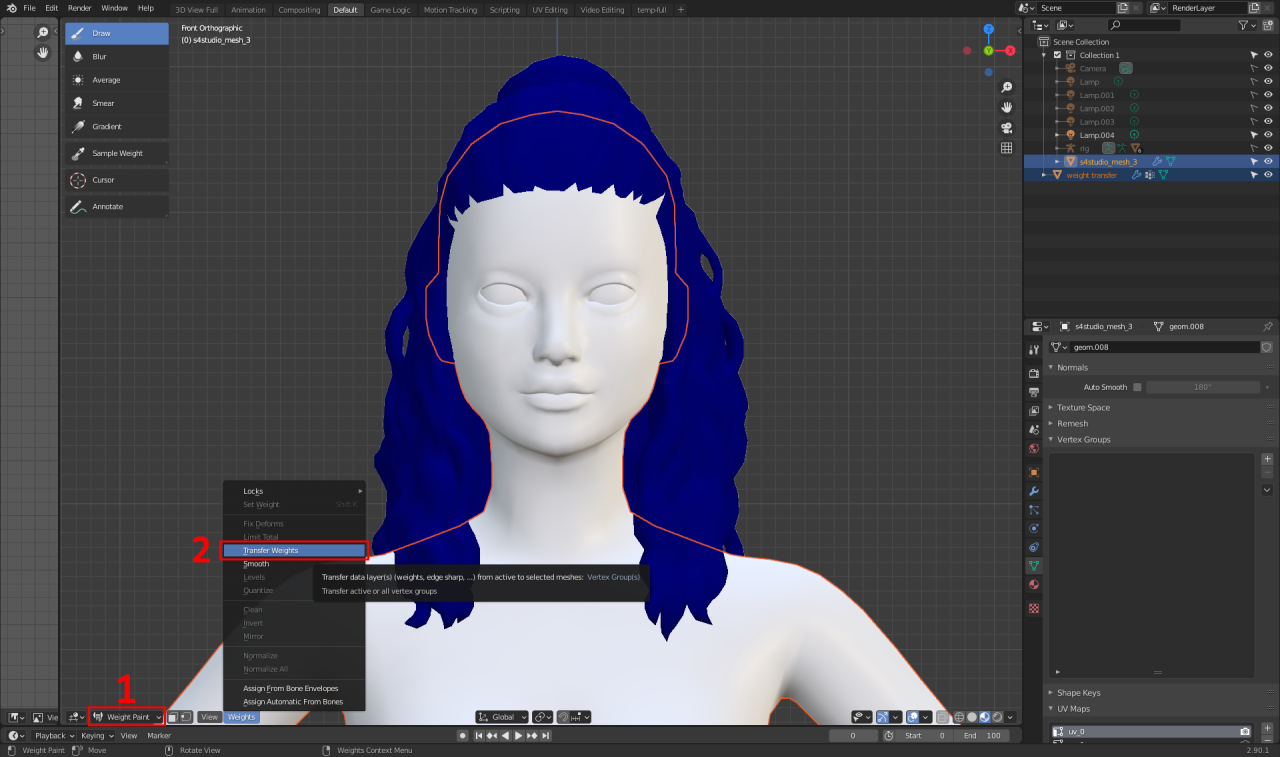
1 – Cambia modalità da "modalità oggetto" a "vernice peso".
2 – Fai clic su questo piccolo pulsante “pesi” e premi “trasferisci pesi”
Fare un passo 5.5:
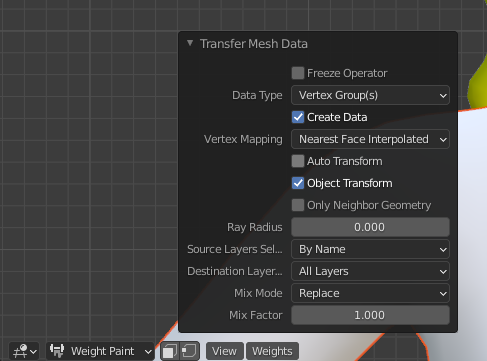
Fare clic sul pulsante "Trasferisci dati mesh" e configurare le impostazioni in modo che corrispondano a queste.
Fare un passo 6:
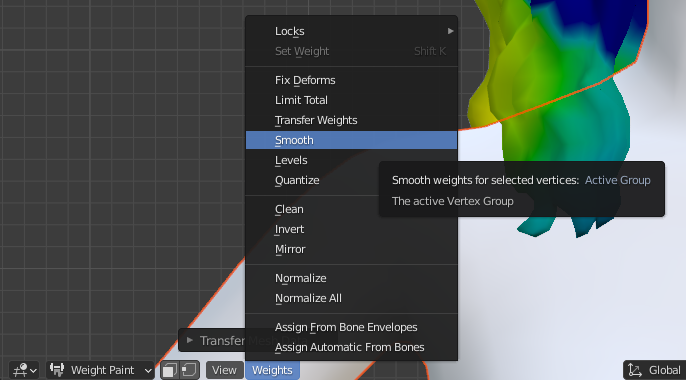
Fare nuovamente clic sul pulsante "pesi"., quindi fare clic su "liscia".
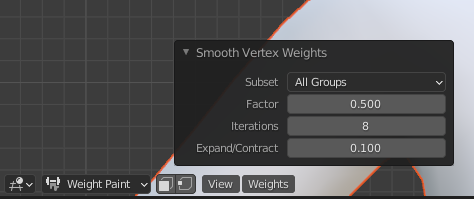
Imposta le impostazioni "uniformi" su queste.
(Prendi queste impostazioni come una guida generale, a seconda dei capelli e della loro lunghezza l'iterazione può variare)
Fare un passo 7:
Salva il pacco e riapri il file dei "pesi eliminati" salvato.
Eliminata la rete di capelli dei pesi rotta, e aggiungere i pesi appena finiti.
Fare un passo 8:

I tuoi capelli saranno per lo più così quando li importi. COSÌ, per risolverlo, basta fare clic su questi tre pulsanti in ordine.
Fare un passo 9:
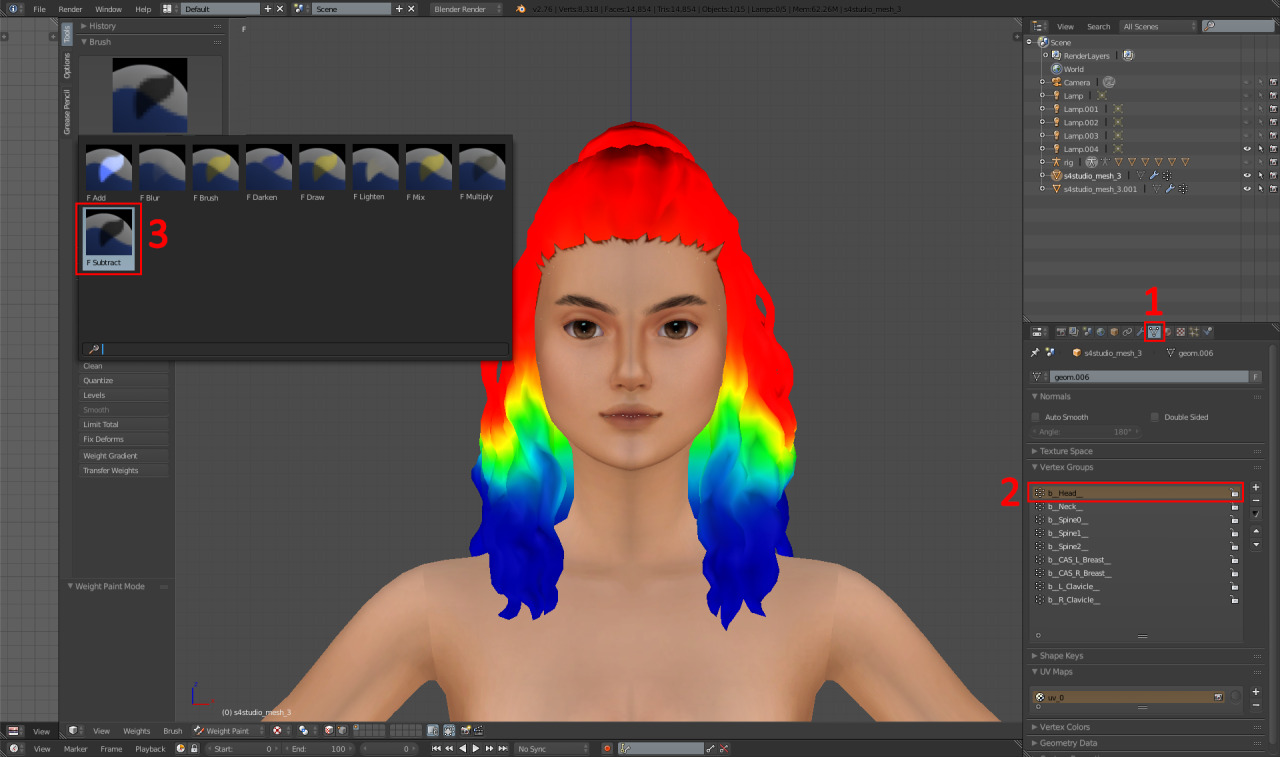
Ora, dobbiamo correggere il peso della testa perché il trasferimento lo incasina lol.
1 – Fare clic su questo.
2 – Fai clic su "b__Testa__".
3 – Vai ai pennelli e fai clic sul pennello "sottrai"..
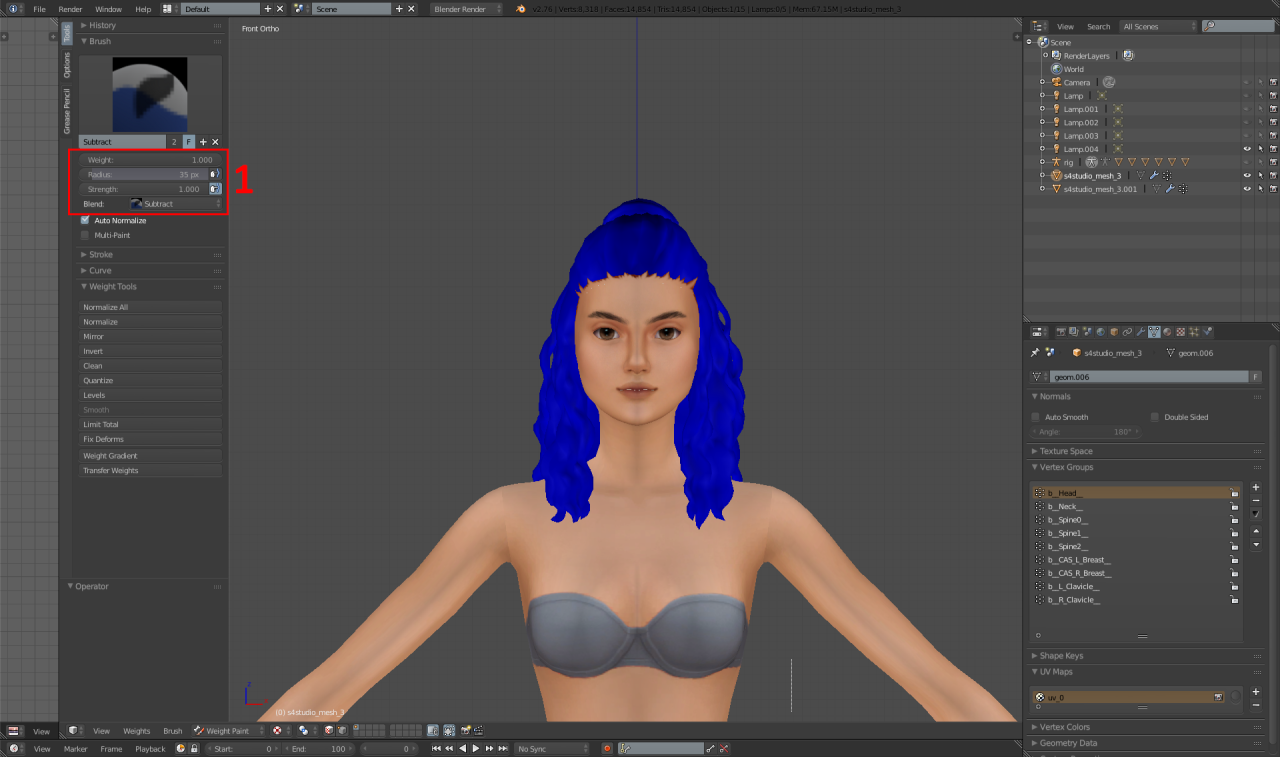
1 – Poi, utilizzando queste impostazioni, usa il pulsante "gradiente peso" e trascina verso il basso nell'area dell'ascella in modo che TUTTA la mesh diventi blu in questo modo.
Fare un passo 10:
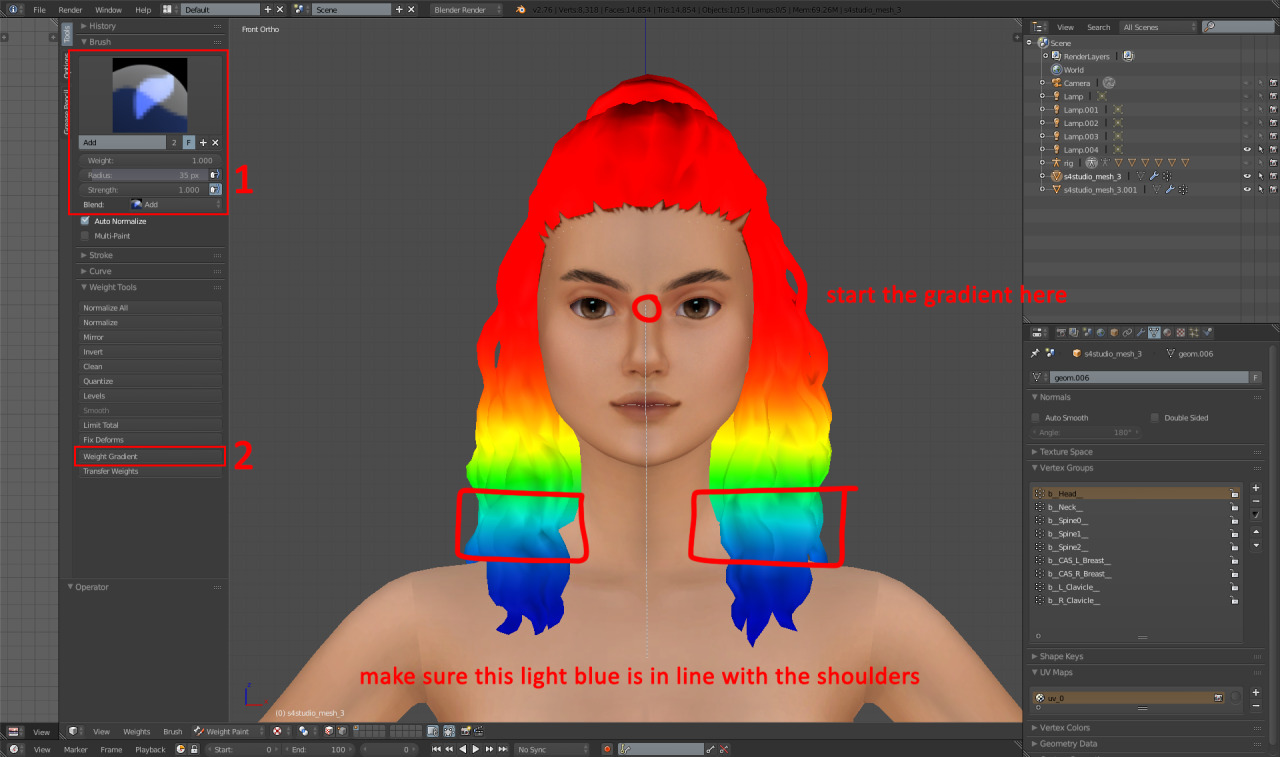
Ora dobbiamo calcolare il gradiente di peso per il peso della testa.
1 – Cambia il pennello in "aggiungi" e mettilo su quelle impostazioni.
2 – Fai clic su "gradiente di peso".
3 – Trascina il gradiente verso il basso, come si vede nella foto.
Fare un passo 11:
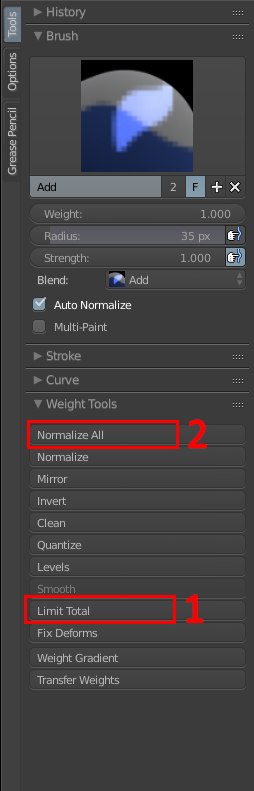
1 – Fare clic su questo.
2 – Fare clic su questo.
(Quando si fa clic su "normalizza tutto", assicurati di essere sul peso "b__Head__".)
Fatto!
Dopo di che, ricongiungere l'attaccatura dei capelli alla mesh, duplica la mesh due volte e ordina i tagli come 0000, 0001 E 0002, quindi salva e importa nuovamente su s4s!
Disclaimer– i pesi della clavicola possono diventare un problema con peli molto lunghi e di conseguenza causare il taglio o lo strappo della rete. Se questo è un problema, ovviamente poi dimenticatevi dei pesi alle clavicole.
In caso di problemi o confusione a riguardo, per favore mandami un messaggio e sarò felice di aiutarti!