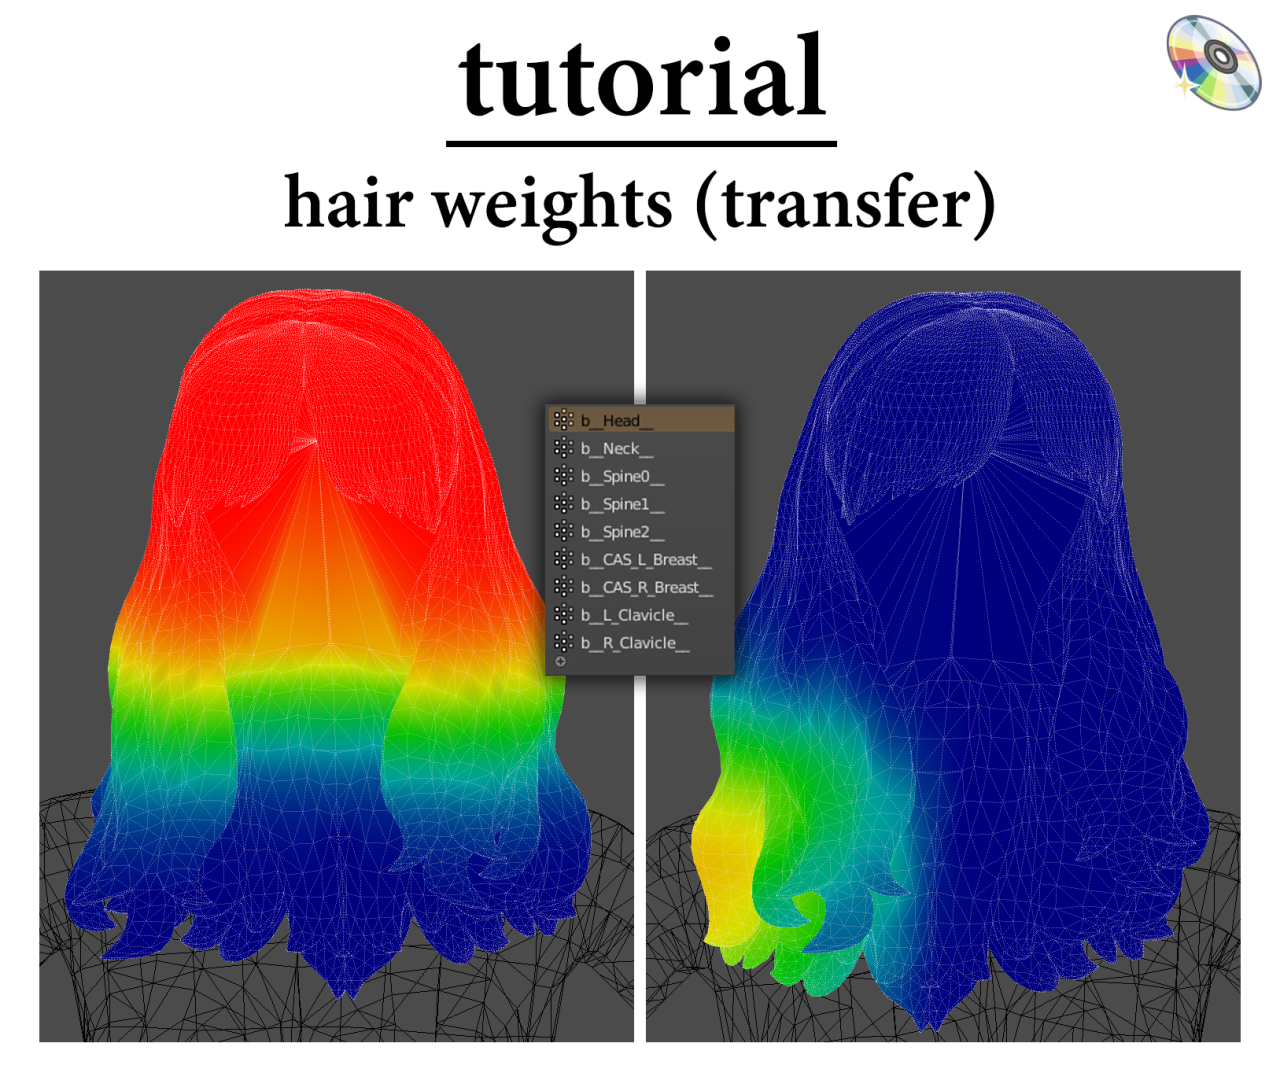
지도 시간 – 머리카락 무게:
요청대로, 제가 머리카락에 무게를 두는 법을 어떻게 배웠는지 살펴보겠습니다 ! 나는 그것을 언급하고 싶다@qicc 나에게 이 방법을 가르쳐 주었으니 모든 공은 그에게 돌아간다., 그는 진정한 왕이다! 그래서, 더 이상 고민하지 않고, 시작해 볼까요 
* 내 테마의 이미지가 열리지 않으므로 대시보드를 통해 읽는 것이 좋습니다. *
단계 1:
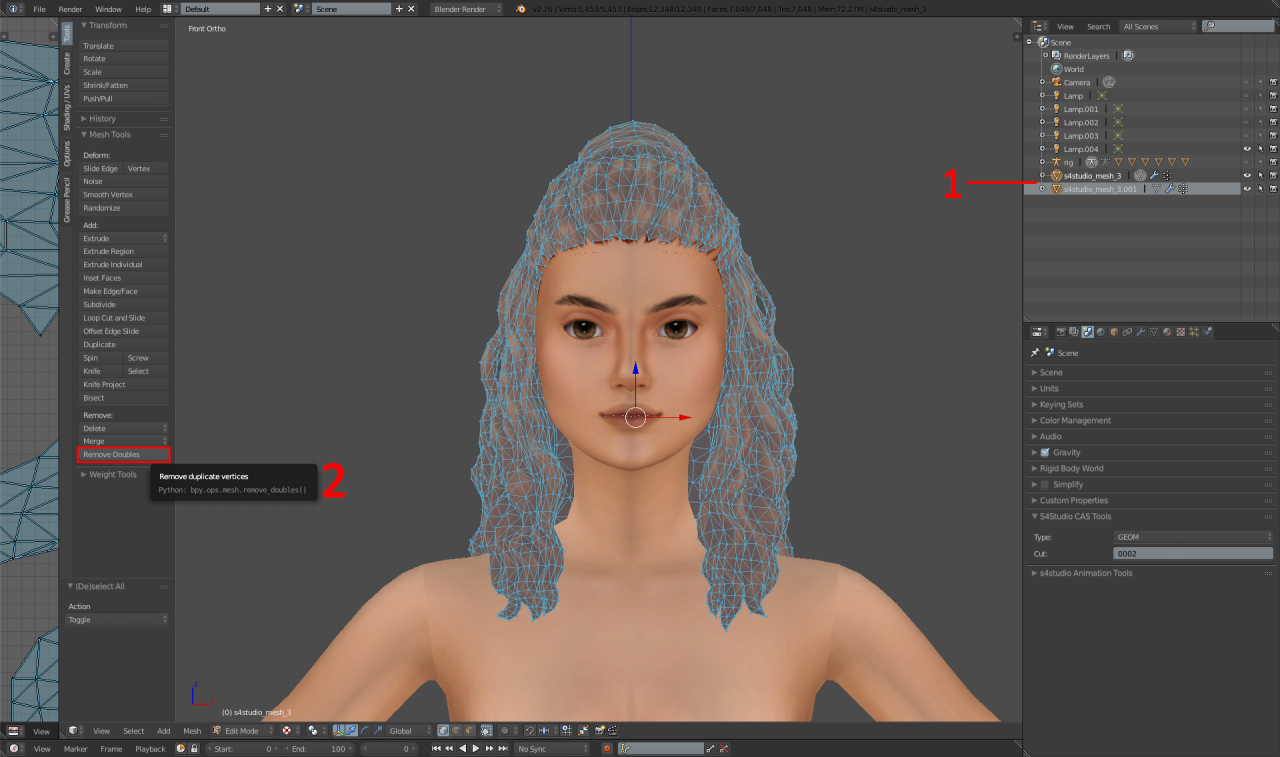
1 – 링크 선택을 사용하여 머리카락과 헤어라인을 분리합니다. (엘) 헤어라인 위에 커서를 올려놓으면. 그 다음에, 키보드에서 P를 눌러 새 레이어로 분리하세요..
2 – 그 다음에, 메인 헤어가 강조된 상태에서, 그림과 같이, '복식 제거'를 클릭하세요.
단계 2:
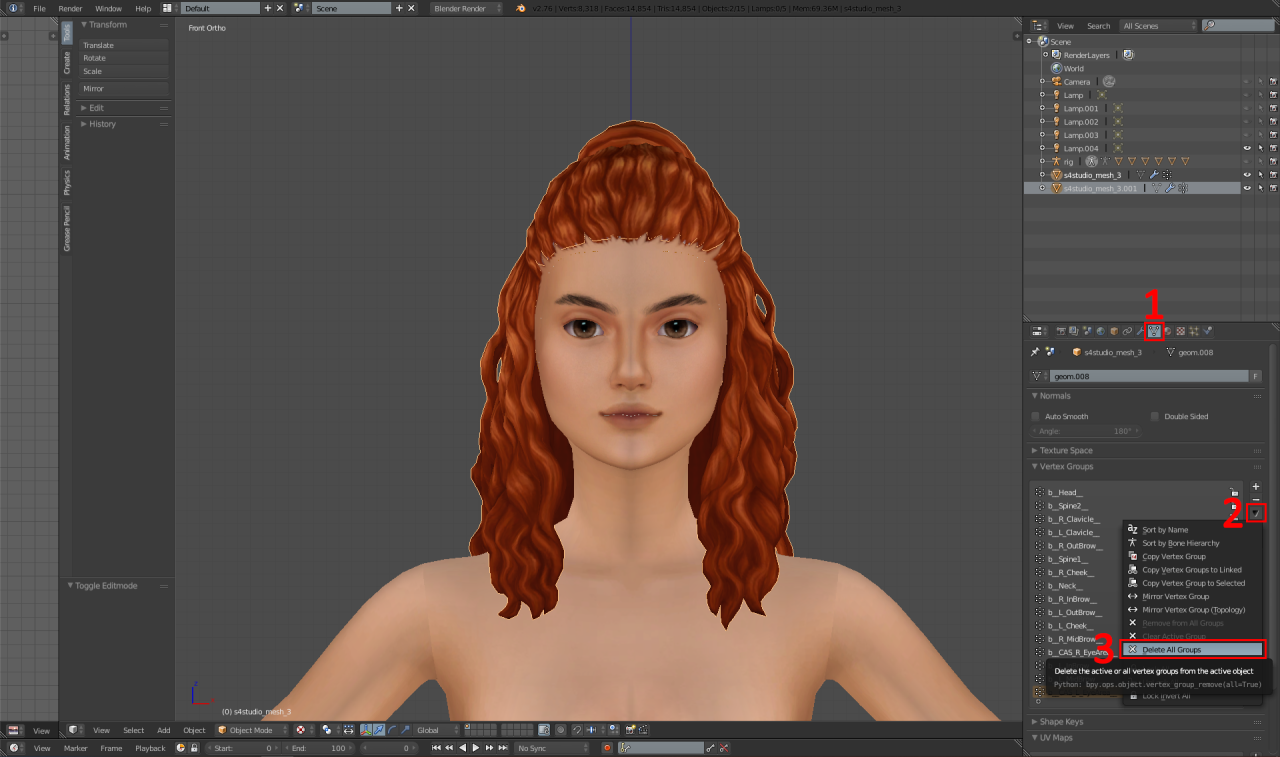
1 – '데이터' 탭으로 이동하세요..
2 – 화살표를 클릭하세요.
3 – '모든 그룹 삭제'를 클릭하세요..
단계 3:
블렌더 파일 저장. 그 다음에, 오픈 블렌더 v2.8+ 그리고 다음으로 이동하세요: 파일 – 열려 있는, 방금 저장한 패키지를 엽니다..
단계 4:
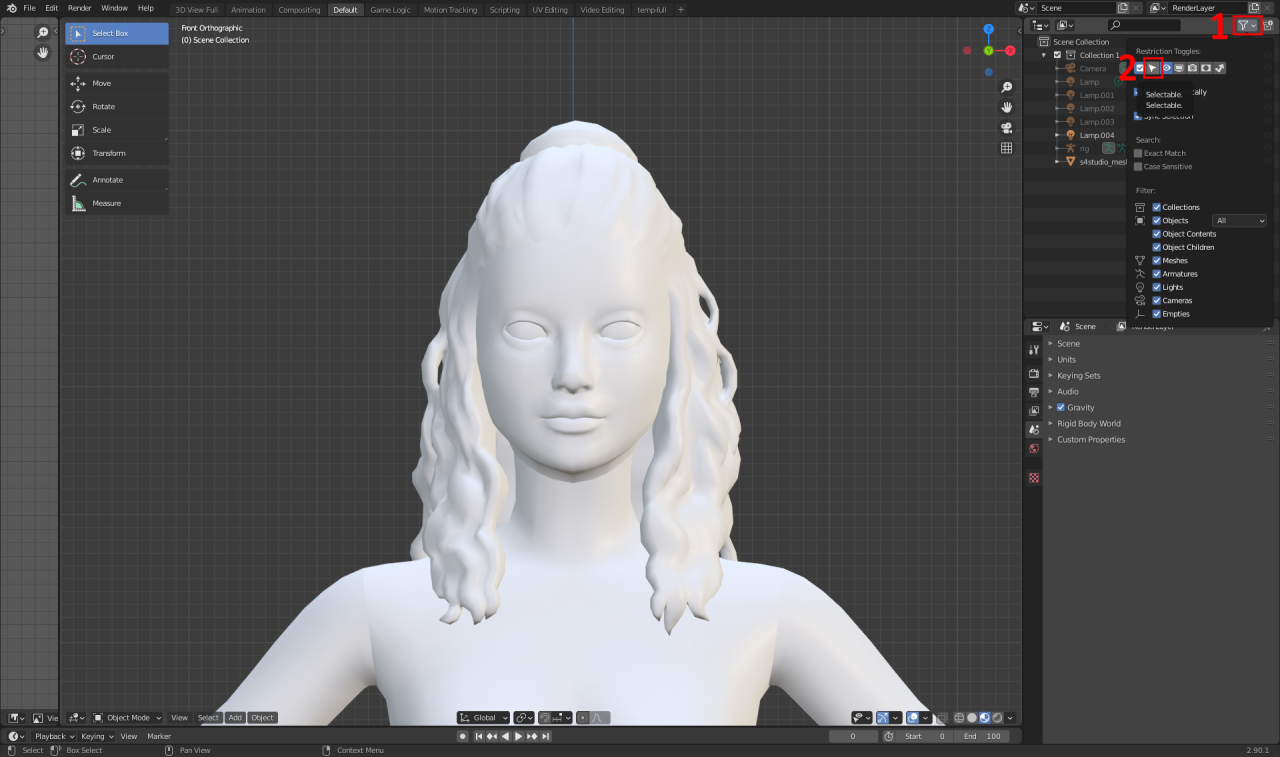
이 파일을 열면, 헤어라인을 삭제할 수 있어요.
1 – 이것을 클릭하세요.
2 – 이것을 클릭하세요.
그 다음에, 이 파일을 추가하세요.
단계 4.5:
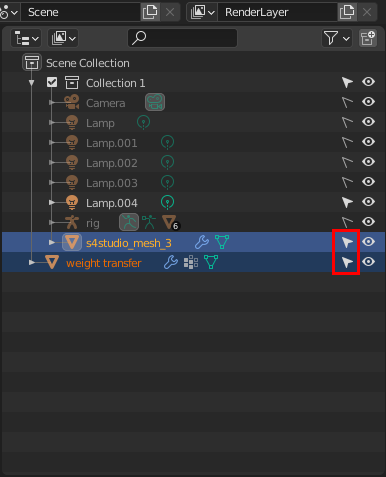
그림과 같이 두 메쉬 모두에 이 작은 커서가 강조 표시되어 있는지 확인하십시오..
그 다음에, 매우 중요한 단계 – 왼쪽 클릭당신의망사, 그 다음에, 교대를 기다리세요 'weight transfer' 메시를 마우스 왼쪽 버튼으로 클릭하세요..
단계 5:
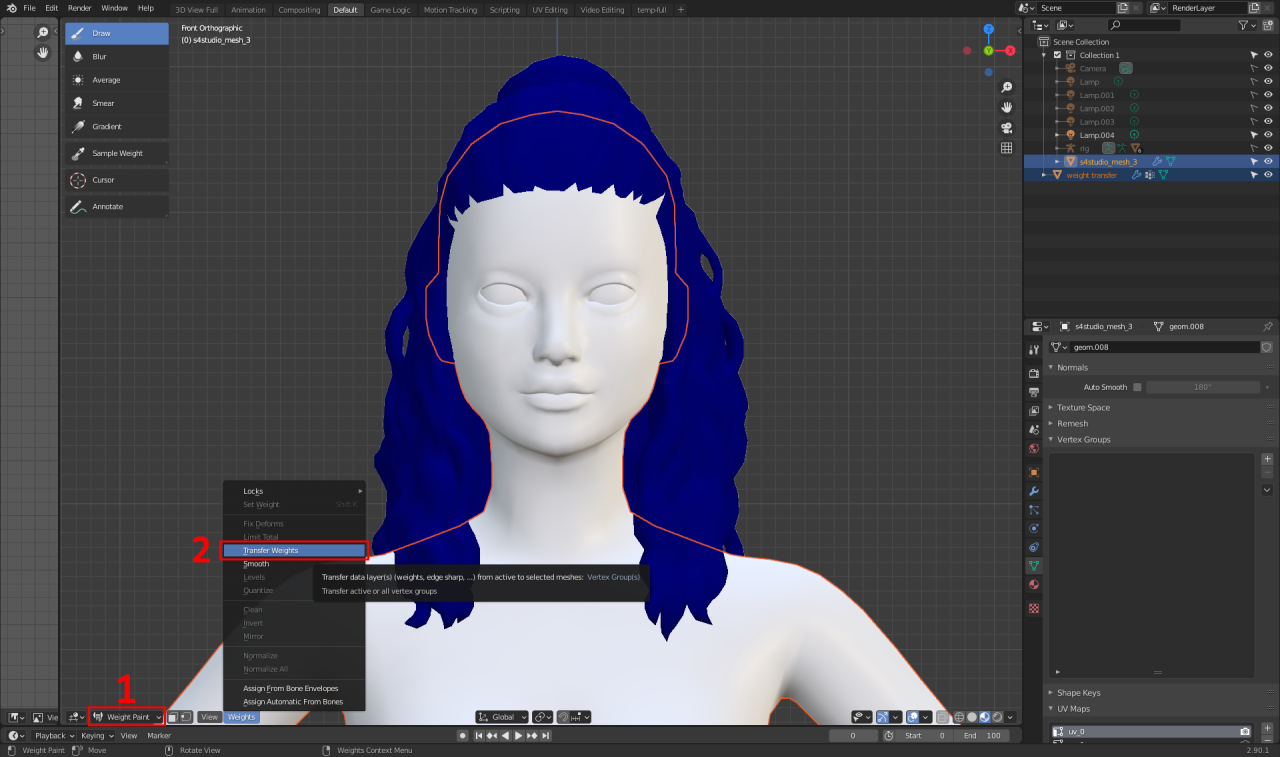
1 – '오브젝트 모드'에서 '웨이트 페인트'로 모드 변경.
2 – 이 작은 '가중치' 버튼을 클릭하고 '가중치 전송'을 누르세요.
단계 5.5:
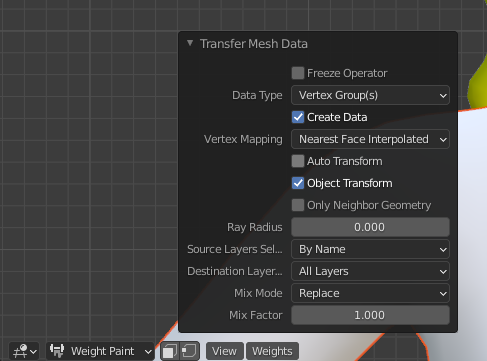
'메시 데이터 전송' 버튼을 클릭하고 이에 맞게 설정을 지정합니다..
단계 6:
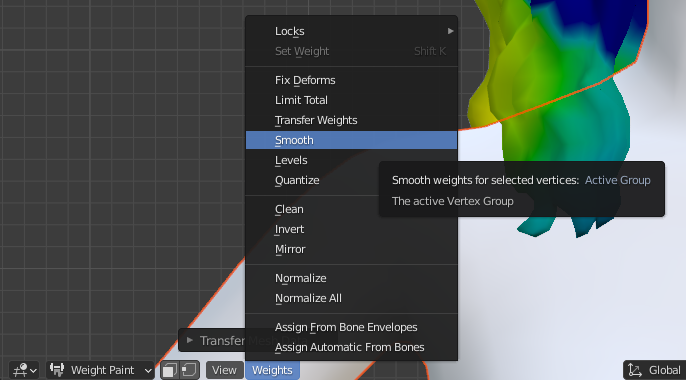
'가중치' 버튼을 다시 클릭하세요., 그런 다음 '부드러운'을 클릭하세요..
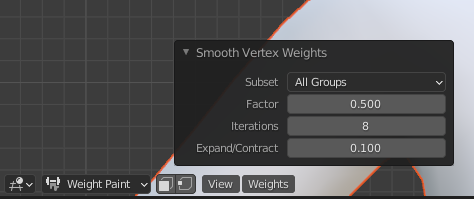
'부드러운' 설정을 다음과 같이 설정하세요..
(이러한 설정을 일반 지침으로 삼으십시오., 머리카락과 길이에 따라 반복이 다를 수 있습니다.)
단계 7:
패키지를 저장하고 저장된 '삭제된 무게' 파일을 다시 엽니다..
깨진 가중치 헤어 메쉬를 삭제했습니다., 새로 완성된 가중치를 추가합니다..
단계 8:

머리카락을 가져올 때 머리카락은 대부분 다음과 같습니다.. 그래서, 그것을 고치기 위해, 이 세 개의 버튼을 순서대로 클릭하세요.
단계 9:
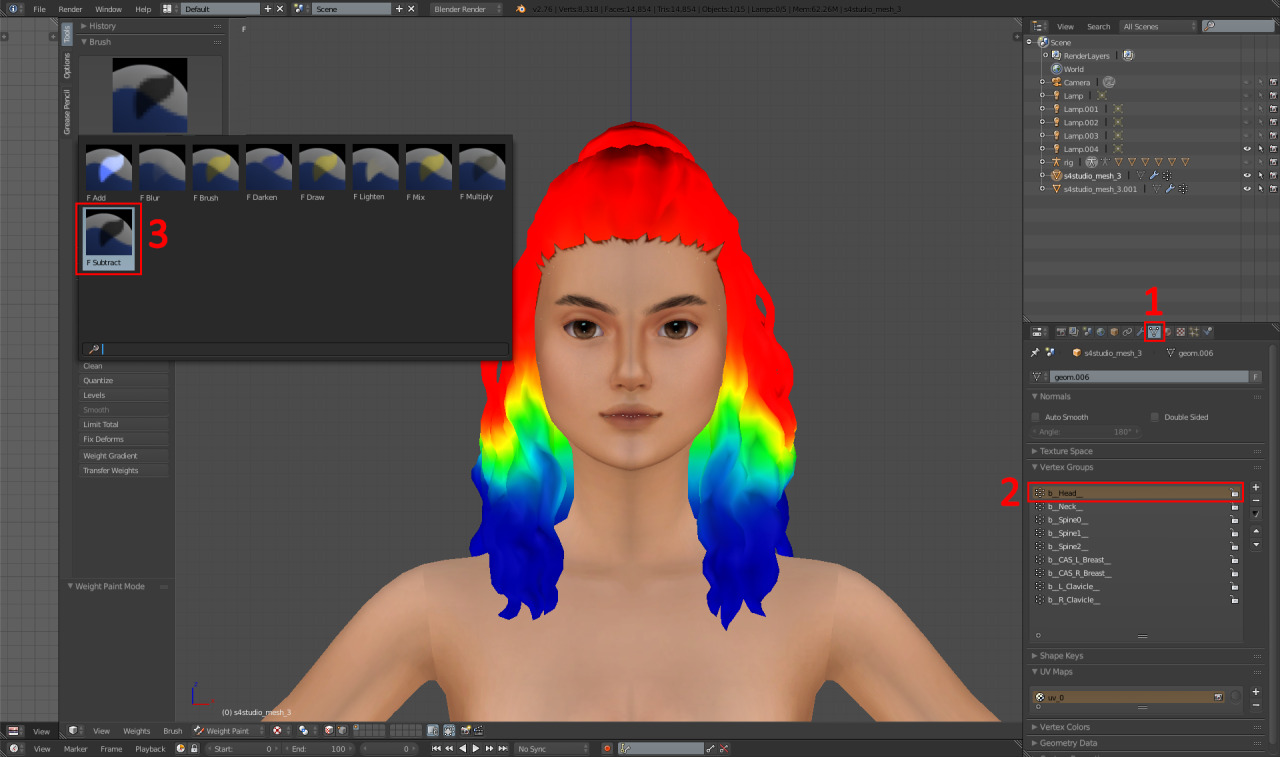
지금, 이동으로 인해 머리 무게가 엉망이 되기 때문에 머리 무게를 고쳐야 합니다 ㅋㅋㅋ.
1 – 이것을 클릭하세요.
2 – "b__머리__"를 클릭하세요..
3 – 브러시로 이동하여 '빼기' 브러시를 클릭하세요..
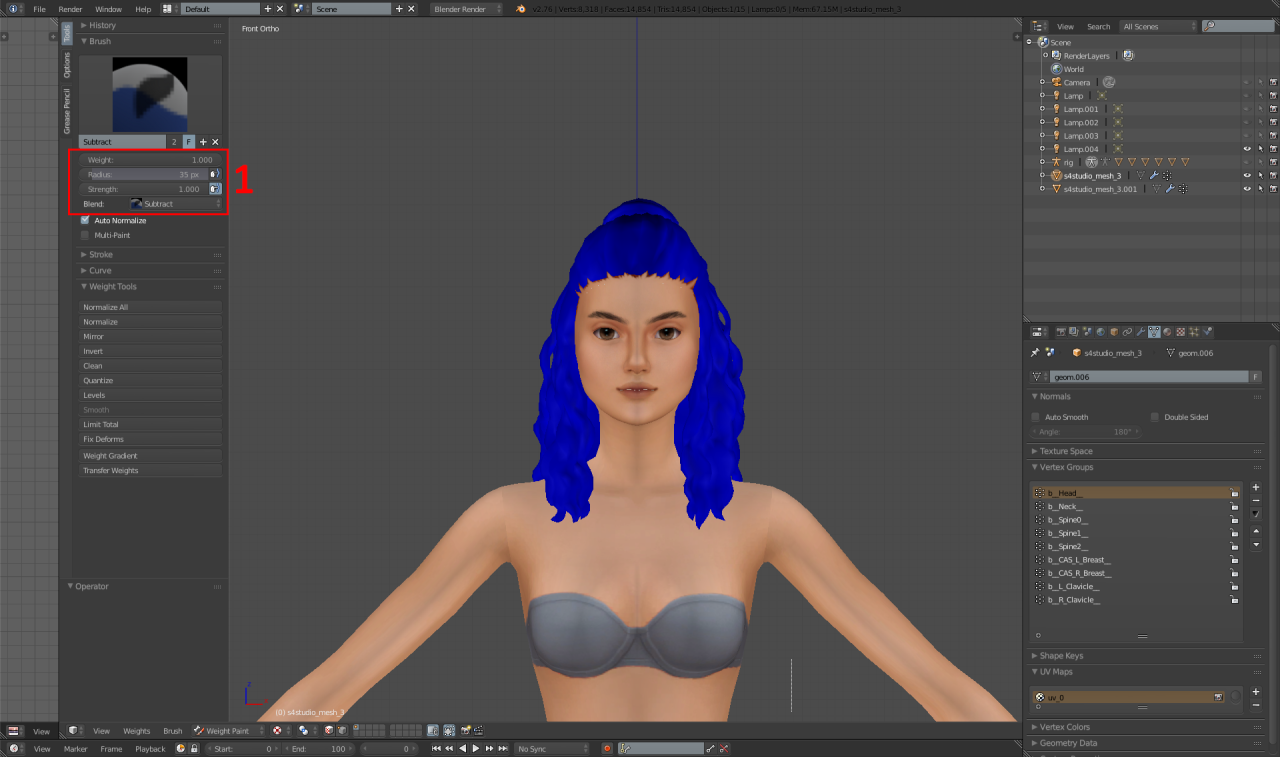
1 – 그 다음에, 이 설정을 사용하여, '가중치 그래디언트' 버튼을 사용하고 겨드랑이 부분을 아래쪽으로 드래그하면 전체 메시가 파란색으로 변합니다..
단계 10:
이제 머리 무게에 대한 무게 구배를 수행해야 합니다..
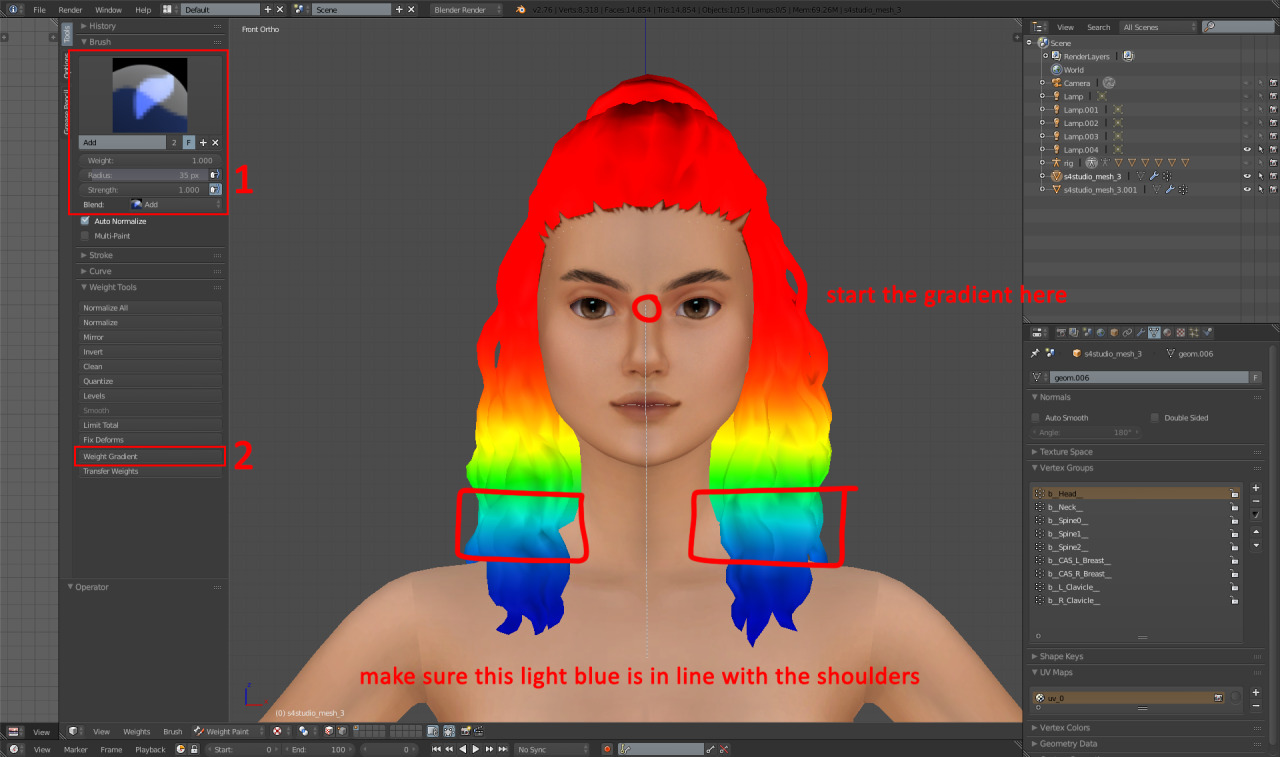
1 – 브러시를 '추가'로 변경하고 해당 설정에 넣습니다..
2 – '가중치 구배'를 클릭하세요..
3 – 그라데이션을 아래쪽으로 드래그하세요., 사진에서 본 것처럼.
단계 11:
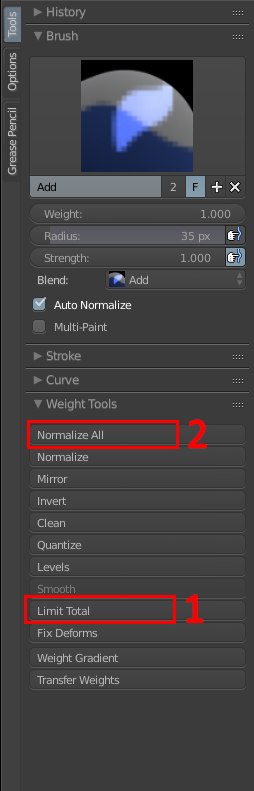
1 – 이것을 클릭하세요.
2 – 이것을 클릭하세요.
('모두 표준화'를 클릭하면, "b__Head__" 무게를 유지하고 있는지 확인하세요.)
완료!
이후, 헤어라인을 메쉬에 다시 연결하세요., 메쉬를 두 번 복제하고 컷 순서를 다음과 같이 지정합니다. 0000, 0001 그리고 0002, 그런 다음 저장하고 s4s로 다시 가져옵니다.!
부인 성명– 쇄골 무게는 매우 긴 털의 경우 문제가 될 수 있으며 결과적으로 잘림이나 메쉬가 찢어지는 원인이 될 수 있습니다.. 이것이 문제라면, 그렇다면 쇄골 무게는 잊어버리세요.
이에 대해 문제나 혼란이 있는 경우, 저에게 DM을 보내주시면 기꺼이 도와드리겠습니다.!