Tutorial – Утези за косу:
Као што је тражено, Прећи ћу на то како сам научио да радим тегове за косу ! I would like to mention that@qicc taught me this method so all credit goes to him, он је прави краљ! Тако, Без даљег одлагања, да почнемо 
* Препоручујем да прочитате преко контролне табле јер отварање слика на мојој теми не ради *
Корак 1:
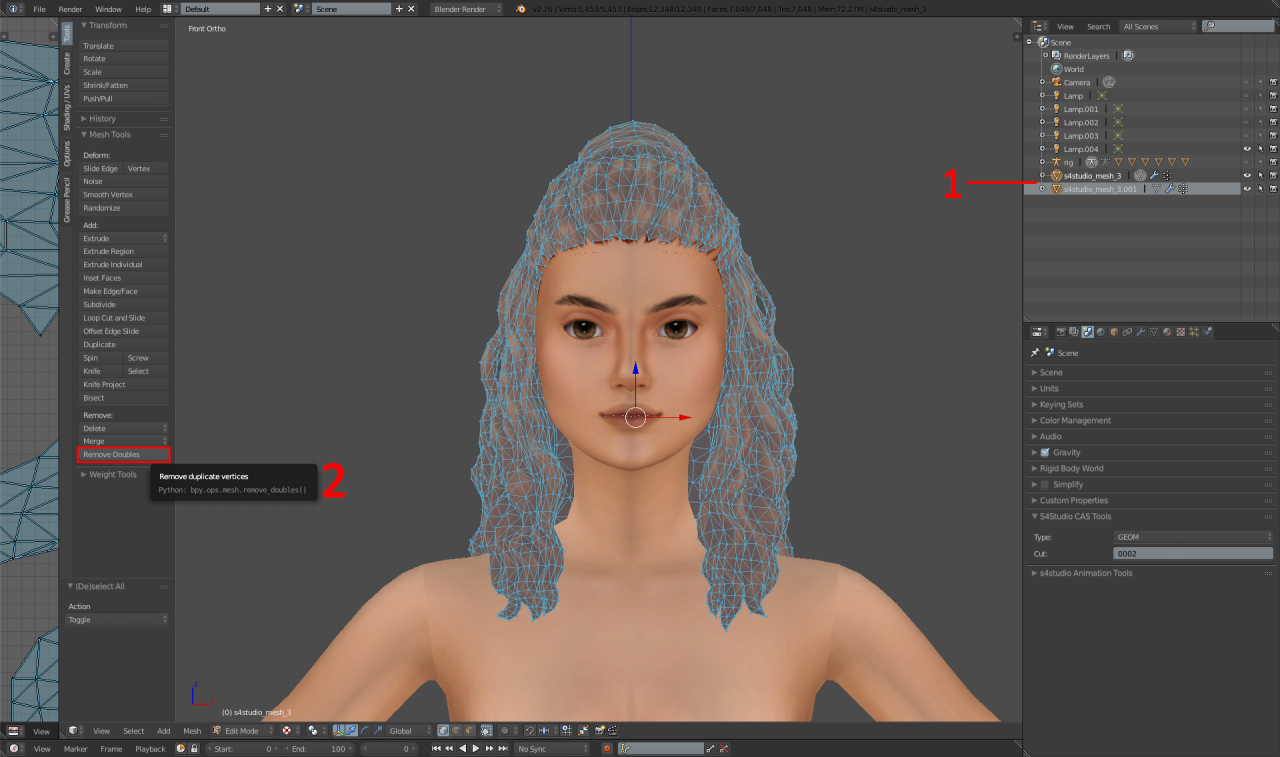
1 – одвојите косу и линију косе помоћу избора везе (Л) и пређите курсором преко линије косе. Онда, притисните П на тастатури да бисте се одвојили на нови слој.
2 – Онда, with the main hair highlighted, as pictured, click ‘remove doubles’.
Корак 2:
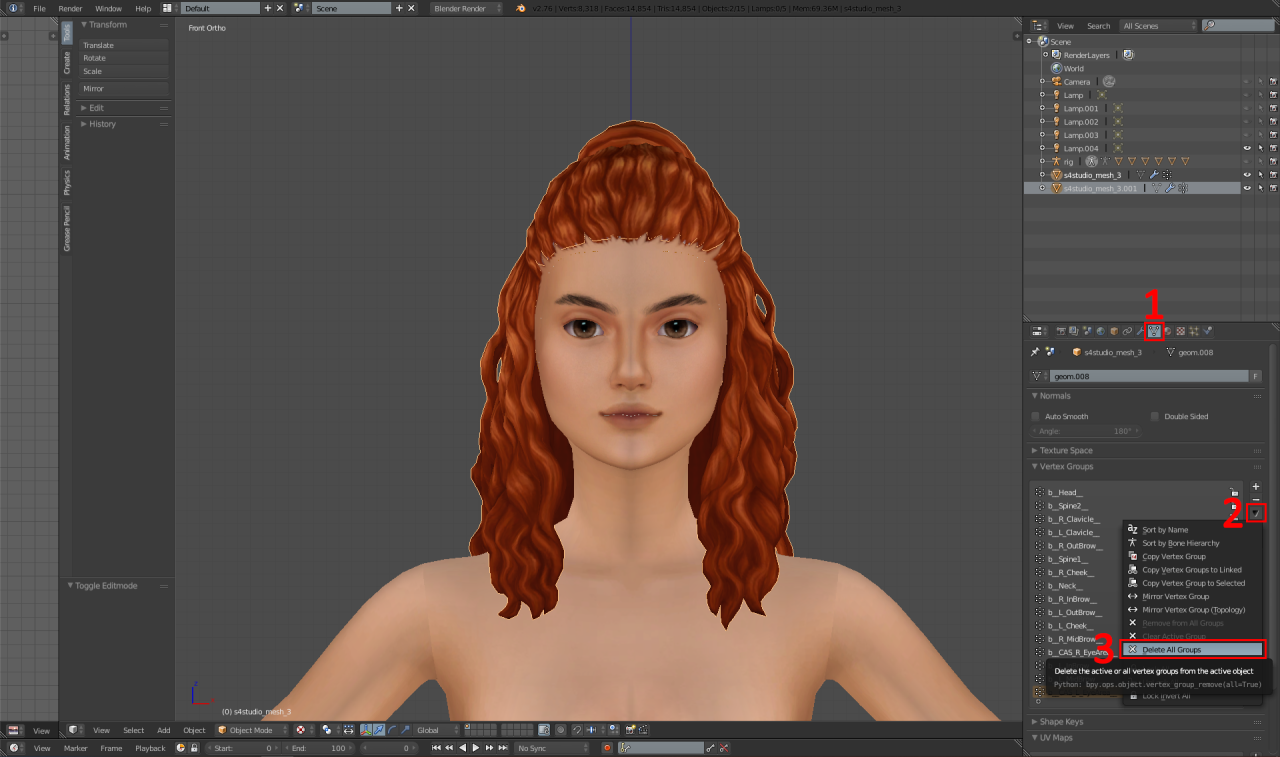
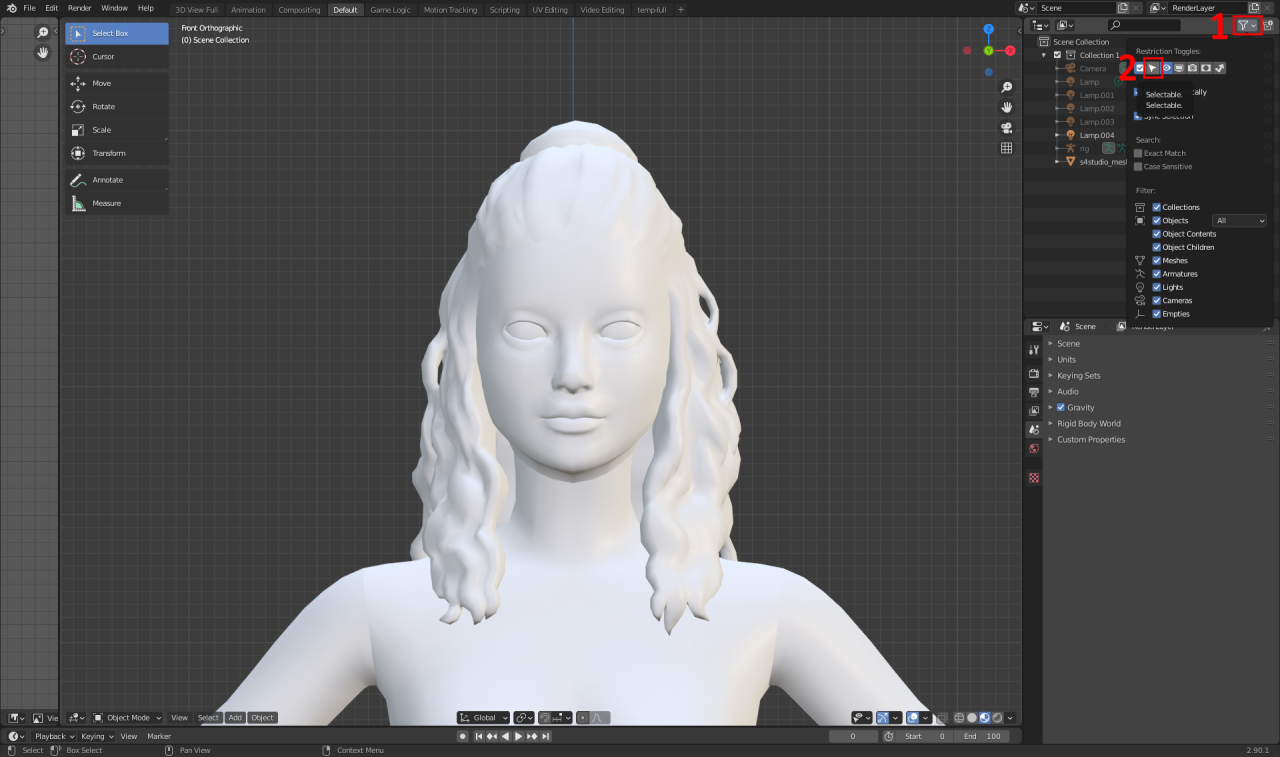
1 – Navigate to the ‘data’ tab.
2 – Click the arrow.
3 – Click ‘delete all groups’.
Корак 3:
Save the blender file. Онда, open Blender v2.8+ and navigate to: File – Open, and open the package we just saved.
Корак 4:
Once you’ve opened this file, you can delete the hairline.
1 – Click this.
2 – Click this.
Онда, append this file.
Корак 4.5:
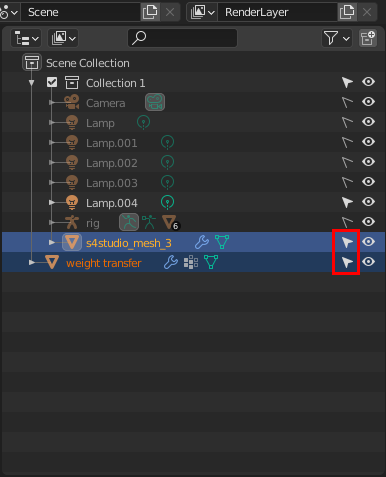
Make sure both meshes have this little cursor highlighted as pictured.
Онда, A VERY IMPORTANT STEP – left clickYOURmesh, then, HOLD SHIFT and left click the ‘weight transfer’ mesh.
Корак 5:
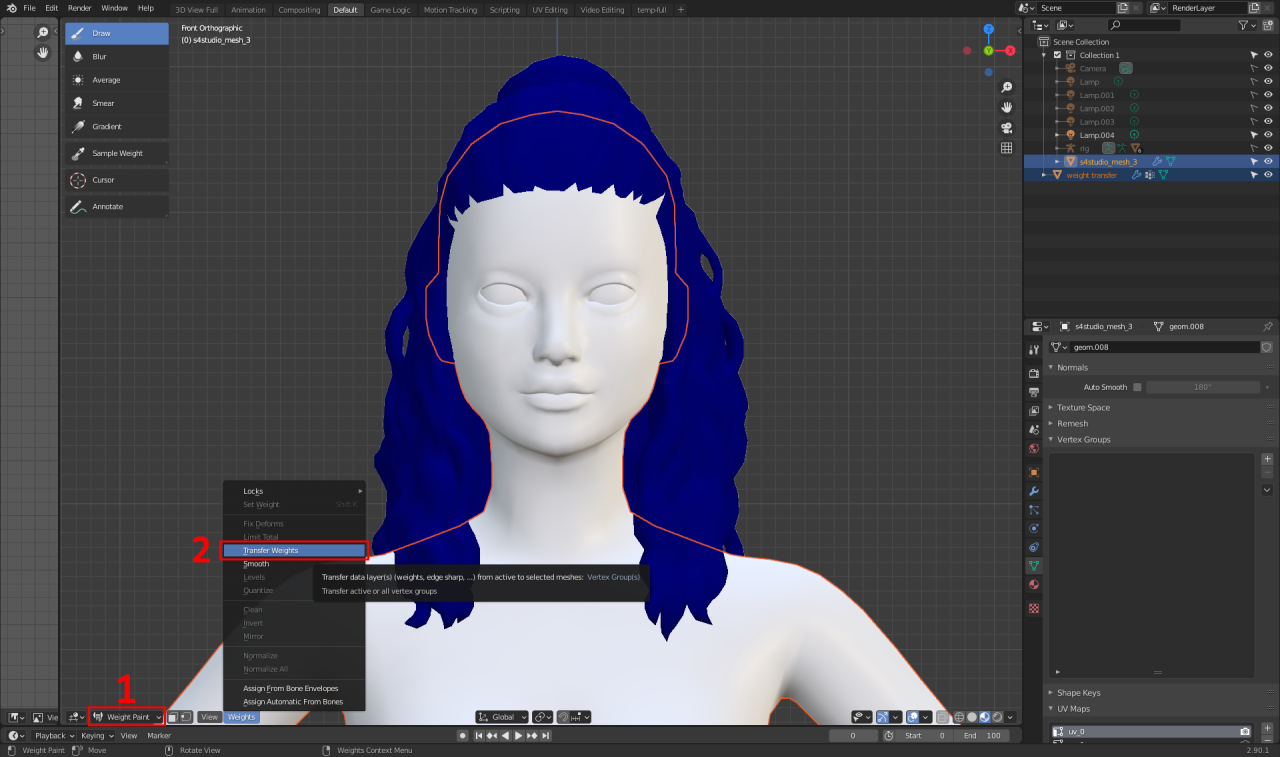
1 – Change mode from ‘object mode’ to ‘weight paint’.
2 – Click this little ‘weights’ button and hit ‘transfer weights’
Корак 5.5:
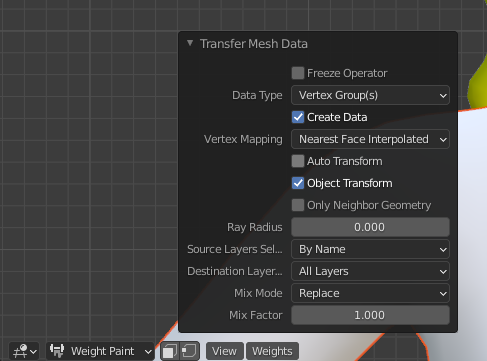
Click the ‘transfer Mesh Data’ button and set the settings to match these.
Корак 6:
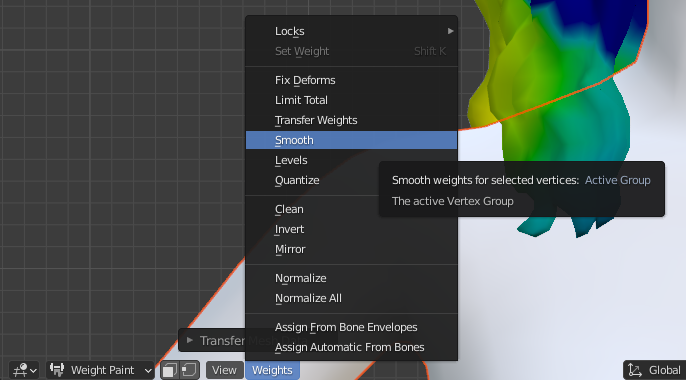
Click the ‘weights’ button again, then click ‘smooth’.
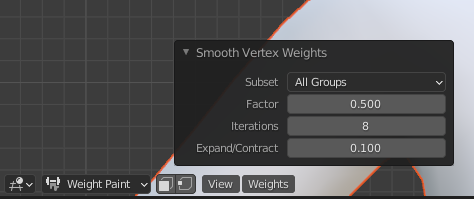
Set the ‘smooth’ settings to these.
(Take these settings as a general guide, depending on the hair and its length the iteration may vary)
Корак 7:
Save your package and re-open the saved ‘deleted weights’ file.
Deleted the broken weights hair mesh, and append the newly finished weights.
Корак 8:

Your hair will mostly look like this when you import it. Тако, to fix it, jus click these three buttons in order.
Корак 9:
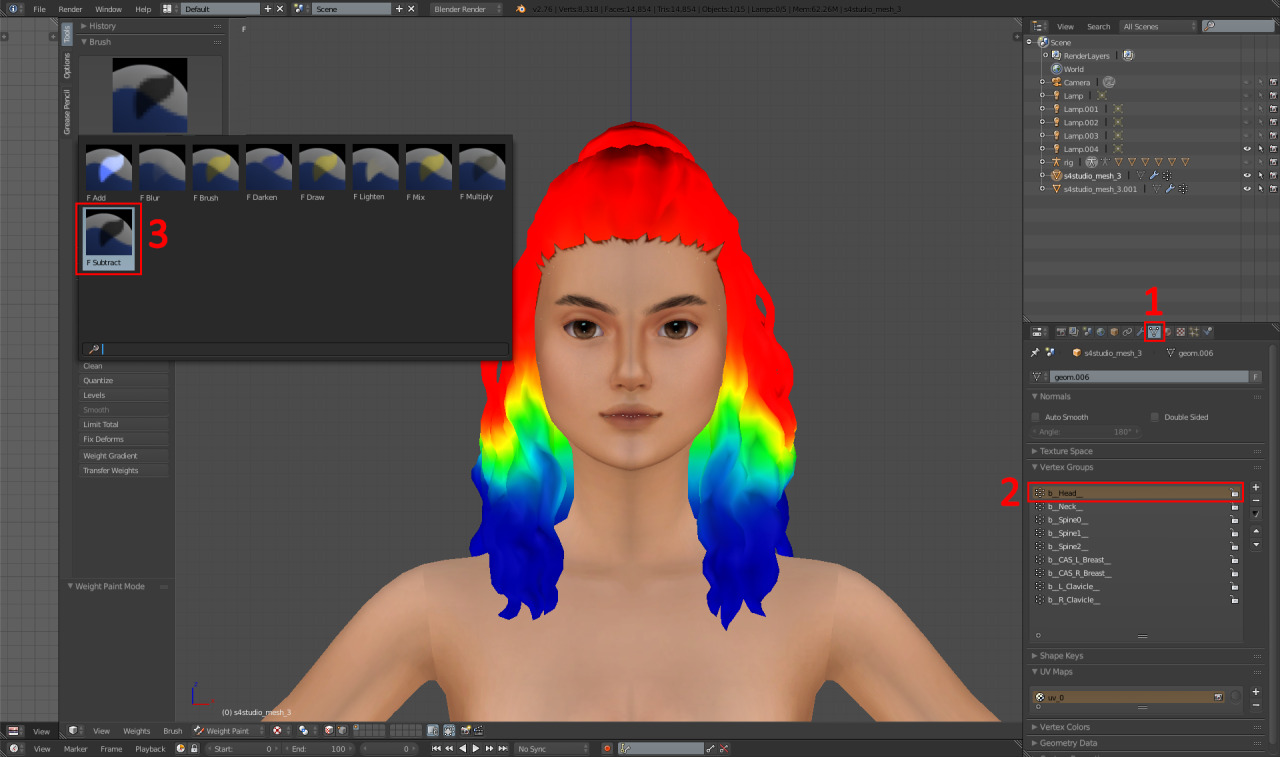
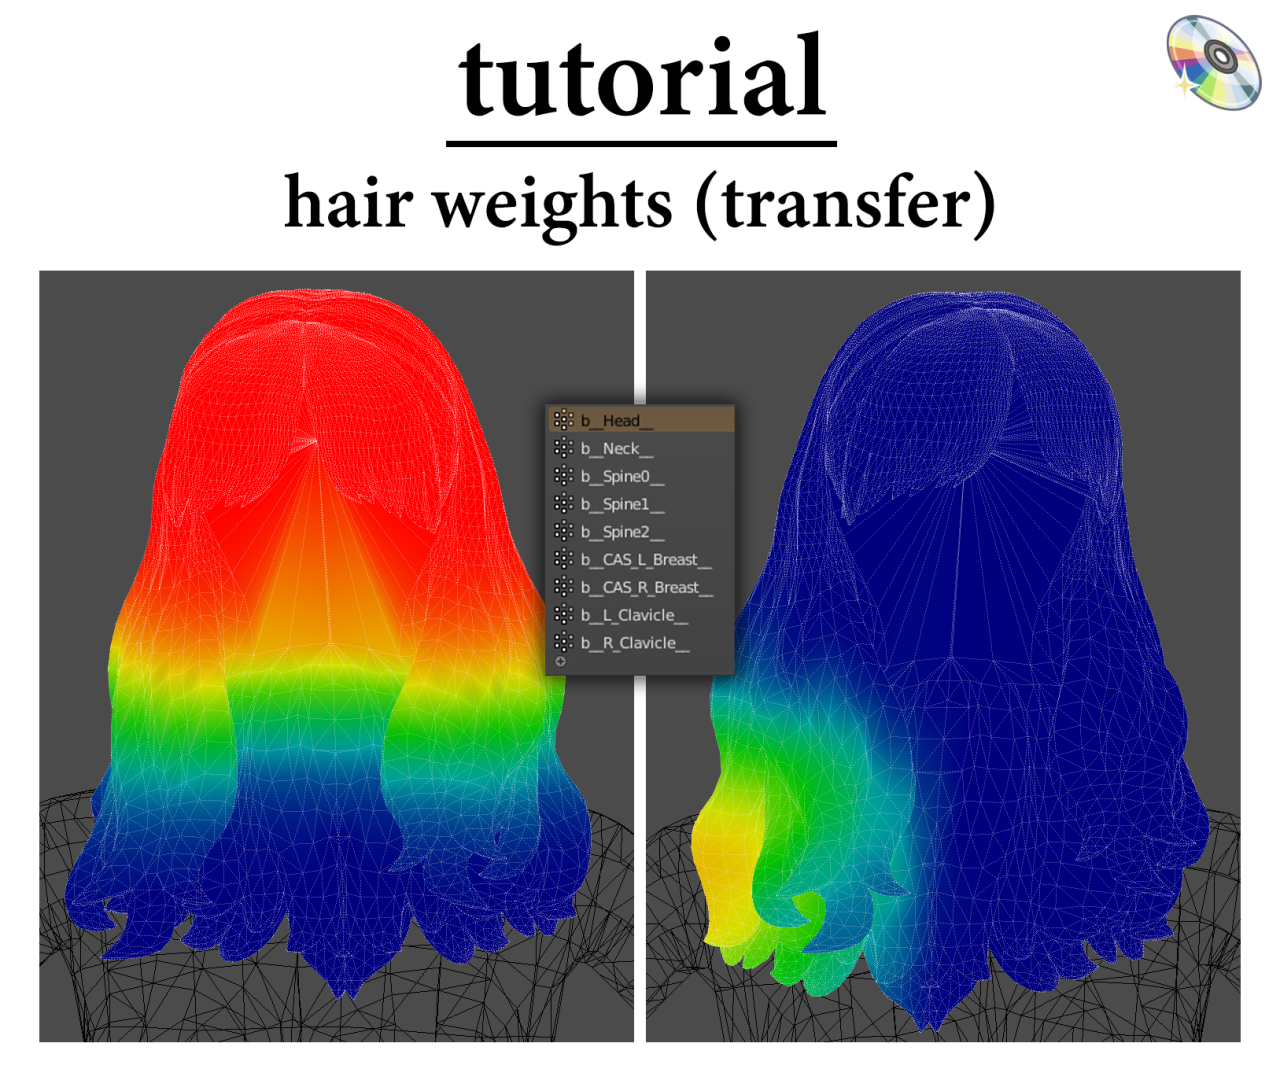
Now, we need to fix the head weight because the transfer messes that one up lol.
1 – Click this.
2 – Click “b__Head__”.
3 – Go to the brushes and click the ‘subtract’ brush.
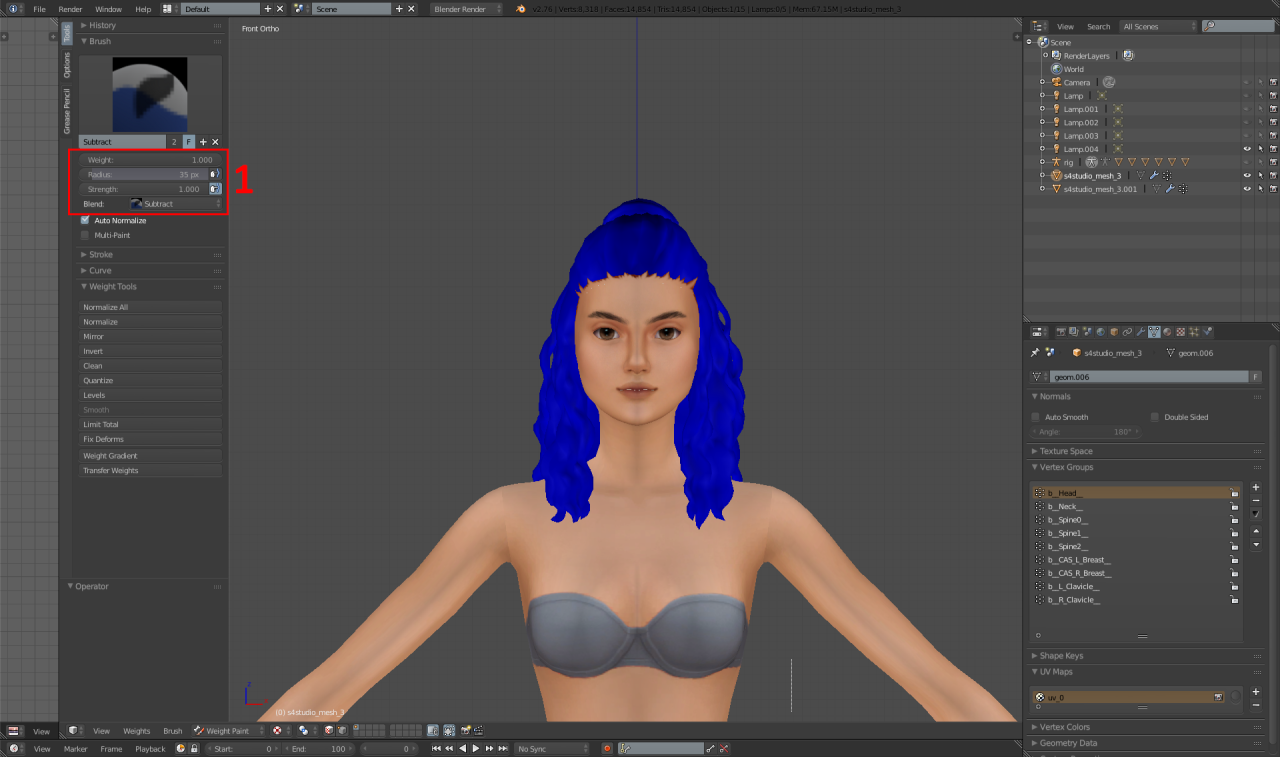
1 – Онда, using these settings, use the ‘weight gradient’ button and drag downwards in the armpit area so the ENTIRE mesh turns blue like so.
Корак 10:
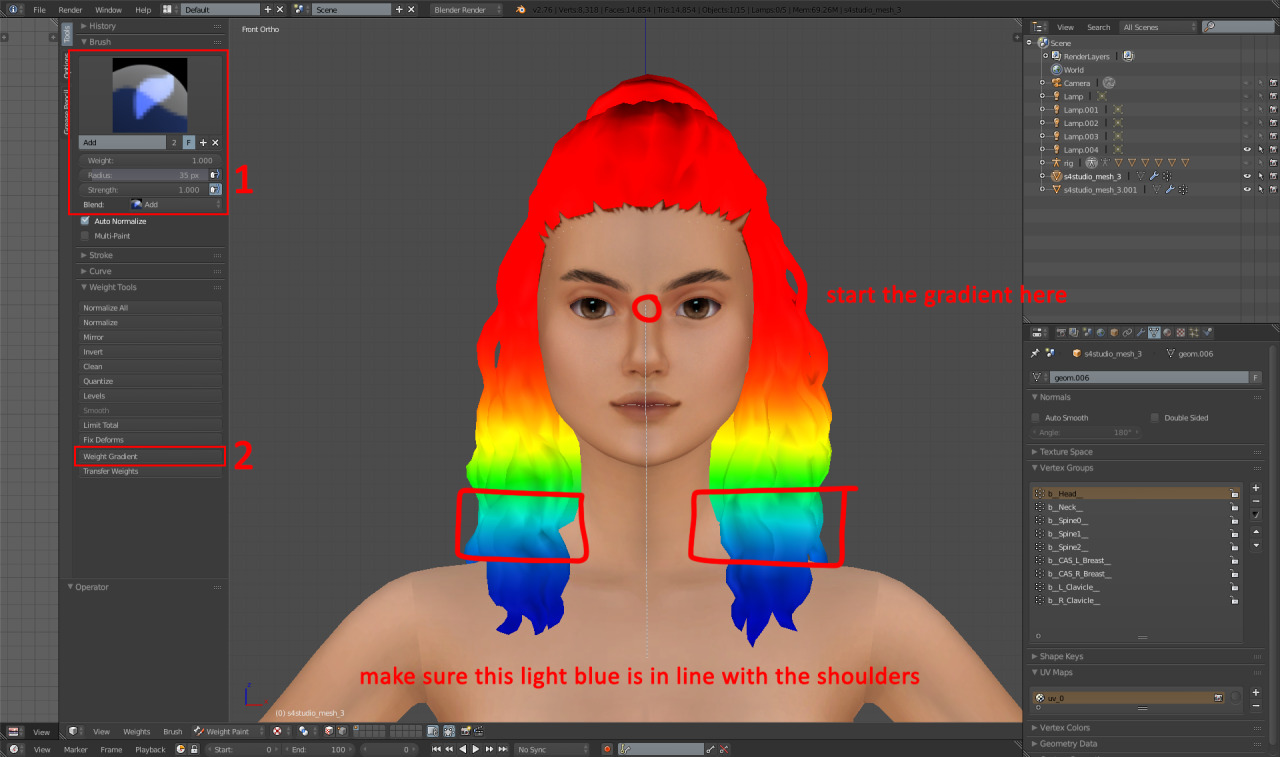
Now we need to do the weight gradient for the head weight.
1 – Change the brush to ‘add’ and put it at those settings.
2 – Click ‘weight gradient’.
3 – Drag the gradient downwards, as seen in the photo.
Корак 11:
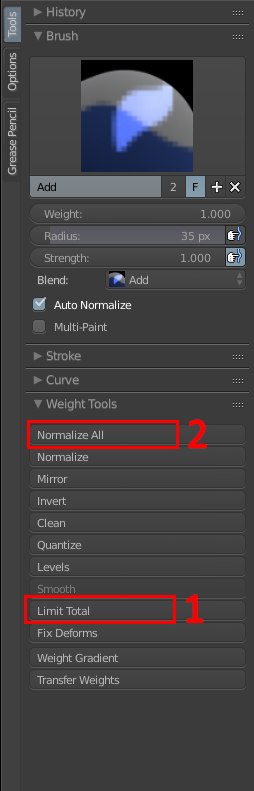
1 – Click this.
2 – Click this.
(When clicking the ‘normalise all’, make sure you are on the “b__Head__” weight.)
Done!
After that, re-join the hairline to the mesh, duplicate the mesh two times and order the cuts as 0000, 0001 and 0002, then save and import back to s4s!
Disclaimer– the clavicle weights may become an issue with very long hairs and as a result cause clipping or mesh tearing. If this is an issue, obviously then forget about clavicle weights.
If you have any issues or confusion about this, please shoot me a DM and I’ll happily help you out!