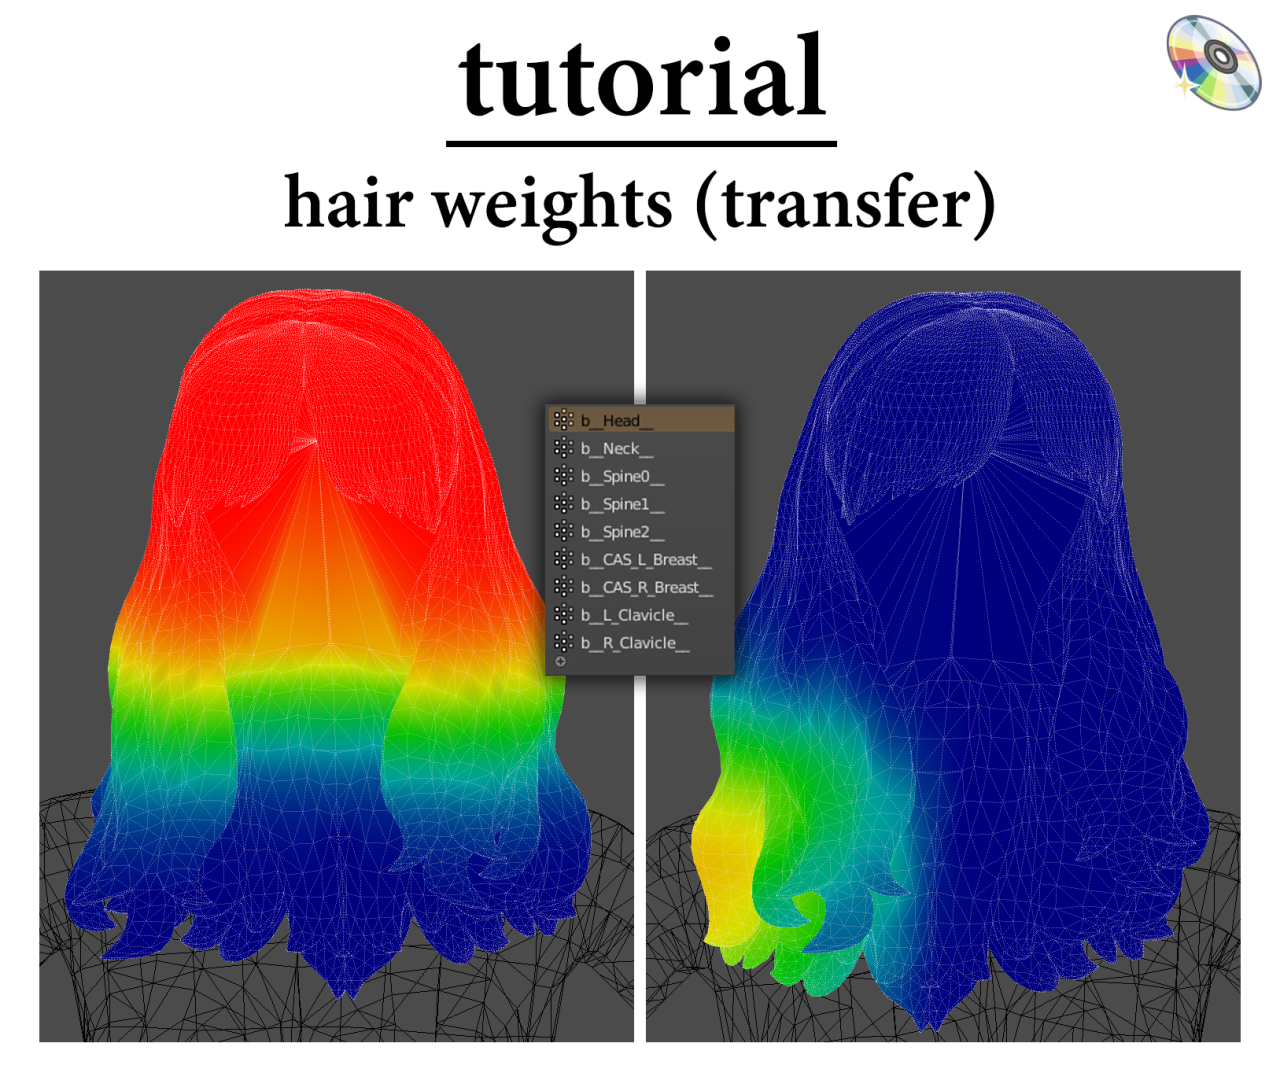
öğretici – Saç Ağırlıkları:
İstendiği gibi, Saçlar için ağırlık çalışmayı nasıl öğrendiğimi anlatacağım ! Bundan bahsetmek isterim@qiccBana bu yöntemi öğretti, böylece tüm kredi ona gider, o gerçek bir kral! Bu yüzden, daha fazla uzatmadan, hadi başlayalım 
* Temamdaki görselleri açmak işe yaramadığı için Dashboard üzerinden okumanızı tavsiye ederim *
Adım 1:
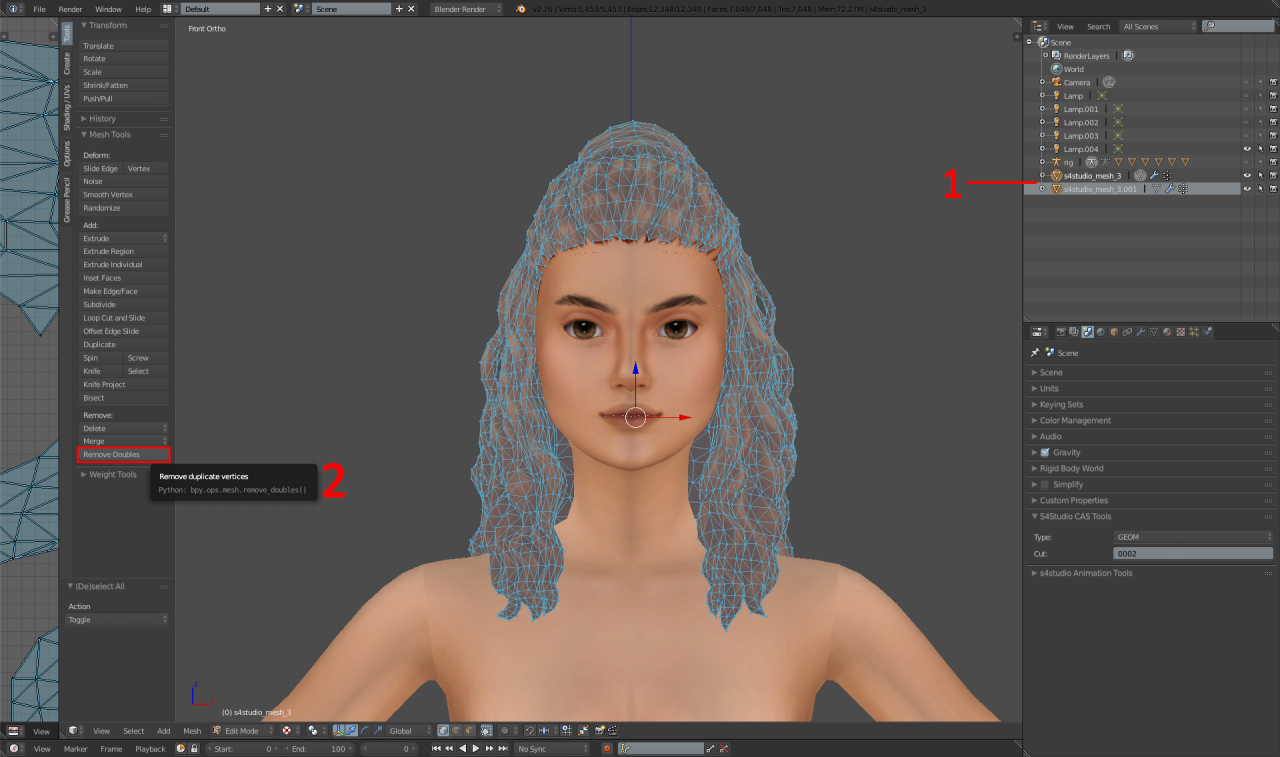
1 – Bağlantı seçimini kullanarak saçı ve saç çizgisini ayırın (L) ve imlecinizi ince çizginin üzerinde gezdirin. Daha sonra, Yeni bir katmana ayrılmak için klavyenizdeki P tuşuna basın.
2 – Daha sonra, Ana saç vurgulanmış, Resimde olduğu gibi, "Çiftleri Kaldır" ı tıklayın.
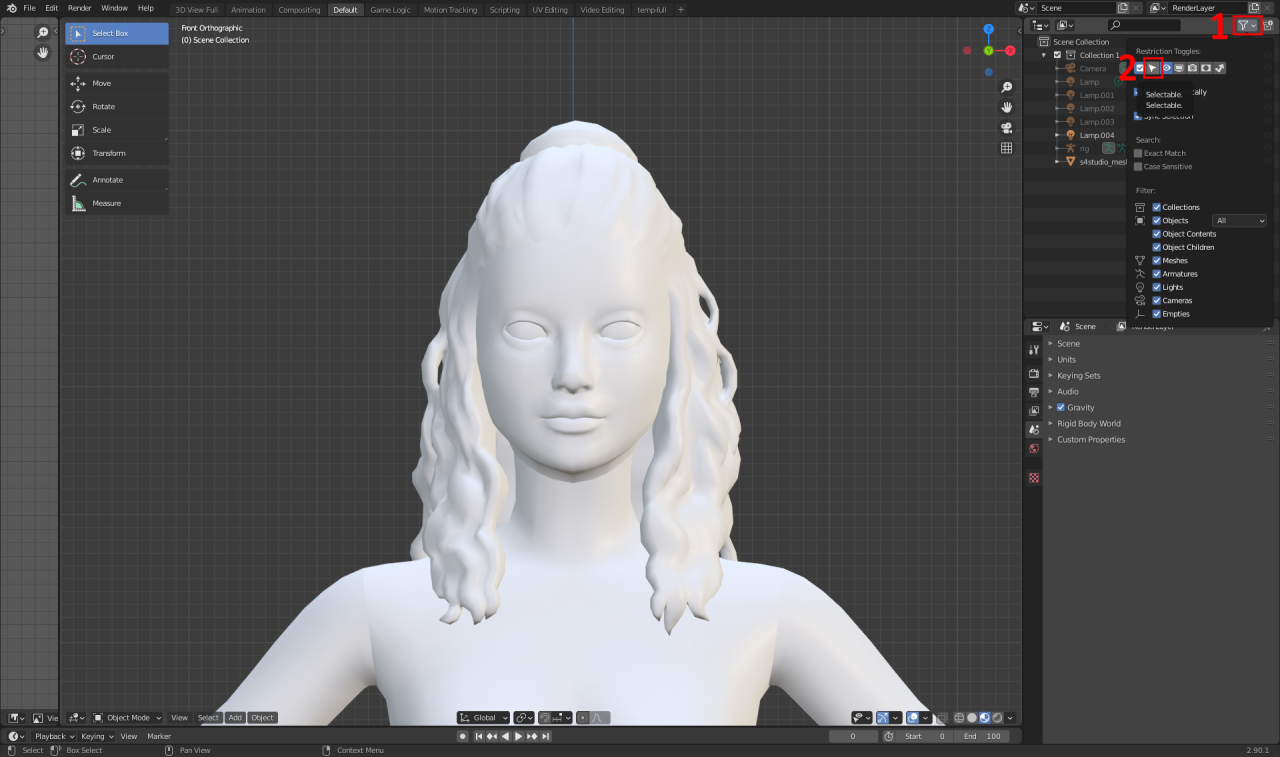
Adım 2:
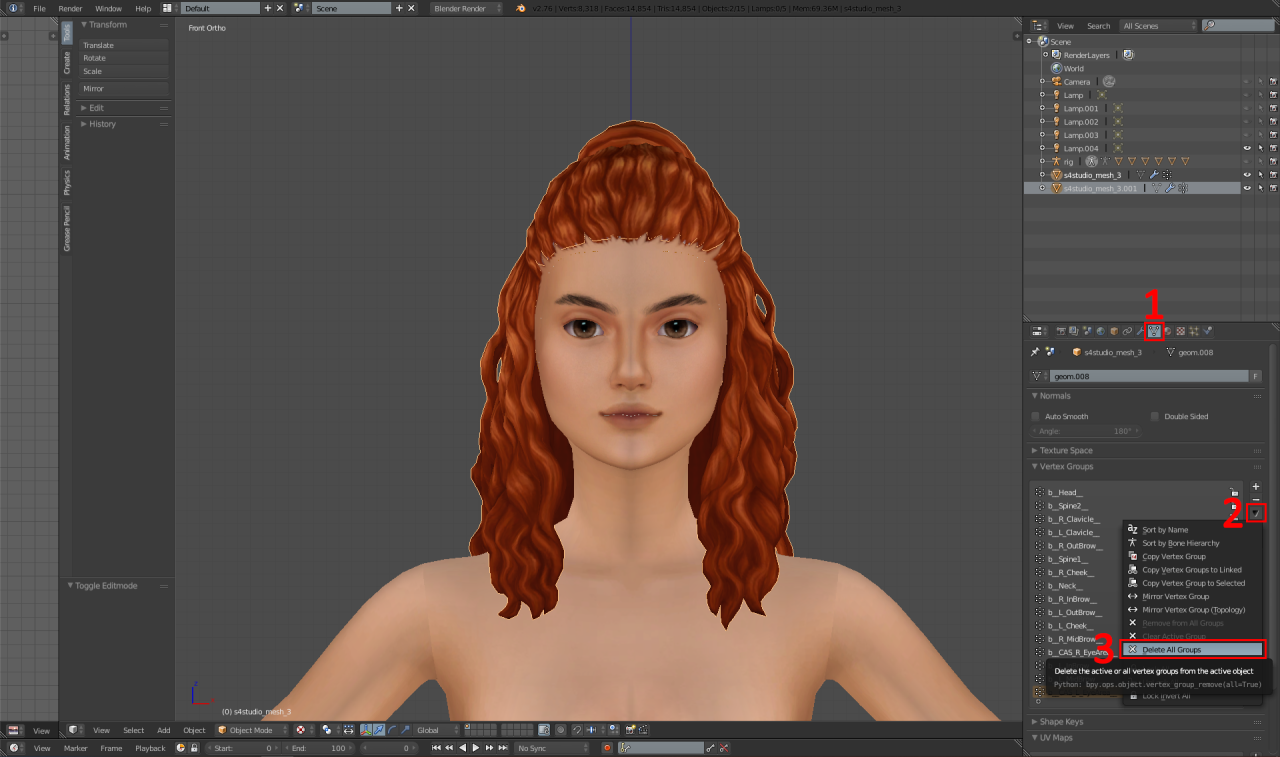
1 – "Veri" sekmesine gidin.
2 – Oku tıklayın.
3 – "Tüm Grupları Sil" yi tıklayın.
Adım 3:
Blender dosyasını kaydet. Daha sonra, açık blender v2.8+ ve gezin: Dosya – Açık, ve kaydettiğimiz paketi aç.
Adım 4:
Bu dosyayı açtıktan sonra, saç çizgisini silebilirsiniz.
1 – BU TIKLAYIN.
2 – BU TIKLAYIN.
Daha sonra, Bu dosyayı ekleyin.
Adım 4.5:
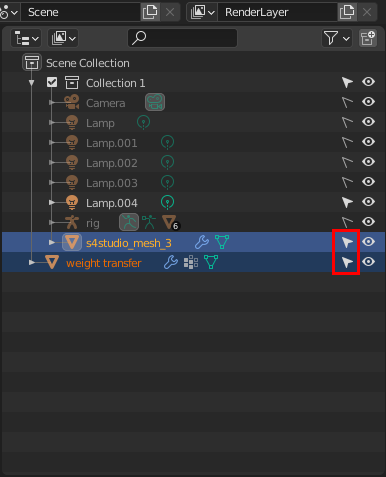
Her iki ağın da bu kadar küçük imleçin resmedildiği gibi vurgulandığından emin olun.
Daha sonra, Çok önemli bir adım – Sol tıklamaSENİNağ, Daha sonra, Vardiya tutmak ve sol "Ağırlık Transferi" ağına tıklayın.
Adım 5:
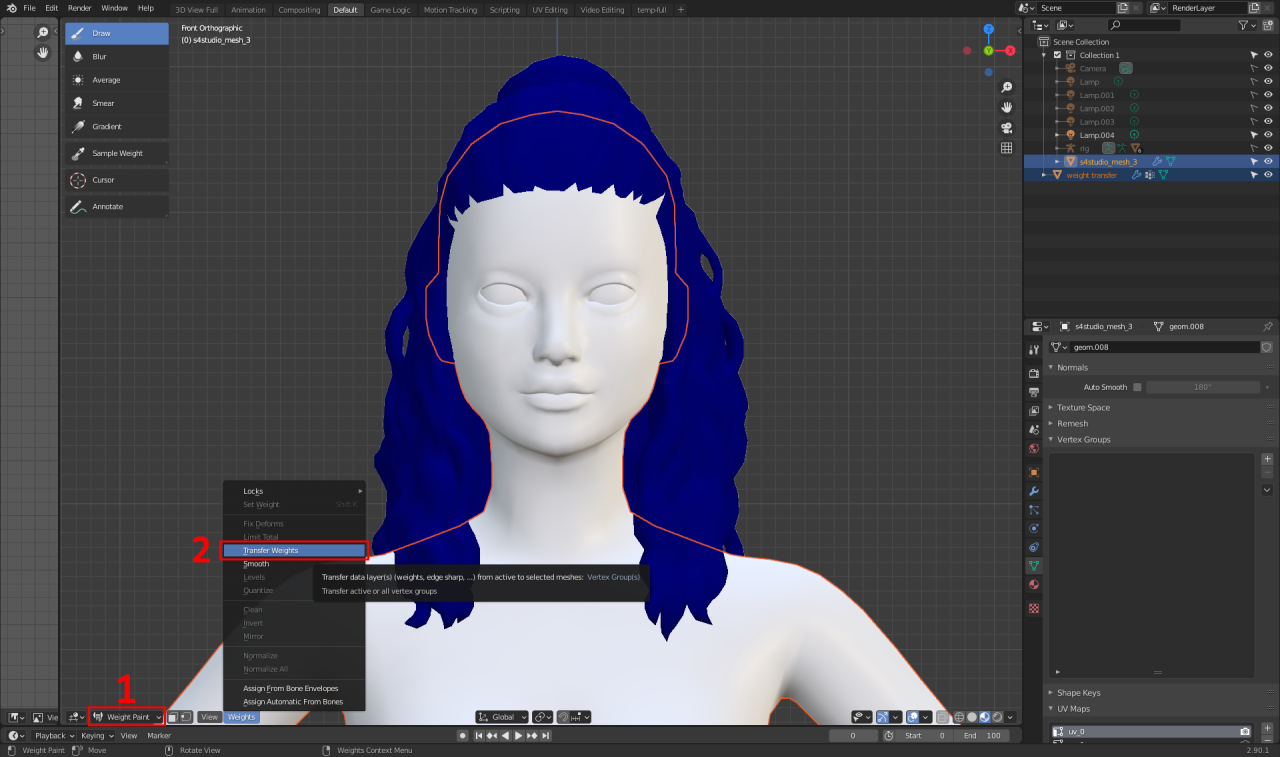
1 – ‘Nesne Modu’nun‘ Ağırlık Boyası ’ı değiştirme modunu değiştirin.
2 – Bu küçük 'ağırlıklar' düğmesine tıklayın ve 'Ağırlıkları aktar'
Adım 5.5:
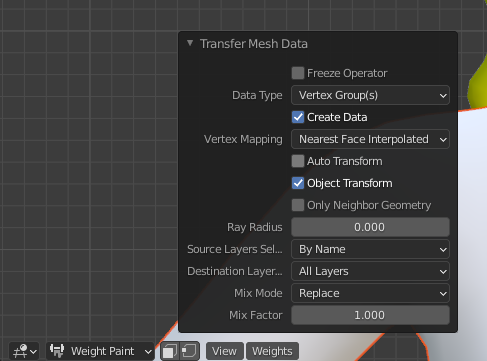
"Mesh Verilerini Aktar" düğmesini tıklayın ve ayarları bunlarla eşleşecek şekilde ayarlayın.
Adım 6:
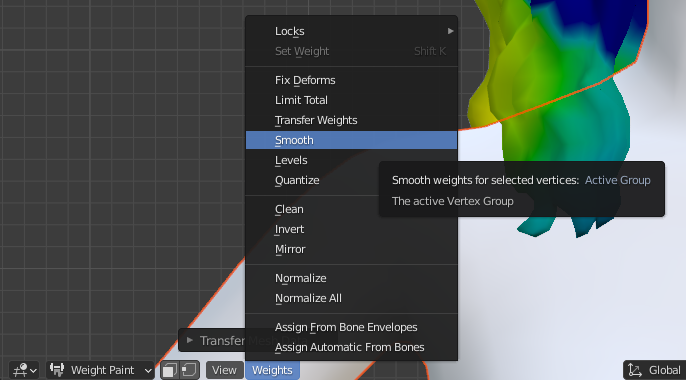
"Ağırlıklar" düğmesini tekrar tıklayın, Ardından "Pürüzsüz" yi tıklayın.
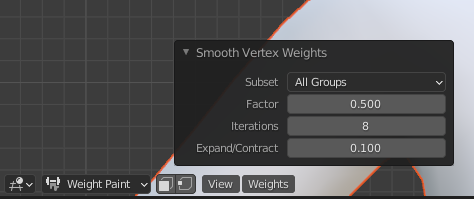
"Pürüzsüz" ayarları bunlara ayarlayın.
(Bu ayarları genel bir rehber olarak alın, Saç ve uzunluğuna bağlı olarak yineleme değişebilir)
Adım 7:
Paketinizi kaydedin ve kaydedilen "Silinen Ağırlıklar" dosyasını yeniden açın.
Kırık ağırlık saç ağını sildi, ve yeni bitmiş ağırlıkları ekleyin.
Adım 8:

İthal ettiğinizde saçlarınız çoğunlukla böyle görünecek. Bu yüzden, düzeltmek için, Jus sırayla bu üç düğmeyi tıklayın.
Adım 9:
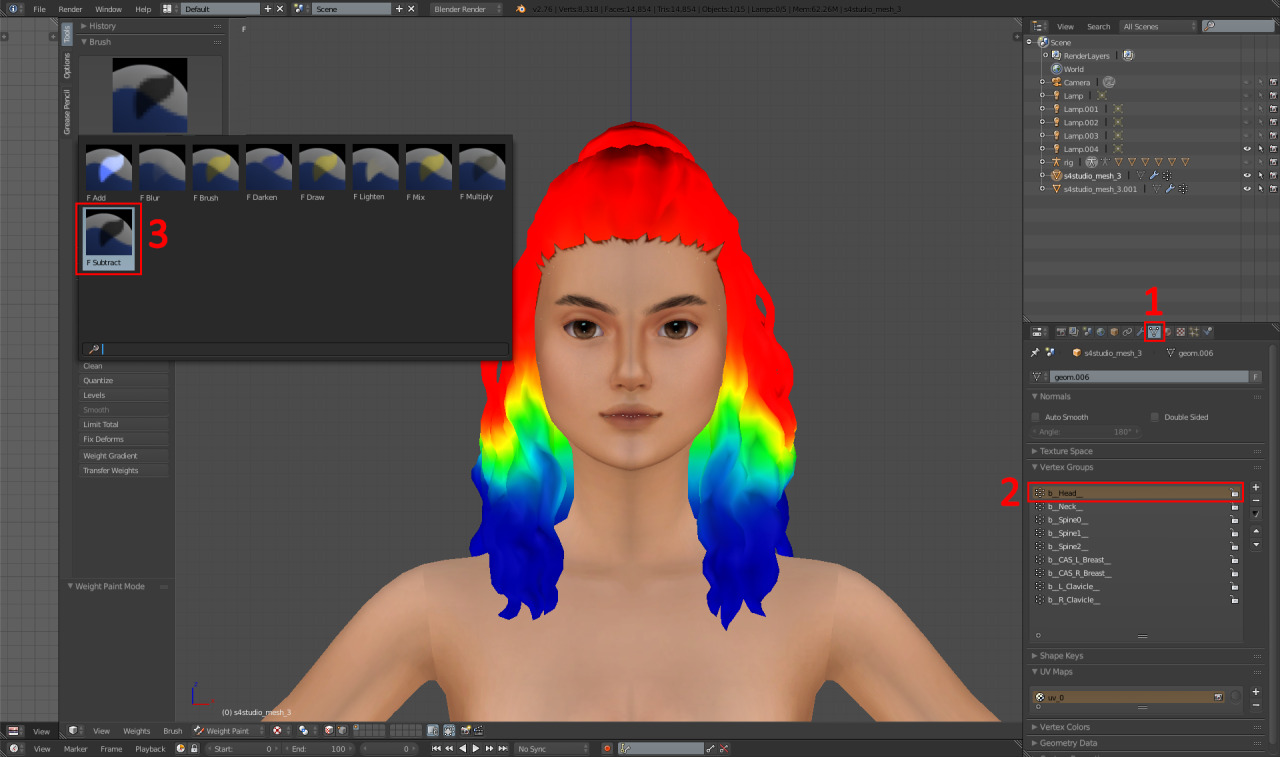
Şimdi, Kafa ağırlığını düzeltmemiz gerekiyor çünkü transfer,.
1 – BU TIKLAYIN.
2 – "B__head__" ı tıklayın.
3 – Fırçalara gidin ve "Çıkar" fırçasını tıklayın.
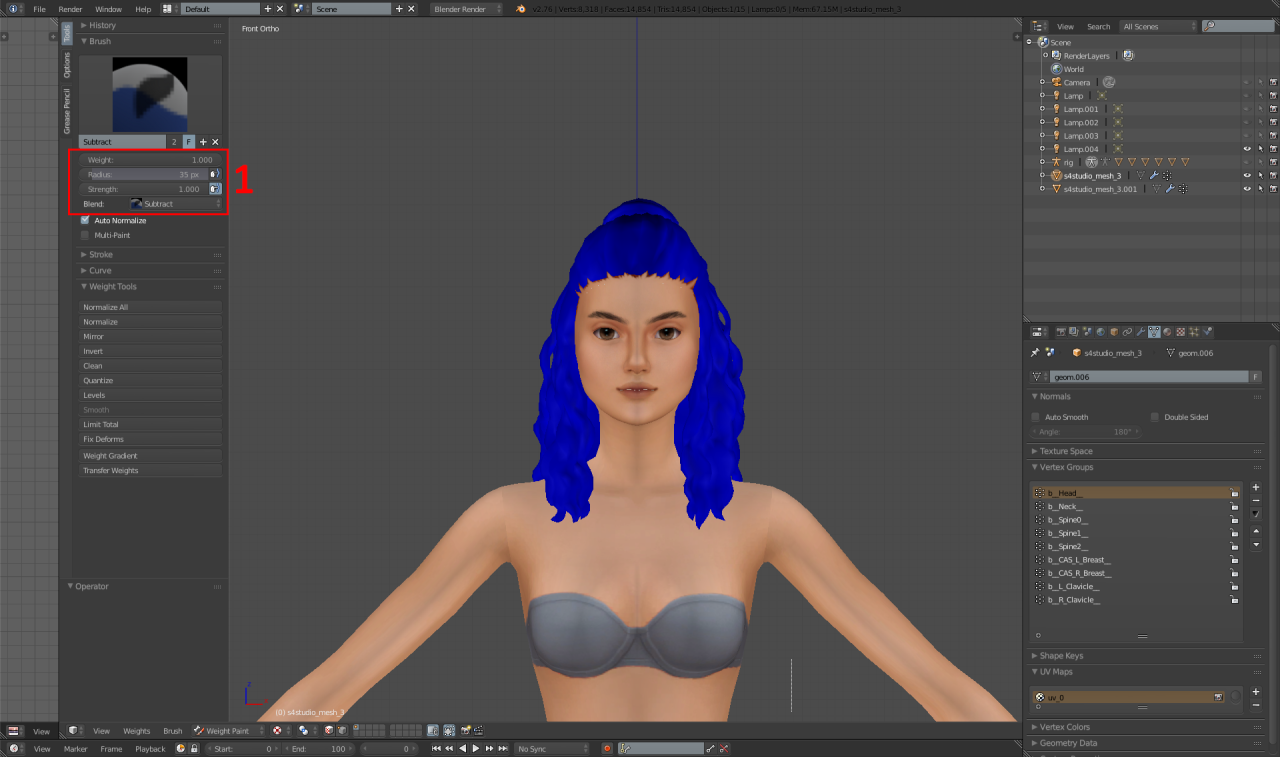
1 – Daha sonra, Bu ayarları kullanmak, "Ağırlık gradyanı" düğmesini kullanın ve koltuk altı alanında aşağı doğru sürükleyin, böylece tüm ağ maviye böyle olur.
Adım 10:
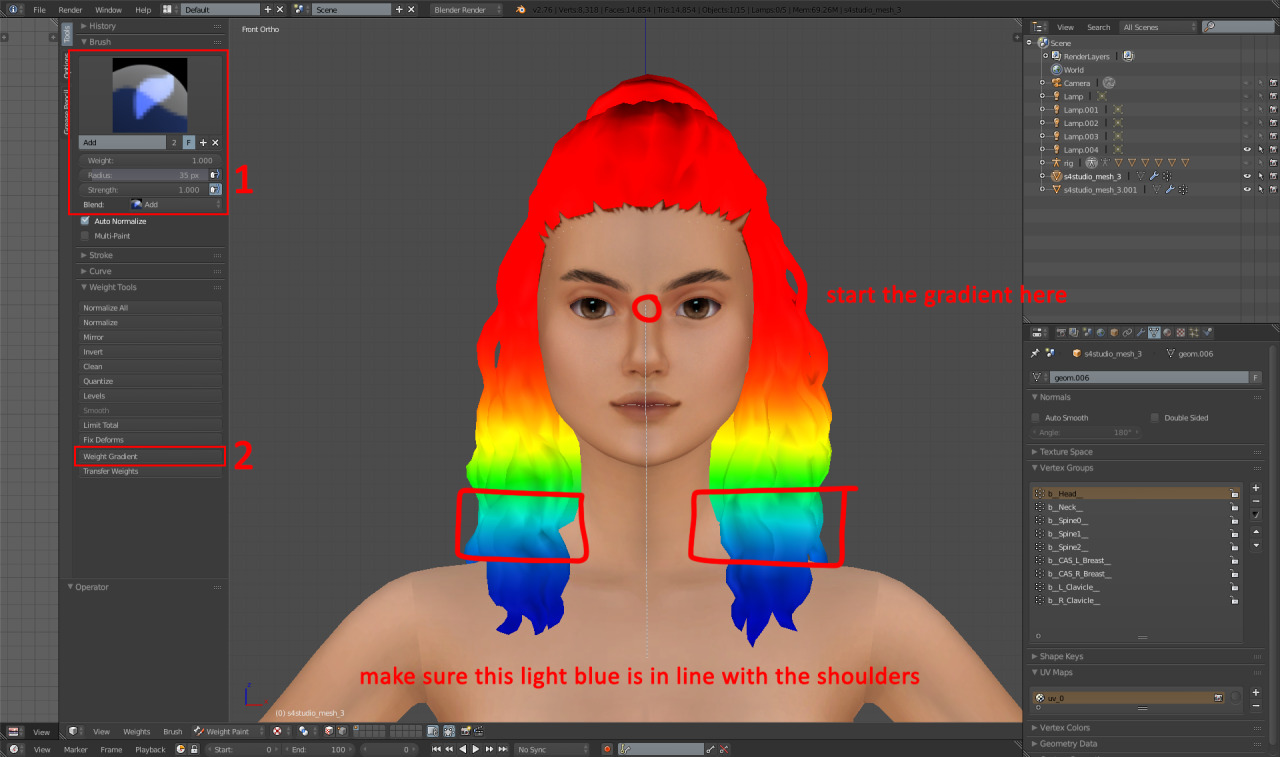
Şimdi kafa ağırlığı için ağırlık gradyanını yapmamız gerekiyor.
1 – Fırçayı "eklemek" için değiştirin ve bu ayarlara koyun.
2 – "Ağırlık gradyanı" yı tıklayın.
3 – Gradyanı aşağı doğru sürükleyin, Fotoğrafta görüldüğü gibi.
Adım 11:
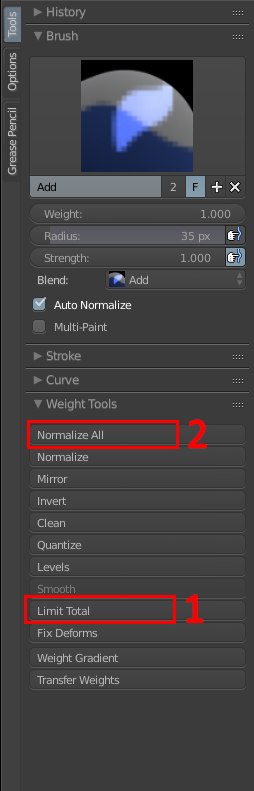
1 – BU TIKLAYIN.
2 – BU TIKLAYIN.
("Her şeyi normalleştir" i tıklarken, “B__head__” ağırlığında olduğunuzdan emin olun.)
Tamamlamak!
daha sonrasında, saç çizgisini ağa yeniden katıl, Mesh'i iki kez çoğaltın ve kesintileri 0000, 0001 Ve 0002, Sonra kaydedin ve S4S'ye geri aktarın!
Feragatname– Klavikül ağırlıkları çok uzun kıllarla ilgili bir sorun haline gelebilir ve sonuç olarak kırpma veya örgü yırtılmasına neden olabilir. Bu bir sorunsa, Açıkçası klavikula ağırlıklarını unutun.
Bununla ilgili herhangi bir sorunun veya karışıklığınız varsa, Lütfen bana bir DM vur ve size mutlu bir şekilde yardım edeceğim!