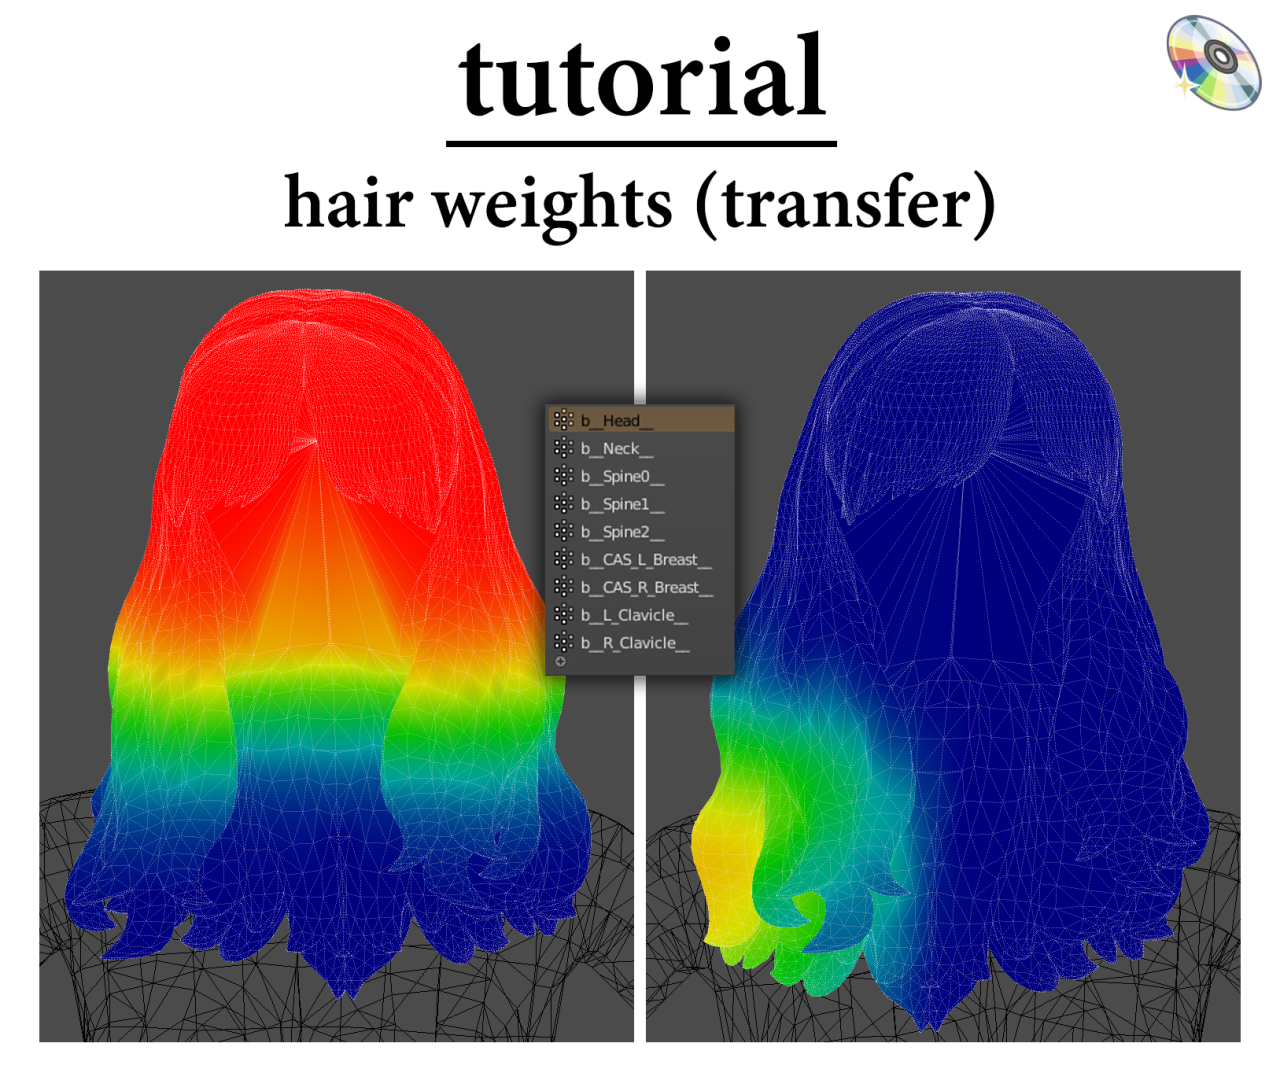
教程 – 头发重量:
按照要求, 我将回顾一下我是如何学会为头发做重量的 ! 我想提一下@qicc教了我这个方法,所以所有的功劳都归于他, 他是一个真正的国王! 所以, 无需再费周折, 让我们开始吧 
* 建议您通过仪表板阅读,因为打开我的主题上的图像不起作用 *
步 1:
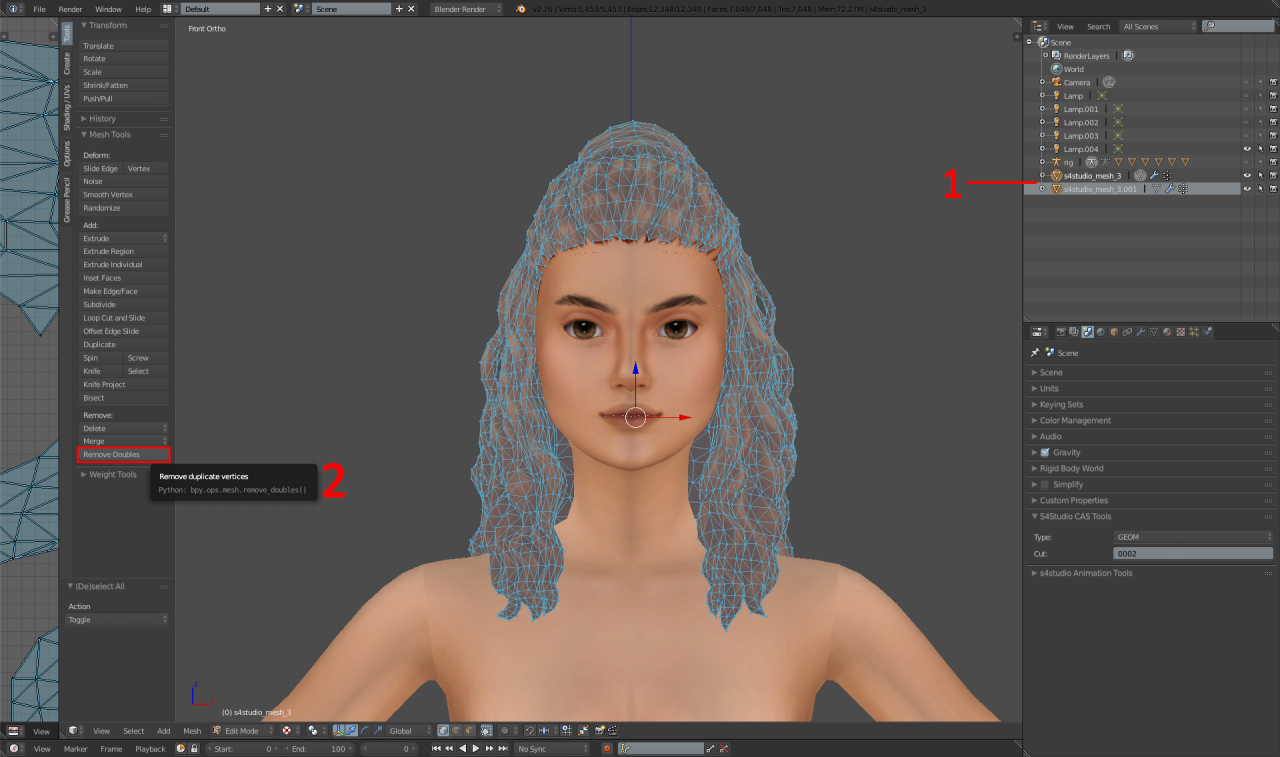
1 – 使用链接选择将头发和发际线分开 (L) 并将光标悬停在发际线上. 然后, 按键盘上的 P 分离到一个新层.
2 – 然后, 突出主要头发, 如图所示, 单击“删除双打”.
步 2:
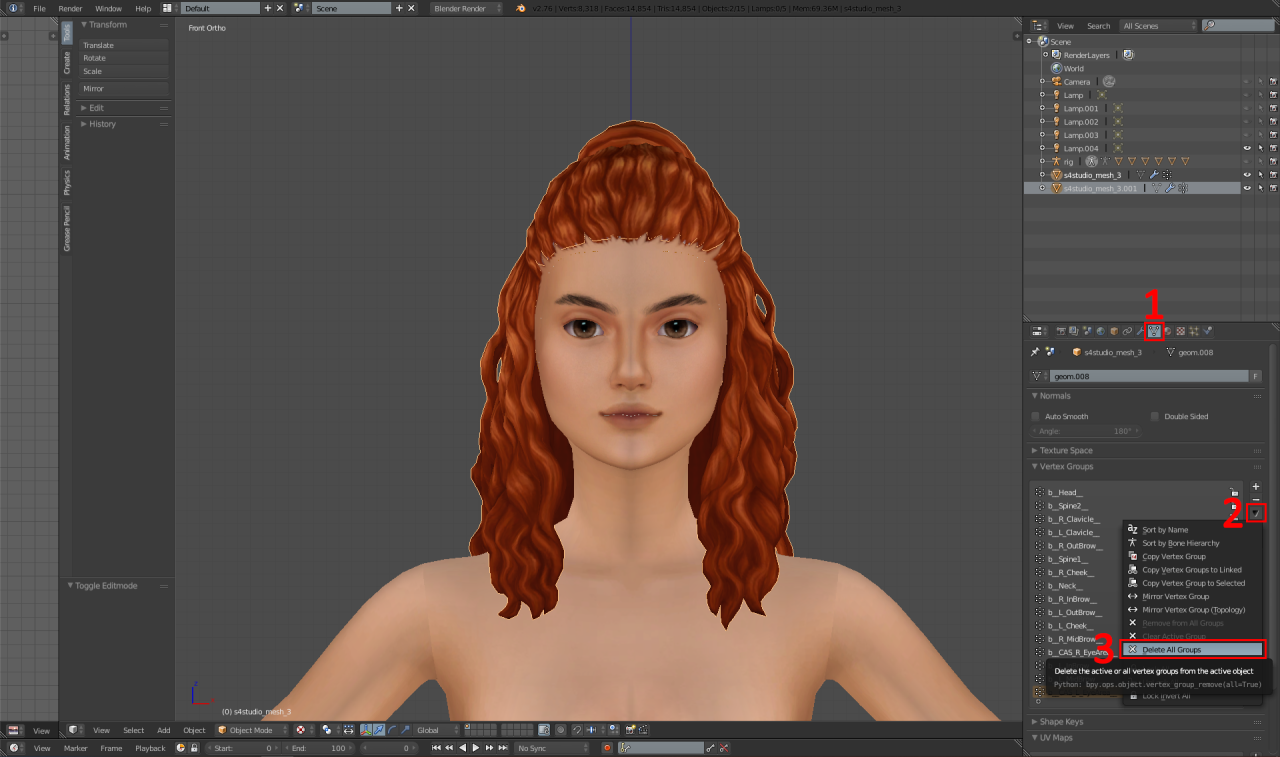
1 – 导航到“数据”选项卡.
2 – 单击箭头.
3 – 单击“删除所有组”.
步 3:
保存搅拌机文件. 然后, 打开搅拌机 v2.8+ 并导航至: 文件 – 打开, 然后打开我们刚刚保存的包.
步 4:
打开此文件后, 你可以删除发际线.
1 – 点击这个.
2 – 点击这个.
然后, 追加此文件.
步 4.5:
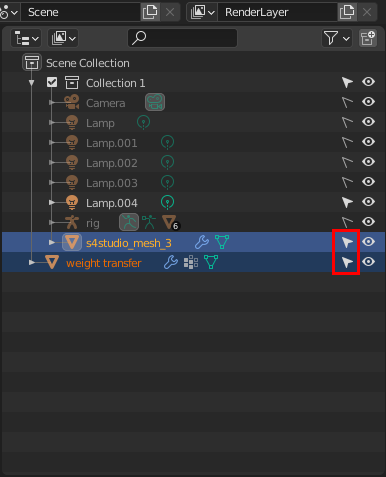
确保两个网格都有这个小光标突出显示,如图所示.
然后, 非常重要的一步 – 左键单击你的网, 然后, 保持移位 然后左键单击“重量转移”网格.
步 5:
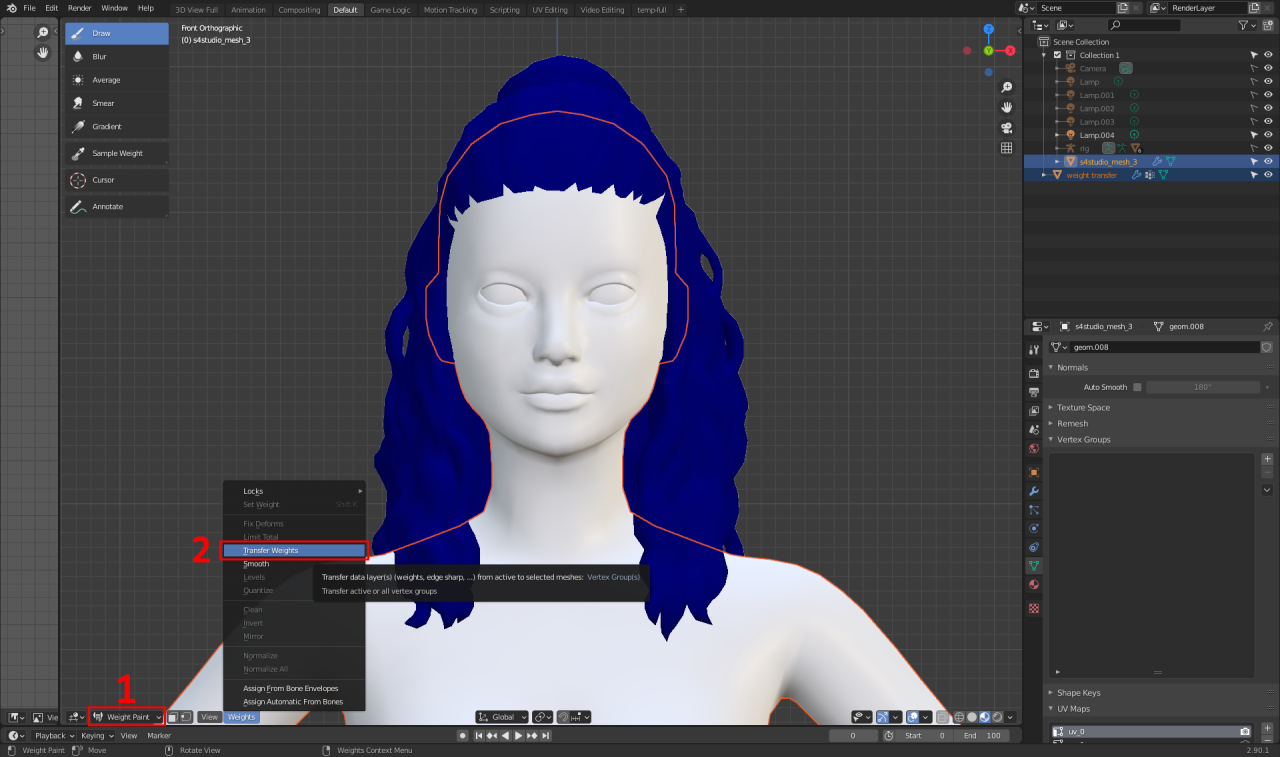
1 – 将模式从“对象模式”更改为“重量绘制”.
2 – 单击这个小“权重”按钮,然后点击“转移权重”
步 5.5:
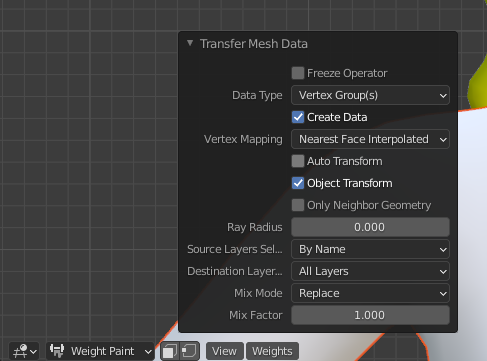
单击“传输网格数据”按钮并进行设置以匹配这些数据.
步 6:
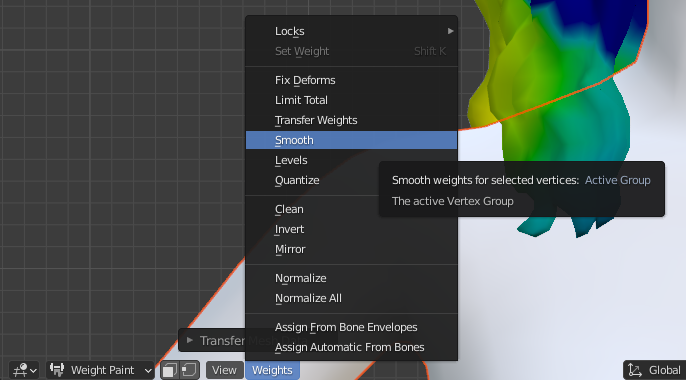
再次单击“权重”按钮, 然后点击“平滑”.
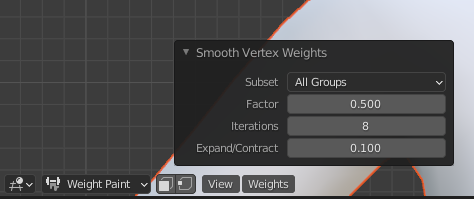
将“平滑”设置设置为这些.
(将这些设置作为一般指南, 根据头发及其长度,迭代可能会有所不同)
步 7:
保存您的包并重新打开保存的“已删除的权重”文件.
删除了破碎的权重头发网格, 并附加新完成的权重.
步 8:

导入时你的头发大部分看起来像这样. 所以, 修复它, 只需按顺序单击这三个按钮即可.
步 9:
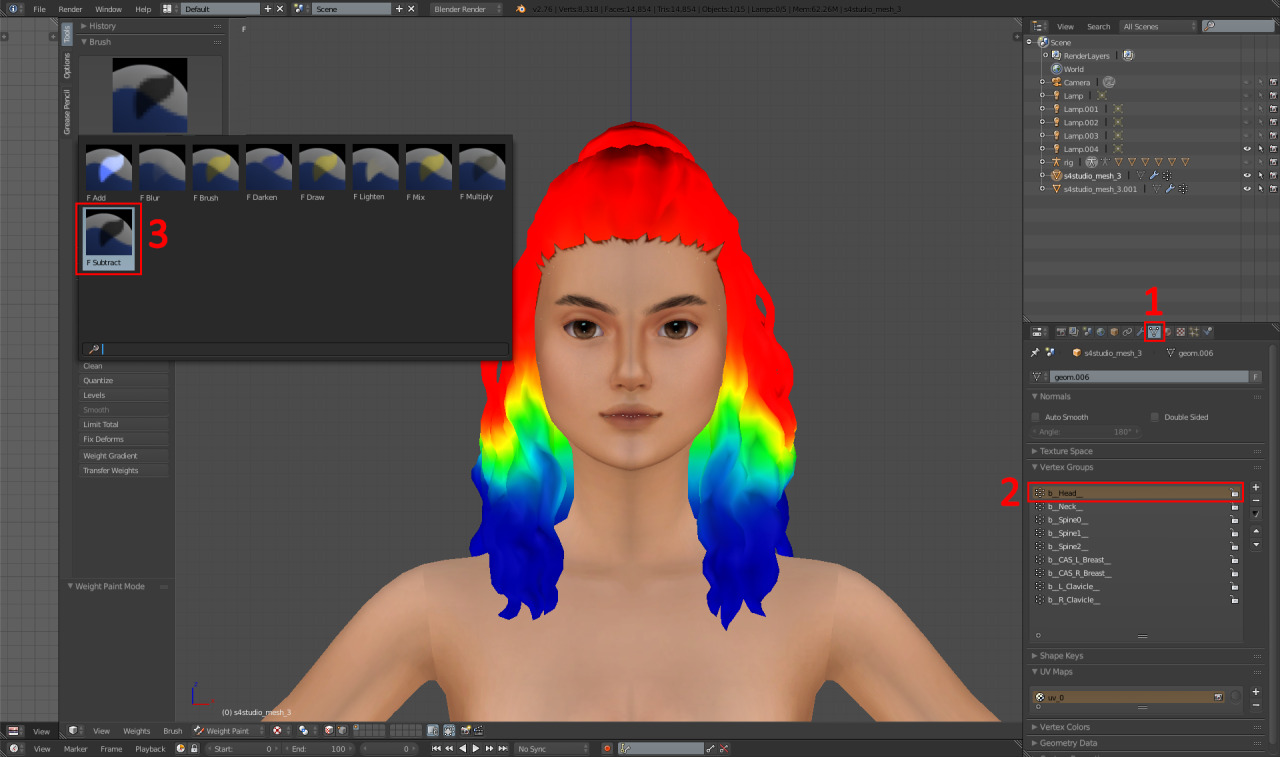
现在, 我们需要修复头部重量,因为转移会弄乱这一点,哈哈.
1 – 点击这个.
2 – 点击“b__头__”.
3 – 转到画笔并单击“减去”画笔.
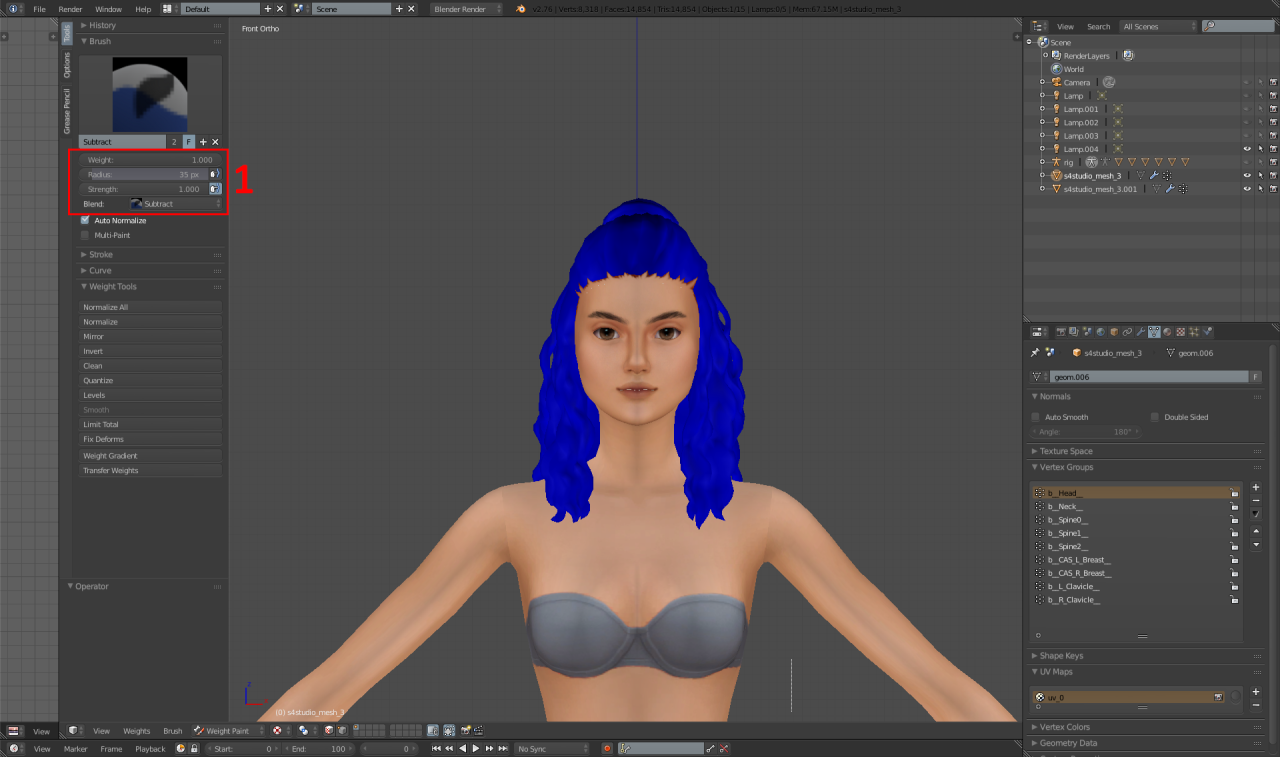
1 – 然后, 使用这些设置, 使用“权重渐变”按钮并在腋窝区域向下拖动,使整个网格变成蓝色,如下所示.
步 10:
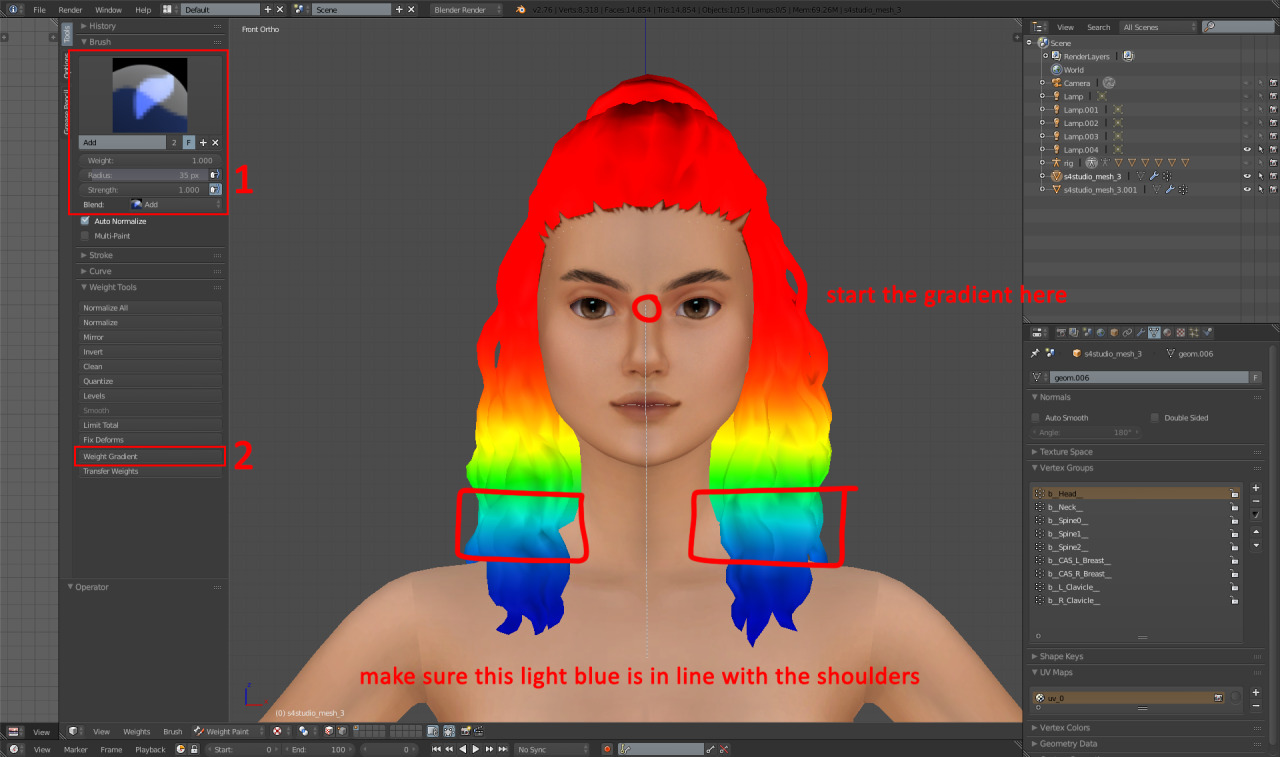
现在我们需要对头部权重进行权重梯度.
1 – 将画笔更改为“添加”并将其置于这些设置中.
2 – 点击“权重梯度”.
3 – 向下拖动渐变, 如照片所示.
步 11:
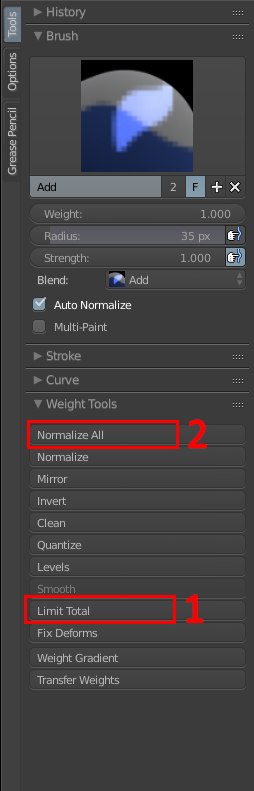
1 – 点击这个.
2 – 点击这个.
(单击“标准化全部”时, 确保您的体重处于“b__Head__”。)
完毕!
在那之后, 将发际线重新连接到网格上, 复制网格两次并将切割顺序如下 0000, 0001 和 0002, 然后保存并导入回s4s!
免责声明– 对于很长的毛发,锁骨重量可能会成为一个问题,从而导致剪断或网状撕裂. 如果这是一个问题, 显然然后忘记锁骨重量.
如果您对此有任何问题或困惑, 请给我发 DM,我很乐意帮助您!